Sunday, February 28, 2010

Penne with Egglplant in spicy tomato sauce

If you have been following this blog, you must know by now that I don't like bland food. That could be the reason for not having too many pasta dishes on this blog. Plus, no one is very enthusiastic about pasta in our house. But, there is an exception. I have not yet posted that recipe here, but will soon. I make a penne pasta with pesto sauce that is unlike most of the pasta you can eat in any place. Coming to this recipe, I was watching food network and Rachael Ray was making seafood pasta with sherry tomato sauce. That made me think a bit and come up with this recipe..


Ingredients:
  • Penne pasta - 2 cups
  • Red Onions - 2 big chopped into medium chunks
  • Egglplant - 1 medium size (I am talking about big fat purple one not the slim ones)
  • Tomato paste or crushed tomatoes - 1 cup
  • Salt - to taste
  • Red chilli flakes - 1 tsp or to taste
  • Cayanne pepper - 1 tsp
  • Black pepper powder - 1/2 tsp or more to taste
  • Olive oil - 4 TBSP divided use
  • Dried Oregano - 1/2 tsp
  • Dried Thyme - 1/2 tsp
  • Red wine or dry sherry or cooking wine - 1/4 cup
  • Garlic - 4 pods chopped finely

Method:
Wash and pat the eggplant dry. Slice them into 1/2 - 3/4 inch thick discs. Brush these with little olive oil. Heat a skillet and when hot add these eggplant slices oiled side down. Now brush the other side with olive oil and sprinkle some salt and pepper powder. Don't move the slices until they get a nice char. I usually use a grill to get this job done, but since not everyone has a grill, giving the method to do without one. If you do have a grill or a grill pan, go ahead and use it. Purpose of this is not to cook the eggplants completely, but to get a nice crust on them. Do this with all the eggplants and set aside.

In a wok or a sauce pan, Add 3 TBSP of olive oil. When hot, add garlic, onion. Add some salt and black pepper powder, cayanne pepper, red chilli flakes. Stir to combine and let it cook. Mean while, boil enough water for cooking the pasta. Salt the water generously and when it comes to boil, add the penne and cook til al-dente about 8 minutes. Drain.

Cut the eggplants into cubes. When the onions are cooked, add thyme, oregano and more cayanne if needed and add all of the eggplants. Since they are already cooked to certain extent, they will be done within minutes. Add tomato puree/paste/crushed tomatoes, red wine and let it simmer for a minute or two. Add the cooked penne and stir to combine. Adjust the seasonings and close the lid and let it be on low flame for 3 - 5 minutes. Serve hot/warm. Leftovers can be reheated in the microwave and served. This made enough pasta for 4 servings. And my kids including the picky eater ate it happily.


Variation:
You could use any herb of your choice. I didn't have any fresh on hand so I went with dried herbs that I had. You can use hot sauce in the place of cayanne and that probably will give you spicier version.

Note:
Using red wine will not make this an alcoholic dish. Alcohol evaporates leaving just the flavor. In fact, unless someone tells you, you cannot even make out that there is wine in this.

I am sending this to 'Pasta Party' hosted by Jyoti of 'Panch Pakwan' along with my Butternut Squash Pasta.

Happy Cooking!! Pin It

Pancakes with Homemade syrup

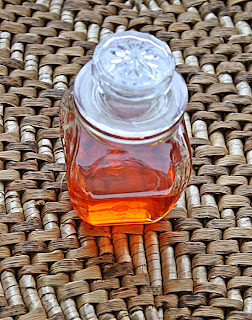
Sometime back, I had written in a post that I would post my recipe for pancakes and home made syrup which I make every two weeks. Even though I have made these many times since then, I never got the opportunity to take pictures and post it.

I make these every 2 weeks and freeze the pancakes. Syrup I make is enough for 2 weeks and stays fine at room temperature. If you want to make more or you think it will not be consumed in 2 weeks, refrigerate it for best results and warm and serve when required.

This pancake recipe is based on Alton Brown's Pancake Recipe on food network. He uses only all purpose flour and I make a mix of different grains. And he calls for separating eggs and I just use the eggs as whole.

Here goes the recipe for Pancakes..

Ingredients:
  • Whole wheat flour - 1 cup
  • All purpose flour - 1/2 cup
  • Oat flour - 1/2 cup
  • Eggs - 2 
  • Butter - 1/2 a stick or 4 TBSP melted. (You can use vegetable or canola oil in its place)
  • Salt - 1/2 tsp
  • Sugar - 1 TBSP
  • Baking Soda - 1/2 tsp
  • Baking Powder - 1 tsp
  • Buttermilk  - 2 cups (I use 1 cup of homemade yogurt thinned with 1 cup of water in its place)

Method:
In a bowl, whisk together all the dry ingredients. In another bowl, whisk eggs, buttermilk, melted butter till well combined. Dump the wet ingredients to dry and mix but do not over mix. Folding gently works fine. Heat a cast iron griddle or a nonstick skillet. You could use butter to grease the pan, but I use vegetable oil spray. When the pan is hot (not over hot), ladle 1/4 - 1/3 cup of the batter on to the pan. When you start seeing bubbles, flip over and cook the other side till both the sides are golden brown. Serve with either maple syrup or home made syrup (recipe follows).

I place the cooled pancakes between the layers of wax paper and freeze in a freezer safe box. Take out the required number of pancakes and warm it up in the microwave and serve.

A Tip:
Turn the pancakes only once. Don't keep on flipping them. This will destroy their fluffiness.


Recipe for the Syrup:
This is from my various experiments. Maple syrup is too expensive and the pancake syrup that they sell in stores is full of preservatives. So, I came up with this where I make a syrup with brown sugar and add some maple syrup to it. Many recipes for pancake syrup call for corn syrup which is again water and sugar boiled to syrupy stage. I used to add the corn syrup before, but now I have figured out the correct proportion so that I don't need all those extra ingredients.

Ingredients:
  • Light Brown Sugar - 1 cup packed
  • Water - 3/4 cup
  • Vanilla extract - 1 - 2 tsp
  • Maple Syrup - 1/4 cup

Method:
In a pan, combine brown sugar and water. Let them boil stirring occasionally. When they are bubbling with froth on the top and all the sugar has melted add maple syrup. Bring to a simmer for a minute or two. Don't let them boil for long as the syrup crystallizes if you do when cool. If you feel the syrup is thin, don't worry. It'll thicken a bit once cool. Immediately after turning off the heat, add vanilla. Store in a clean jar or syrup dispenser and use within 2 weeks. If storing for longer, store in the refrigerator.

Happy Cooking!! Pin It

Friday, February 26, 2010

Vegan Apple Date Muffins

If you have been reading this blog, you know that I am very fond of muffins. They can be made healthy and are perfect for breakfast or for a snack. I had a library borrowed book which had something called 'Pear Fig muffin'. When I read that, suddenly I wanted to make 'Apple Date Muffin' since I neither had pears nor figs on hand. But, this recipe is not adapted from that. I worked my other muffin recipes a bit and came up with this recipe. Result was very moist, tasty muffin and with very less fat.

Here they are..

Ingredients:
  1. Whole wheat flour - 1 cup
  2. All purpose flour - 3/4 cup
  3. Baking Powder - 2  tsp
  4. Baking Soda - 1 tsp
  5. Nutmeg powder - 1/4 tsp
  6. Cinnamon powder - 1/2 tsp
  7. White sugar - 1/3 cup
  8. Salt - 1/2 tsp
  9. Unsweetened applesauce - 1 cup
  10. Vegetable or Canola oil - 1/3 cup
  11. Water - 1/4 cup
  12. Apple cored and diced finely - 1 medium 
  13. Dates chopped finely - 1/2 cup
Method:
Preheat the oven to 400 F. I did at 375 since I was using dark colored pan. Line a 12 standard size muffin pan with liners or grease them with vegetable oil spray. In a large bowl, whisk all the dry ingredients (1 through 8). In another bowl, combine applesauce, water, vegetable oil. Whisk it well. Dump the whole wet ingredients to dry mixture and stir. Do not over mix. Stir in apples and dates. Divide the batter (it'll be quite thick) between the 12 muffin cups. It will be almost full. Bake for 22 - 24 minutes or till a tooth pick inserted in the center comes out clean. Mine were done at exactly 22 minutes. Cool on the wire rack for 2 - 3 minutes before unmolding from the pan. Let them cool on the wire rack. We ate them warm and they were delicious.

Some more pictures..
 
By the way, if you are reading this line, thank you for that and this post marks my '100th' post. 100 posts in about 4 months - I guess it's not bad. What do you think?

Happy Baking!!
Pin It

Heerekayi Gojju in peanut sauce / Chinese Okra gravy in peanut sauce

Usually Chinese okra is used in making dal (tovve in kannada), bhajis, chutney. I wouldn't call this vegetable suitable for making every kind of dish since it is very watery. One more problem with this vegetable is it shrinks too much and leaves you with so little after cooking. This dish I am talking about goes very well with rotis, chapathis and even rice. Best part is you can make it very quickly. The same recipe can be used with eggplant, zucchini, tomatoes or combination of the two vegetables and tomatoes.

Here goes my recipe..

Ingredients:
  • Chinese Okra - 3 big peeled and diced into chunks don't throw the peel. You can make chutney out of it.
  • vegetable or peanut oil - 2 TBSP
  • Dried red chillies - 2 broken
  • Curry leaves - a few
  • Hing - a big pinch
  • Mustard seeds - 1/2 tsp
  • Turmeric - a big pinch
  • Salt - to taste
  • Rasam powder - 1 - 1/2 tsp or to taste
  • Jaggery - a lemon size
  • Tamarind - a lemon size ball soaked and thick juice extracted.
  • Peanuts - 1/3 cup - 1/2 cup
Method:

In a sauce pan, heat oil. When hot, add mustard seeds. Once they splutter, add broken chillies, curry leaves, hing. Mix it for a few seconds. Add all the vegetables now. Add turmeric, some salt and mix well. You can add some water and cover the lid and let it cook. Chinese okra or heerekayi cooks very fast that it hardly needs more than 5 minutes. Meanwhile, grind peanuts and rasam powder in a mixie. You can add some water to make a smooth paste or leave it like a powder. I like the paste better since it blends very well with the whole mixture. Once the vegetables are cooked, add this paste, jaggery, tamarind extract and mix well. Boil for a few minutes till jaggery is dissolved and the raw smell is gone. Adjust the seasonings if necessary and turn off the heat. You can control the consistency of this gravy by adding desired amount of water. I make it thin if I am serving with rice and thick if serving with rotis.

Tips:

If you do not want to use rasam powder, you could just use red chilli powder but add some cumin seeds, fenugreek seeds to the oil along with mustard seeds. You could try adding some coriander - cumin powder too.

Happy Cooking!! Pin It

Thursday, February 25, 2010

Baked French Fries

It is kind of funny that in my previous post, I wrote about how I dislike potatoes and my very next post, I am talking about french fries. But, show me a kid who doesn't like french fries. Just like all the other kids, my kids love them too and I thought of making it for them in a healthier way. This recipe is an outcome of many experiments that I have made. It takes longer to make them in the oven than frying them, but when you consider how low these are in fat, I guess you can't complain about the time.

Here is my version..

Ingredients:
  • Baking potato - 1 large (see picture)
  • Vegetable or olive oil - 2 tsp
  • Salt - 1/2 tsp or to taste

Method:
Line a baking sheet with parchment paper or silpat mat. You could use aluminum foil. If you do, make sure you grease it really well to prevent sticking. Wash and peel the potato. Slice them into 1/3 - 1/2 inch thick slices. Then slice these discs to get 1/3 - 1/2 inch thick sticks. (You know what I mean) In a bowl, toss these cut potatoes with 2 tsp of oil and salt. Pour it on to the baking sheet and spread it so they are in single layer. Preheat the oven to 400 F. Bake in the oven for a total of 30 minutes removing halfway and flipping the fries once. If you make your potatoes thicker, you might need couple more minutes or less if thinner. Keep an eye on them.

Remove from the oven and if the salt is less, you can sprinkle salt and serve with ketchup. First time I made these, I had added chilli powder with oil and salt and they were delicious. But, my kids found it too hot and they wanted plain ones. You could play with the flavoring by using garlic powder, pepper or dried herbs.

Look how big a potato I used..

And this is how they look before going into the hot box..

And this is how they look after they are done baking..

It was enough for my 2 kids and there was some left over too which could have been enough for another kid.

Happy Baking!! Pin It

Wednesday, February 24, 2010

Baked Banana Cutlet/Baked Plantain patties

I hate catered food with a passion. This is for the main reason that everywhere the food is catered, the menu is same. Appetizers are most of the time samosa and cutlet. Main course is always vegetable pulav. Side dishes are always something with heavy cream. There is no variety. I understand that it is easier to cook for the crowd with potato as main ingredient. And don't get me wrong, I used to love potatoes a decade back, but now I almost hate potatoes.

That is one of the reason I never eat cutlets or samosas. Plus, even when it is not shallow fried, it still has lot of oil. I had couple of plantains on hand and I was wondering what to do with them. Suddenly, I decided to make cutlets and that too low fat by baking. I am happy that I experimented on this since they came out very good. Here goes my take on cutlets baked. I am sure if you use potatoes, and if you are a potato lover, you'll be surprised how tasty these are without added fat.

Ingredients:
  • 2 small plantains - skin peeled lightly and shredded
  • chilli powder - 1/2 tsp or to taste
  • salt - to taste
  • baking soda - a pinch
  • Whole wheat flour  - 1/4 cup
  • fine soji - 1/4 cup
  • Bread - 1 slice torn into pieces and pulsed in a food processor to get crumbs
  • salt - a pinch
  • chat masala - a pinch
  • Oil - 1 TBSP

Method: 

Line a baking sheet with aluminum foil and brush some oil on the foil. Preheat the oven to 325 F. In a bowl, combine grated plantains, chilli powder, salt, baking soda, whole wheat flour, fine soji, oil. Mix well. The dough will come together and will still be sticky. Don't add too much flour. In another bowl, combine bread crumbs with a pinch of salt and chat masala. Make small lemon size balls and flatten them. Coat them well in bread crumb mixture and place on the prepared baking sheet. Use all the dough to make patties and place them on the baking sheet. Bake in the oven for 15 - 20 minutes and flip them. Bake them for an additional 15 - 20 minutes and the cutlets are ready. I gave the range since if you make the patties thinner, they bake faster. I baked mine for 20 minutes on each side. You could use the store bought bread crumbs to get a better browning on the top. Serve with your favorite chutney/sauce.

Happy Cooking!! Pin It

Spicy Batter Bread

I make spicy masala bread all the time. But, I didn't have the time or patience to knead and let it raise, shape and bake the loaf today. I chose an easier option but a healthy one. I chose to make batter bread.

For those who are not used to this lingo, batter bread is a combination of yeast bread and quick bread you could say. Quick bread is something that you mix it up and bake and is ready within an hour time from start to finish. Whereas yeast breads are let to raise, shaped and baked. Batter bread has yeast as an ingredient, left to raise only once and not shaped at all. I had borrowed a book from library - 'Betty Crocker's Homemade Quick Breads'.

This book has a recipe called 'Fresh Herb Batter Bread'. I modified it a lot to my taste and here is my take on spicy batter bread. Those who want to enjoy authentic spicy bread you get in bakeries in bangalore, you could try my Masala Bread. This comes very close to that and quickly too.

Ingredients:
  • 1 cup whole wheat flour
  • 1 cup All purpose flour
  • 1/2 cup fine soji
  • 1/2 cup cornmeal (stone ground fine ground)
  • Green chillies - 12 chopped
  • Sugar - 1 TBSP
  • salt - 1 tsp
  • Dry yeast - 1 package or 2 1/4 tsp
  • 1 1/4 cups warm water
  • 2 TBSP vegetable oil 
  • Two medium carrots grated
  • 2 TBSP chopped mint (you could use the herb of your choice or a combination)
  • Little butter or oil to brush the baked bread.

Method:

Grease a 9 X 5 loaf pan. Mix 2 cups of the flours, sugar, salt and yeast in a bowl. Add warm water and beat for a minute till everything is mixed well. Add chopped chillies, carrots, mint or herb of choice. With a wooden spoon, mix and add the rest of the flours (Please note that the original recipe had only all purpose flour). Pour the batter into the pan and smooth the top with the spatula. Cover loosely with a greased aluminum foil and keep in a warm place for 40 minutes. I kept it in the oven and left the light on for an hour.

Towards the end of the raise time, preheat the oven to 375 F (I baked mine at 350 since I was using a dark pan). Bake for 45 minutes to 50 minutes or till golden and sounds hollow when tapped. Remove from the oven and brush the top with butter or oil. Cool on the wire rack and slice when completely cool. This bread was very good with a little bit of crunch from soji.

Enjoy with a cup of coffee or tea.

Notes:
Original recipe didn't have chillies or carrots. I added some and you can saute onions and add them too. It makes a healthy bread with different grains and not lot of fat.

Happy Baking!! Pin It

Monday, February 22, 2010

Cake Decorating Basics - Part 5

This post is a continuation of the previous posts Part IV, Part III, Part II and Part I.
For those who haven't been following this series, a quick intro of what these parts have -
Part I - Introduction of cake decorating
Part II - Cake baking and decorating lingo
Part III - Frostings in general
Part IV - Cream cheese frosting.

And this post is about cake boards. Yes, cake boards. You might wonder why on earth am I writing about this. Cake board is a simple board that you place your cake on. If I want to compare the significance of a cake board in layman terms, I would say if a nicely decorated cake is a beautiful dress, pretty shoes that match the dress corresponds to the appropriate cake board.

If you have taken wilton courses or seen some videos on youtube, you can see many of them use silver or gold colored cake boards. They are sold in bakery supply stores and other stores like Michaels, A.C. Moore, Joann and even in walmart. Wilton's website link for the cake boards can be found here. Wilton also sells something called fanci foil wrap which can be used to cover any cardboard that you cut and use for the cake. When I first started the cake decorating classes, I didn't want to spend money on the cake boards or foil. I used to cut my own circle from the cardboard boxes and cover them with aluminum foil. They worked fine. But, if I look at the pictures of those cakes now, I feel like they don't look pretty because of the foil covered board.

But before we go into the creative ideas of making cake board pretty, there are following types of cake boards that are used in common.

1. Cardboard cake boards
2. Foam core
3. Masonite
4. Wood

You can cut cardboard and make the appropriate size. Foam core is the same way too. Masonite cannot be altered by us (unless you have super tools) and are sold in certain shapes and sizes. They are heavy and reusable. You may cover them with something or place the cake directly on the top. Wood ones can be cut and covered and reused. I have two huge wooden ones that my colleague cut it for me. One round and one square.

There are some options to cover the cake board. Basic being aluminum foil or fanci foil wrap. Other option is to cover it with fondant (but you are spending way too much money on fondant). You could wrap the board with fabric which matches the theme, and wrap that with the food safe plastic (cling wrap or saran wrap or basket packing material) and place the cake on it. Then again you can't find fabric in each and every theme and it gets expensive too. My favorite way of having a pretty cake board is by using gift wrapping paper. And most of the time, I use a matching ribbon as the edging too. I wrap the board with gift wrapping paper that match the theme and cover it with food safe plastic. I am copying couple of pictures to show you want I mean. Sometimes, if you don't get appropriate paper, go with what you feel matches the most.


And for this, even when I searched so much for pooh wrapper, I couldn't get any. So, I went with this one..
 

Following cake has the board covered in fondant which I painted with green food color to mimic grass..
  

Now to the size of the cake boards. Technically cake board should be 2 inches bigger width and lengthwise than the cake. It is to make sure you have enough space for the border. But, if your design involves details that are drawn on the board and not on the cake (example the rocks in the above cake are on the board), you can cut the board to an appropriate size. 
Even the cakes that are stacked are placed on the board. Those need to be same size as the cake. They can't be bigger since the board will show.

On another note, wilton sells something called as cake drums. These are sturdy circles or squares which have a height of 1/4 an inch. These look very pretty if you glue a matching ribbon on the edge. Since I am very frugal, I use two layers of the foam core to get that effect and not spend money on the cake drums.

I hope you have enjoyed reading this post.

Enjoy!!
Pin It

Sunday, February 21, 2010

My kid's Birthday Cakes

I have not posted anything for the past couple of days since I was very busy with party preparations. My kid's birthday party was a double party one being held at a party place called 'Pump It Up' for her school class mates and other kids and then Indian friends came home for lunch. I had plans of making my next post on cake decorating about cake boards and showing this picture, but for now I just want to share the pictures.

This one went to 'Pump It Up' to cut the cake. Vanilla - strawberry (two layers of vanilla and two layers of strawberry cake) cake with chocolate ganache filling.
 
Another view..


And then, she wanted a princess castle cake to cut at home. She has seen me work on cakes and knows some stuff about icing and all. She didn't want me to use any other color but pink. I couldn't be very creative in using colors because of this, plus my original design was to create woods in the back of the castle and a pond in the front, which had to be pushed away since I was so tired and I had to cook for the party too. To be honest, I am not very happy with this cake, but my kid loved it and that's all matters. Right?

Some of the pictures I took didn't come out good, so I can't share the better views with you all.

I'll go into the details of how I built this cake later if someone is interested. For now, enjoy the weekend. Pin It
Thursday, February 18, 2010

Pie / Tart

Pin It

Miscellaneous Desserts

Pin It

Indian Sweets / Desserts

Besan Laddoo
Boondi Laddoo
Broken Wheat Pudding / Godhi Payasa 
Butternut Squash Sweet drink / Payasa
Carrot Almond Kheer/Pudding 
Carrot Ricotta Halwa/Dessert Pudding
Cashews, Poppy Seeds Rice Pudding 
Coconut Burfi/Barfi/Fudge
Doodh Peda with Ricotta Cheese 
Gasagase Payasa / Poppy Seeds drink
Gulab Jamun (Easier version)  
Hayagreeva / Lentil and poppy seed dessert
Kaju Burfi / Cashews Fudge
Kayi Bellada Anna / Coconut Jaggery Rice
Kheer / Indian Rice Pudding
Kulfi 
Mango Rice Pudding
Moong Dal Halwa
Nutty Doodh Peda / Nutty Milk fudge
Pumpkin Prathaman (Pumpkin Coconut Smoothie) 
Rave Unde / Rava Laddoo
Ricotta Coconut Fudge / Burfi
Sweet Pongal / Shakkar Pongal / Sakkarai Pongal
Tapioca Vermicelli Kheer/Pudding
Vatteyappam / Steamed Sweet Rice cakes  
Vegan Grits Pudding / Grits Payasam
Whole Wheat Flour Laddoo / Poori Idicha Unde
Pin It

Indian Savory Snacks

Pin It

Cookies / Bars

Cake Mix Spice Cookies
Cardamom Biscotti
Cardamom Cookies (Eggless)
Cashew Cookies
Cheesecake Blondies
Chewy Chocolate Chip Cookies 
Chocolate Biscotti 
Chocolate Chip Cookies
Coconut Almond Cookies
Coconut Macaroons
Craisins and White Chocolate Biscotti
Cumin, Pepper Crackers/Biscuits (Vegan)
Double Chocolate Ricotta Cookies 
Dry Fruit Cookies
Eggless Oatmeal Chocolate Chip Cookies
Eggless Almond Chocolate Biscotti
Giant Chocolate Chip Cookie 
Gingerbread Biscotti
Ginger Spice Cookies 
Glazed Sugar Cookies
Granola Bars
Kesar Nankhatai
M & M Cookies
Macadamia and White Chocolate Chip Cookies 
Molasses Oat Bran Cookies (Eggless)
Molasses Rye Ragi Snaps (Vegan)
Mrs.Field's Chocolate Chip Cookies
Peanut butter Cookies 
Peanutbutter bars with toffee bits 
Peanut butter Cornmeal Cookies
Pepper Biscotti (Eggless and Savory) 
Pumpkin Chocolate Bars
Quick Palmiers 
Savory Shortbread Cookies / Iyengar bakery Khara Biscuit
Science of Baking - Cookie Baking
Soft Applesauce Spice Cookies (Vegan) 
Soft Mango Cookies (Egg less) 
Soft Ricotta Chocolate Chip Cookies (lowfat, eggless)
Vanilla Biscotti 

Pin It

Spice Powders

Pin It

Drinks / Ice cream / Cold dessert

Drinks / Juices / Beverages / Ice Creams
 
Pin It

Miscellaneous / Tips

Pin It

Cakes and Cake Decorating

Carrot Coconut Cake
Chocolate Cupcakes
Chocolate Zucchini Cake
Coconana Loaf Cake (Coconut Banana Loaf Cake)
Coconut Poppy Seed Coffee Cake 
Cold Oven Cream Cheese Pound Cake  
Cornmeal Lime Snack Cake
Cream Cheese marbled Chocolate Cake 
Cream Cheese topped Pumpkin Bars
Date Cake with Coconut
Easiest Vanilla Cake
Easy Pineapple Coconut Cake  
Easy, low fat pumpkin spice cake
Eggless Chocolate Sour cream Pound Cake 
Eggless Coconut Cake
Eggless Mulberry Cupcakes
Gingerbread Mini Cupcakes
Eggless Almond Date Cake
Eggless Peanut butter swirled chocolate cake 
Eggless Pumpkin Ricotta Cake  
Eggless Sourcream/Yogurt Cake
Eggless Vanilla Bundt Cake
Homemade Cake Mix
Honey Cardamom Snack Cake
Mango Chiffon Cake
Molten Lava Cake (Using cocoa powder)
Orange Almond Caramel Upside down cake  
Plum Cake
Quick Chocolate Cupcake 
Ricotta Pound Cake
Sourdough Applesauce Spice Cake  
Sourdough Banana Cake with chocolate chips
Sourdough Chocolate Cake
Sourdough Pumpkin Spice Cake
Sourdough Vanilla Cake
Sourdough Vegan Apple Butter Cake
Sourdough Chocolate Zucchini Cake
Strawberry Summer Cake 
Two tried cake recipes  
Vanilla Buttermilk Cupcakes
Vanilla Cake using homemade cake mix
Vanilla Cupcake with Chocolate Creamcheese frosting
Vegan Banana Chocolate Cake (Low fat)  
Vegan Banana Walnut Cake (low sugar, low fat)
Vegan Apple Orange Cake (Sourdough)
Vegan Cashew Cake 
Vegan Coconut Cake
Vegan Date Coconut Cake
Vegan Date Walnut Loaf Cake 
Vegan Mango Cake
Vegan Mango Coconut Cake 
Vegan Pumpkin Snack Cake 
Vegan Sourdough Chocolate Cake with Peanut Butter glaze
Vegan Vanilla Cake - two recipes 
Weight watcher's Applesauce Cocoa Cake (Egg less)
Yeasted Coffee Cake
Yeasted Olive Oil Pear Cake  

Cake Decorating Basics
A Butterfly Cake
Baby Shower Cake  
Birthday Cakes - Scroll and Heart shaped cake with flowers
Cake Decorating Basics Part - I
Cake Decorating Basics Part - II
Cake Decorating Basics Part - III
Cake Decorating Basics Part - IV 
Cake Decorating Basics Part - V
Cake Decorating Basics Part - VI  
Cake Decorating Basics Part - VII
Cake Decorating Basics Part - VIII  
Cake Decorating Basics Part -  IX
Cake Decorating Basics Part - X
Castle Cake Picture
Dora Cake
Easy Cupcake Decorating Ideas  
Easy Fondant Roses
Making of a mermaid Cake
Marshmallow Fondant 
Mickey Mouse Club House Cake
Pharmacy themed decorated cake
Princess Jasmine and Aladdin themed birthday cake
Royal Icing 
Simple Elmo Cake
Spongebob Square pant Cake
Thomas the train Cake
Vegan Fondant
When your creativity blanks out - another cake
Car Cake

Pin It