Showing posts with label breakfast. Show all posts

Friday, December 6, 2013

Vanilla Muffins

This is one of those recipes which can be tweaked into different flavors by changing the additives. I was planning to make it a mango muffin but when I went to chop the mangoes, I found it was spoiled from inside and I had to throw it out. This made good snack for the kids and is pretty easy to make too. Pictures are really bad since it has been raining like crazy for the past 2 days here with no sun light whatsoever.
One Year Back - Honey Rolls / Buns
Two Years Back - Lemon Coconut Bread, Vanilla Cake using Homemade mix
Three Years Back - Dry Fruit Yeast Bread/Cake
Four Years Back - Coconut Almond Cookies
Ingredients:
All purpose flour - 2 3/4 cups
Baking Powder - 1 TBSP
Baking Soda - 1/4 tsp
Sugar - 1/2 cup
Brown Sugar - 1/3 cup
Salt - 1/2 tsp
Oil - 1/3 cup
Eggs - 2 large
Milk - 3/4 cup
Vanilla - 1 TBSP
Optional - 1 cup of dried fruits or chopped fresh fruit or chocolate chips or nuts.
Method:
Preheat the oven to 350 F. Line a 12 cup muffin pan with paper liners or grease the cups. In a bowl, whisk together flour, salt, baking powder and baking soda. In another bowl, whisk together eggs, oil, both the sugars. Stir in vanilla. Start adding the dry mixture to wet alternating with milk starting and ending with dry mixture. This batter is very very thick.  Divide between the cups and bake for 20 - 22 minutes or until a toothpick inserted comes out clean. These muffins almost look dry on the top but are very moist. Cool on the wire rack.

Enjoy.


Pin It

Apple Pie Bread

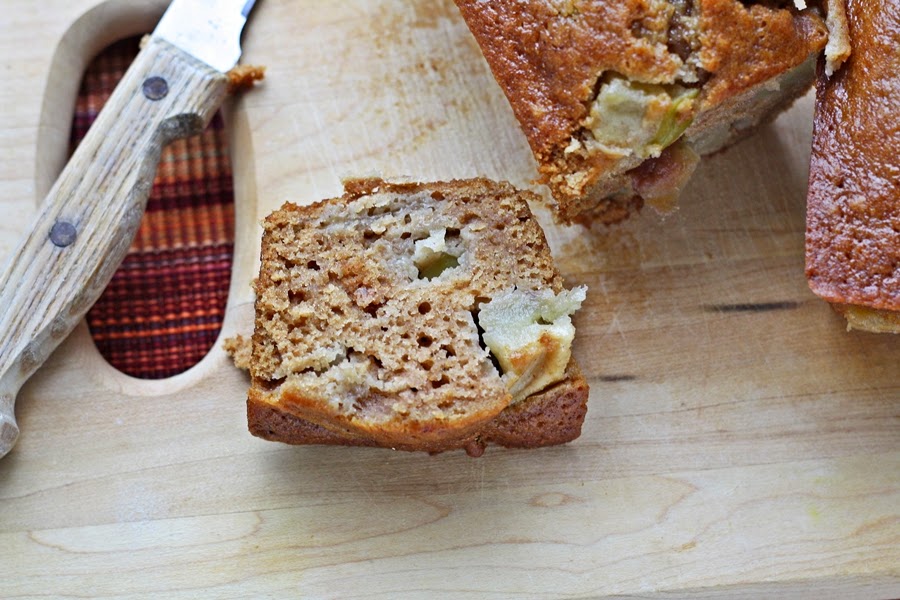
I have made apple pie only once in my life. I do know how to make it but never make it since I am not fond of it. Do you know the reason for me not liking it? It is because almost all the time, filling separates from the crust while eating and for some reason, I don't like the feel of just the filling or just the crust. So, I incorporated the apple pie filling into the applesauce bread and called it Apple Pie Bread. Cool right?
One Year Back - Pumpkin Pecan Bread
Two Years Back - Sweet and Spicy Almonds, Lemon Coconut Bread
Three Years Back - Holiday Gift Ideas
Four Years Back - Eggless Pecan Pie Bars
Adapted from a banana bread recipe from the book - The Sweet Melissa Baking Book 
Ingredients: Makes one 9 X 5 loaf or 4 mini loaves
For the apple pieces:
Unsalted butter - 2 TBSP
Brown Sugar - 3 TBSP packed
Granny Smith or baking apples - 2 cored and chopped into 1/2 - 3/4 inch cubes
Cinnamon - 1/2 tsp

For the bread batter:
All purpose flour - 2 cups
Baking Soda - 1 tsp
Ground Cinnamon - 1/2 tsp
Ginger - 1/4 tsp
Cloves - 1/4 tsp
Nutmeg - a pinch
All Spice - a pinch
Salt - 1/2 tsp
Oil - 1/3 cup
Eggs - 2 large
Sugar - 1 cup
Orange juice or water or milk - 1/4 cup
Applesauce - 1 1/2 cups

Method:
Apples:
Heat butter in a skillet. Add chopped apple pieces, brown sugar, cinnamon and stir. Let them cook for about 5 minutes or bit soft. Turn off the heat and let it cool to room temperature.

Making the bread:
Preheat the oven to 350 F. Line a loaf pan with parchment paper (recommended) or grease and flour. In a bowl, whisk together flour, spices, salt. In another bowl, whisk together eggs, oil, sugar till eggs are beaten and have mixed well with sugar and oil. Stir in applesauce. Now add the dry mixture alternating with orange juice or milk. When no streaks of flour can be found, add the cooked apple mixture. Stir. This is quite a wet batter. Pour into the prepared pan and bake for 60 minutes or till done in case of a large loaf pan or 40 - 45 minutes in case of mini loaf pans. Cool in the pan for 10 minutes and then turn on to the wire rack very carefully to cool completely.  I baked them into mini loaves.

Enjoy.

Pin It

Wednesday, September 25, 2013

Buttermilk Brownie Muffins

Just because a recipe comes out of a published cookbook/baking book doesn't mean it will make what it advertises for. I had such an experience with this recipe. I won't mention the book name just because I have baked few things from that book and they turned out great every time. So, I will give it a benefit of doubt that it was a mistake in printing.
I have been baking for 15 years now. Very actively after I had kids, about 7+ years. I might not be an expert in baking but very very rarely things don't turn out the way they should when I bake. Because of this vast experience in 'baking', I can make out if something is not correct before it goes into the oven. When I mixed the batter for these muffins, I knew instantly that it will not work. I added more flour to fix it and it turned out perfect. If, I had baked as suggested in the recipe, it would've been a disaster. These are a bit sweeter than regular muffins but the name itself suggests that and I was alright using that much sugar. You can cut it down to 3/4 cup if you don't want a sweeter muffin.
One Year Back - Vegan Navaratna Kurma
Two Years Back - Sweet Couscous and Apple Salad
Three Years Back - Sweet Milk Rolls/Buns

Ingredients: 
Oil - 1/3 cup
Water - 2/3 cup
Buttermilk - 2/3 cup
Unsweetened Cocoa - 1/4 cup
All purpose flour - 2 1/3 cups
Sugar - 1 1/3 cups
Baking Soda - 3/4 tsp
Salt - 1/2 tsp
Egg - 1 large
Vanilla - 1 tsp

Method:
Preheat the oven to 375 F. Line muffin cups with paper liners. This recipe should give 14 regular sized muffins. In a bowl, whisk together salt, baking soda, all purpose flour. Set aside. In another bowl, whisk together oil, sugar, cocoa, egg until cocoa is mixed well with egg and oil. Add water and buttermilk to it and mix. Stir in vanilla. Dump the dry ingredients to this and whisk gently to mix. Pour into the prepared pan. It gets filled more than 3/4 th of the muffin cup. Bake for 18 - 20 minutes or until a toothpick inserted in the center comes out clean. Cool on the wire rack for 5 minutes in the pan and then remove to cool completely on the wire rack.

Enjoy.
Pin It

Monday, September 9, 2013

Whole Wheat Banana Aebleskiver / Gundu Pongal / Paniyaram

Now that the school has started, dilemma of what to pack for lunch has become a routine. It is very easy if I have bread on hand. It can be turned into some kind of sandwich even if there isn't lot of time. But since I have decided not to buy bread, that means I have to keep baking bread twice a week so that we have bread on hand or come up with something else that kids would eat. Today was one such day where there was no bread and not too much time. I packed these as lunch since they are not that sweet. I thought they taste less sweeter than the nutella sandwich that my kids love.

One Year Back - Pumpkin Chocolate Chip Bread
Two Years Back - Vegan Sourdough Chocolate Cake with peanut butter glaze
Three Years Back - Sourdough Pumpkin Spice Cake
Ingredients:
Whole Wheat Flour -1 cup
Fine Soji / Semolina - 1/2 cup (See Notes)
Sugar - 1/2 cup
Milk - 1 cup (Use almond milk for vegan version)
Banana - 1 large ripe
Water - 1/2 cup - 3/4 cup (depending on how large the banana is and how much water the wheat flour absorbs)
Cardamom - 4 pods crushed into powder (You could use cinnamon instead)
Baking Soda - 1/4 tsp
Oil - for cooking

Method:
Mix the flour, soji, sugar in a bowl. Add the mashed banana along with milk to make a batter. Slowly start adding part of water and mix gently. It should be like a pancake batter, easily scoopable but does run down. Set it aside for 10 minutes. Flour will have absorbed some liquid. Add the remaining water to make the correct consistency batter. Add baking soda and cardamom powder and mix gently.

Heat the Aebleskiver pan / Pancake puff pan and add at least 1/4 tsp of oil to every cup. You might have to use a bit more if your pan is not a non-stick one. Pour the batter and cover with a lid. When you start seeing the steam and the top of the batter has crusted at the edges, gently flip and let the other side cook. Remove and serve with a glass of milk or if more sweetness is desired, with some maple syrup.
This post is written for weekend cooking post that I write with Srivalli  and  Vaishali.      

Notes:
If you cannot get soji, you could use fine ground cornmeal or even quick oats.

Enjoy.
Pin It

Monday, August 19, 2013

Banana Nut Granola

Saga of over ripe Bananas

Some people just toss it in the trash can.
Some people freeze it for later use in smoothies or milk shakes.
Some people bake banana bread or muffin using them.
Some people bake banana cake using them.
Very few people can think of making granola with them and I am one of those. Idea came because of my previous experience with Pumpkin Granola. It was delicious and I probably will make this kind of granola more often than others.
One Year Back - Brownie Biscotti
Two Years Back -  Poppy seed drink / Gasagase Payasa
Three Years Back -  Craisins and White chocolate chip biscotti 
Ingredients: 
Rolled Oats - 6 cups
Brown Sugar - 1 cup packed
Canola Oil - 1/4 cup
Mashed banana - 1/2 - 3/4 cup (From 2 large bananas)
Salt - 1/2 tsp
Cinnamon - 1 tsp
Raisins - 1 - 1 1/2 cups (Or your favorite dried fruits like dried cranberries or chopped dates)
Walnuts - 1 cup chopped

Method:
Preheat the oven to 300 F.  Line two large baking sheets with aluminum foil and spray with vegetable oil spray. Set aside. In a bowl, take rolled oats and chopped walnuts. Toss gently. In a saucepan, combine brown sugar, canola oil, mashed banana, salt and cinnamon. Heat stirring occasionally till brown sugar melts a bit and combines with the rest of the ingredients in the pan. It doesn't have to boil. Pour this on to the Oat and walnut mixture and stir to combine. There will be a  lot of lumps, leave them as is or break them into smaller lumps. Spread on the two baking sheets and bake for 45 - 55 minutes  stirring once midway and rotating the baking sheets. If you have spread it thin enough, it should be ready in 45 minutes. If you have too many big lumps, it will take up to an hour. Remove from the oven and let cool slightly. I would suggest you to break the lumps into smaller ones since it will add texture uniformly through out the cereal. Add raisins and mix. Once cooled completely, store in an air tight container. This should be good for two weeks if not eaten by then. I prefer to eat this with warm milk instead of cold milk.

Notes:
You could add vanilla instead of cinnamon and add a cup of chocolate chips instead of raisins for a different taste. Add chocolate chips once the granola has cooled.

Enjoy.
Pin It

Tuesday, July 9, 2013

Chocolate Squash Muffins - Vegan, low fat, low sugar

You have a bag of yellow squash from the produce junction. And by mistake, your 8 year old dumps the bag of bananas in the freezer (in the name of helping mommy after the grocery store trip). What would you do with these two? Make these muffins. These are really good and not high in fat or sugar and can be eaten as breakfast or as a snack. I changed the original recipe quite a bit by using whole wheat flour, flax eggs and using banana instead of applesauce.
One Year Back - Shahi Pulav
Two Years Back - North Indian Cucumber salad - Chucumber
Three Years Back - Homemade vegetable broth
Adapted from cooking light website.
Ingredients:  Makes 1 9 X 5 loaf or 15 regular sized muffins.
Sugar - 1/2 cup (See Notes)
Oil - 3 TBSP
Flax eggs - 2 TBSP flax meal mixed with 6 TBSP of warm water (or use 2 large eggs for a non vegan version)
Mashed banana - 1 cup (See Notes)
Whole Wheat flour - 1 cup
All purpose flour - 1 cup
Cocoa - 2 TBSP
Baking Soda - 1 1/4 tsp
Salt - 1/4 tsp
Vanilla - 1 tsp
Yellow Squash - Peeled and grated 1 1/2 cups (One medium)
Chocolate chips - 1/2 cup 

Method:
Preheat the oven to 350 F. Line cupcake pan with liners or spray with vegetable oil spray. If baking in the loaf pan, spray and lightly flour the pan. In a bowl, combine both flours, salt, cocoa, baking soda. Whisk and set aside. In another bowl, whisk together the mashed banana, sugar, oil. Whisk in the flax meal and water mixture, stir in vanilla. Add the grated squash to it and mix as uniformly as you can. Dump the dry ingredients to it and stir to combine. It will look a bit dry but within few seconds, it will mix well and make a thick muffin batter. Stir in the chocolate chips. Pour into the prepared pan and bake. For muffins, it will take about 24 - 26 minutes and for the loaf, it will take about 55 - 60 minutes. Test with the toothpick. Cool in the pan for 5 minutes and then turn it on to the cooling rack to cool completely.

Notes:
Original recipe calls for applesauce and not bananas. Since banana puree is much more sweeter than natural applesauce, I reduced the sugar to 1/2 cup from 3/4 cup mentioned in the original recipe. It was sweet enough and chocolate chips add to the sugar too. If you are using applesauce, you might want to increase the sugar to 3/4 cup.

Enjoy.
Pin It

Sunday, July 7, 2013

Methi Thepla (Gujarathi flat bread using fenugreek leaves)

Thepla is a Gujarathi flat bread or roti. It has chick pea flour or besan added to the whole wheat flour which makes it very soft. I like to try different kinds of rotis since it adds variety to the food. Plus, this particular recipe uses greens which is an added bonus. My kids ate these happily with yogurt and it was one of the easier way to make them eat fenugreek leaves. Traditionally this recipe has lot of oil, but I used very minimal amount. It still tastes good. I prefer to eat this as a snack with some tea.
One Year Back - Shahi Pulav
Two Years Back - North Indian Cucumber salad - Chucumber
Three Years Back - Homemade vegetable broth
Ingredients:
Whole Wheat flour - 2 cups
Chickpea flour / Besan - 1/2 cup
Salt - 1 1/2 tsp or to taste
Red chilli powder - 2 tsp or to taste
Fenugreek leaves - just the leaves and tender stems about 2 cups
Turmeric - a generous pinch
Yogurt - 1/2 cup
Oil - 2 TBSP for the dough and more for cooking ( I brush both sides with oil lightly using a pastry brush)
Water to make the dough

Method:
Mix all the ingredients and make a soft dough. Cover and let it sit for 20 - 30 minutes. Knead the dough and dusting with more flour, roll into thin rotis or tortillas. Cook on the hot skillet smearing some oil on both sides. Serve with plain yogurt and pickles. This will taste good with any dal or curry that is not very spicy.

This post is written for weekend cooking post that I write with Srivalli  and  Vaishali, 
Enjoy.
Pin It

Thursday, May 30, 2013

Yeasted Coffee Cake

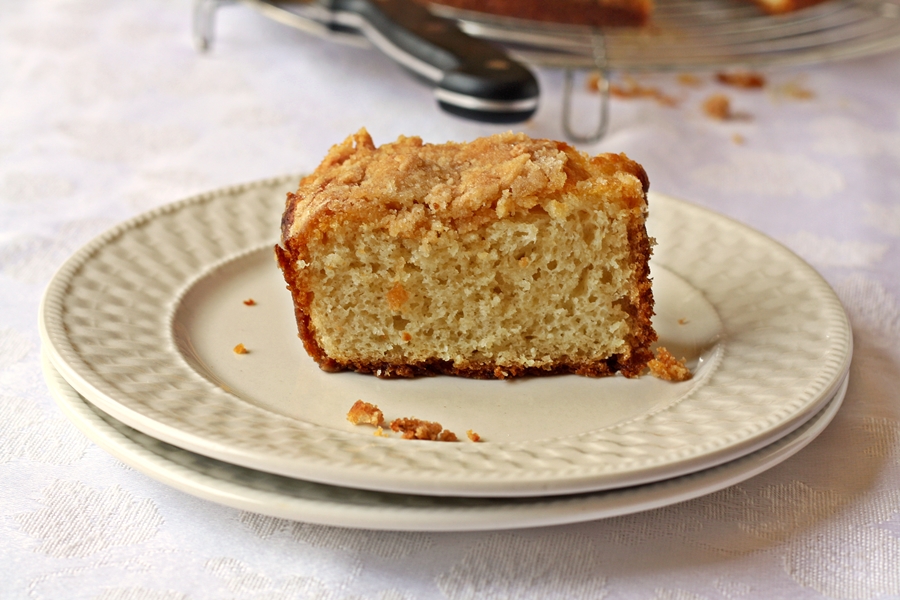
If you are a fan of a piece of cake to go with coffee or tea and that is not too sugary, this is for you. Best part of it is you can make the batter in the night and just pour into the pan and bake in the morning. Kids were not fond of this though since it lacked sweetness that they look for in a cake. Next time, I might swirl in the struesel topping with a knife to make sugar go all the places and not just on the top.
One Year Back - Strawberry Pineapple Crush
Two Years Back - Oats and Cashew Milk
Three Years Back - Kesar Nankatai and Molasses Oat bran Cookies
Ingredients:
For the Cake:
All purpose flour - 2 cups
Sugar - 1/4 cup
Warm water - 2/3 cup
Oil - 2/3 cup
Vanilla - 1 tsp
Salt - 1/2 tsp
Active dry yeast - 1 packet or 2 1/4 tsp
Eggs - 2 large (or 1 large and 2 yolks)

For the Struesel topping:
All purpose flour - 3/4 cup
Cold butter - 4 TBSP cubed
Sugar - 1/4 cup
Brown Sugar - 1/4 cup
Salt - a pinch

Method:
In a bowl, take the warm water, add sugar to it and add the yeast. Let the yeast froth. When the yeast is frothy, to the same bowl, add salt, oil, eggs. Break the egg yolks and stir to make it uniform. Dump the flour and with a wooden spoon, stir to combine well. It will be like a thick pancake batter. Stir in the vanilla. Let it sit at room temperature for 30 minutes covered. Then transfer it to the refrigerator for 8 hours or overnight.
In the morning, take out the batter and let it sit at room temperature for 30 - 45 minutes. Make the struesel topping by combining all the ingredients mentioned in "For the Struesel topping" section with a fork or pastry blender. You could even use a food processor to mix them till they look like coarse meal.
Preheat the oven to 350 F. Spray a tube pan with vegetable oil spray and dust with flour. Stir the batter to deflate a bit. Dump the batter into the pan. This is not a very big cake so it will cover the pan only for  3/4" of depth. Sprinkle the struesel topping on to the batter evenly. Bake for 45 - 50 minutes or until the cake looks brown. Let it sit in the pan for 10 minutes before removing it to the wire rack to cool completely.

Notes:
You could use a 9" square pan instead. Baking time will need to be altered.


Pin It

Monday, May 6, 2013

Poori / Deep fried, puffed bread

This weekend, I made Poori Saagu for brunch. Best part was the kids wanted to help and my two girls alternately pressing the dough balls (I have a poori press) made it so easy for me to fry them. And they thought it was so much fun that they want me to make pooris every weekend so that they can help.
Sometimes, kids have funny questions and my older one asked "Mommy, does every Indian know how to make poori?" and to that I did reply a "Yes". So, technically, this is not an innovative or even a new recipe at all. But, there are certain things when followed, you make a very good poori and not just an ordinary one. The trick is to use fine soji or chiroti rawa. It makes the pooris retain their shape longer. I always made it with equal parts of whole wheat flour, fine rawa and all purpose flour or maida. I skipped using maida in this just to make it a little better nutrition wise. Also, people use flour to roll pooris and that leaves the dry flour in the oil and sometimes on the top of the fried poori. Try using oil instead and you will see how clean they look. They are of course greasy but once in a while it is alright to eat such food in moderation.
One Year Back - Garlic Toast
Two Years Back - Vegan Sourdough Scallion Pancakes
Three Years Back - Fenugreek Curry / Menthyada Gojju
You can find the recipe for Saagu with which this is served generally here.
Ingredients: 
Whole Wheat flour - 2 cups
Fine Soji - 1 cup
Salt - 1 tsp or to taste
Oil - 2 TBSP for the dough and more for frying
Water - 1 1/4 - 1 1/2 cups

Method:
Mix Whole wheat flour, soji, salt and oil. Add water a little by little and make a soft dough. Cover and let it sit for half an hour at least. When ready to make pooris, heat oil in a pan. Knead the dough for couple of minutes and divide into small lemon or lime sized balls. You should be able to make 24 - 26 pooris out of this dough. Roll the balls smoothly and spray lightly with vegetable oil spray or you could brush them with oil.
For rolling, do not use flour as we do for rotis. Apply a little oil on the surface that you are rolling the dough. Take the dough and flatten it a little thicker than what we make for rotis. Oil has to be moderately hot for the pooris to puff up. Gently slide the flattened dough into the oil. With a slotted skimmer or a ladle, press the disc when it starts coming up in the oil. This is the way to make them puff up evenly and nicely. Gently turn over and let the other side become brown. Remove and drain on the paper towel. Serve hot with potato subzi or Saagu.

This post is written for weekend cooking post that I write with Srivalli  and  Vaishali,  

Enjoy.
Pin It

Friday, March 22, 2013

Whole Wheat Applesauce Bread

Inertia - A property of matter by which it continues in its existing state of rest or uniform motion in a straight line, unless that state is...
This post is being written just to come out of my state of inertia regarding blogging. I am one of those who get saturated (read bored) with something pretty easily. I start off with something, go deep into it and after a while, I lose interest. That did happen to me with respect to blogging. Person who used to blog 4 and even 5 times a week, who used to spend time and submit pictures to these food photography sites lost interest. Reason, lack of motivation. I found something else that is interesting at the moment. Fiction reading and writing. You might ask why not stop it if you don't have any interest. I will tell you all a secret. I cannot justify having so many props and stuff that I bought for blogging. Either I have to get rid of them (which is very hard since I spent a lot of money and time on them) or keep blogging. Do you think it is a ridiculous reason for blogging, I think so too.

Let's come to this recipe. I made it as a snack for the kids. Not very fattening and not too sugary either. You can use any spice you want in place of plain cinnamon.
One Year Back -  Carrot Ricotta Halwa/Pudding
Two Years Back -  Apricot Orange Bread, Mango Chiffon Cake, Portuguese Sweet Bread
Three Years Back - Iyengar Bakery Toast/Indian Bruschetta
Ingredients:
Whole Wheat flour - 1  1/2 cups
Sugar - 1/4 cup
Honey - 1/4 cup
Applesauce - 1 cup (I used the sweetened one. If using unsweetened, increase sugar to 1/2 cup)
Oil - 1/4 cup
Eggs - 2 large or 2 flax eggs
Salt - 1/2 tsp
Cinnamon - 1 tsp
Baking Soda - 1 tsp
Baking powder - 1 tsp

Method:
Preheat the oven to 350 F. Spray a 9 X 5 or a 8 X 4  loaf pan with vegetable oil spray. I used 3 mini loaf pans. In a bowl, combine together flour, salt, cinnamon, baking soda and baking powder. In another bowl, beat together sugar, oil, eggs or flax eggs. When the mixture is well mixed, add applesauce, honey and stir. Dump the dry ingredients to the wet and stir gently to combine. Pour into the prepared pan and bake for 45 - 50 minutes in case of the larger pan and 30 - 35 minutes in case of mini loaves or until a toothpick inserted in the center comes out clean.
Cool on the wire rack and remove from the pan to cool completely after 10 minutes. Slice when completely cool.

Enjoy.
Pin It

Tuesday, February 5, 2013

Beet Chocolate Bread

If you ask my older daughter to name a few vegetables, her list would be peas, green beans, lima beans and carrots. They are the vegetables that she would eat in any form without fuss. If you ask my younger one to list few vegetables, her list would be tomatoes, tomatoes, tomatoes and maybe spinach. Not that I stick to only those vegetables, I do make them eat other veggies, but it is not an easy task. I had beets and I thought I would turn them into a cake or muffin. But then, I didn't want the color to make my kids not eat it, so I hid it using cocoa and made this bread. They have no clue that there is beets in it and they are eating it happily as snack.
One Year Back - Simple Edamame and Greens Rice
Two Years Back -  Yeasted Olive Oil Pear Cake, Salad with italian dressing
Three Years Back - No knead Focaccia

Ingredients: 
All purpose flour - 1  cup
Whole Wheat flour - 1 1/2 cups
Unsweetened Cocoa - 1/2 cup (I used dutch processed, but natural works too)
Sugar - 1 cup (See Notes)
Baking powder - 1/2 tsp
Baking Soda - 1 tsp
Salt - 1 tsp
Oil - 3/4 cup
Egg - 3 large
Vanilla - 2 tsp
Beet- peeled and shredded with fine grater - 2 cups (about 1 large beet)
White chocolate chips - 1 cup (optional) 

Method:
Preheat the oven to 350 F (In my case, 325 F since I was using dark pans). Grease two 8 X 4 pans with vegetable oil spray. Set aside. In a bowl, whisk together all purpose flour, whole wheat flour, cocoa,  baking powder, baking soda and salt. Set aside. In another bowl, whisk together oil, sugar and eggs. Stir in vanilla. Make a well in the center of dry ingredients and pour the liquid mixture. Stir slowly so that it mixes evenly. Stir in shredded beets and white chocolate chips if using. This is a very thick batter.  Scoop into the prepared pans and bake for 50 - 55 (will be less if you use 9 X 5 pans and at 350 F) minutes or until a toothpick inserted in the center comes out clean. Cool in the pan for 10 minutes and then turn it on to the wire rack to cool completely.  This bread doesn't rise much, so keep that in mind when you fill the pans.


Notes:
This is not a very sweet bread at all. Perfect for snacks for kids.
 
Pin It

Monday, January 28, 2013

Pineapple Muffins

No, I am not having a muffin mania on this blog. I have been making some muffins for the kids' snack and this one was one of them. It doesn't have a lot of fat, but has lots of fruit in it. Very moist and tender. One of my kid loved it whereas the other complained about too much pineapple. Depends on if you like lot of fruit in the muffin or not.
One Year Back - Banana Sourcream Cake (Low Fat)
Two Years Back - Sweet Corn Raisin Bread, Vegan Tomato Soup
Three Years Back - Cranberry Rice Orange Muffins, Multigrain Brown Bread
Ingredients: (makes 12 standard sized muffins)
All purpose flour -  3/4 cups
Whole Wheat flour - 1 cup 
Salt - 1/4 tsp
Baking powder - 1 TBSP
Crushed pineapple in its juice - 1 1/2 cups (don't drain it. Measure it in liquid measuring cup)
Oil - 1/4 cup
Sugar - 2/3 cup
Egg - 1 large
Vanilla - 1 tsp
Method:
Preheat the oven to 375 F. Line a 12 cup muffin pan with liners or grease with vegetable oil spray. In a bowl, whisk together flours, baking powder, salt. In another bowl, whisk together pineapple and its juice, oil, sugar and egg. Mix till egg is broken and the mixture is uniform. Add vanilla and stir. Now dump the whole dry ingredients and stir to combine. Divide between the 12 cups and bake for 20 - 22 minutes or until a toothpick inserted in the center comes out clean. Cool in the pan for 5 minutes and then turn it on to the wire rack to cool completely.

Enjoy.
Pin It

Thursday, January 24, 2013

Orange Chocolate Chip Muffins

For some reason, no one is interested in eating oranges at our place. Clementines work, but not oranges. The main reason being it is hard to peel compared to clementines. I had quite a few oranges that people gave as part of the gift bag. I had to use it up somehow and I made these muffins. They were not too sweet, citrusy and light and perfect for kids' lunch box snack.
One Year Back - Sweet potato Chili
Two Years Back - Vegan Mango Cake
Three Years Back  - Butternut squash Pasta, Eggless Blueberry Coffee cake, Chewy Granola Bars
Ingredients:
All purpose flour - 1 3/4 cups
Sugar - 2/3 cup
Oil - 1/2 cup
Orange juice - 2/3 cup (I used freshly squeezed juice)
Egg - 1 large
Baking powder - 1 TBSP
Salt - 1/4 tsp
Orange Zest - 1 TBSP
Vanilla - 1 tsp
Mini chocolate chips - 3/4 cups (See Notes)
Method:
Preheat the oven to 375 F. Line 12 cup muffin tray with paper liners or spray with vegetable oil spray. In a bowl, whisk together all purpose flour, salt, sugar and baking powder.  In another bowl, beat orange juice, oil and egg until nicely combined. Add vanilla, orange zest and mix. Dump the dry ingredients to wet and slowly stir with a spatula or a wooden spoon. Stir in chocolate chips. Do not over mix. Divide between 12 muffin cups. Ice cream scoop works best to divide them uniformly. Bake for 22 - 24 minutes or until a toothpick inserted in the center comes out clean. Cool in the pan for 5 minutes and then turn it on to the wire rack to cool completely.

Notes:
Try not to use the regular sized chocolate chips. This batter is a little thin and the chocolate chips might sink into the bottom.

Enjoy.

Pin It

Saturday, December 1, 2012

Pumpkin Granola

Today is the beginning of December. A month that lot of people look forward to mainly because of holidays.  The best thing I like about December is the chance to bake a lot of things to give as gifts. And today marks the beginning of Bake-A-Thon 2012. I am sure some of you might not agree with the name since I am not posting everyday, but still I want to call it by the same name. Some of my blogger friends wanted to join me in this venture. I am happy that I have company because with the busy office work, it is easy to stop blogging unless you have some motivation. So, thanks go to Preethi, Veena, Priya, Srivalli and  Sumana.
One Year Back - Cranberry Corn Muffins
Two Years Back - Holiday Gift Ideas
Three Years Back - Cake Decorating Basics - II

Ingredients: 
Rolled Oats - 5 cups
Brown Sugar - 1 cup packed
Canola Oil - 1/4 cup
Pumpkin Puree - 3/4 cup (I used homemade)
Salt - 1/2 tsp
Cinnamon - 1 tsp
Ginger - 1 tsp
Cloves - 1/2 tsp
Nutmeg - 1/4 tsp
All Spice - 1/4 tsp
Dried sweetened Cranberries - 1 - 1 1/2 cups (Or your favorite dried fruits like raisins or chopped dates)
Walnuts - 1 cup chopped (Pecans make another delicious addition/variation)

Method:
Preheat the oven to 325 F.  Line two large baking sheets with aluminum foil and spray with vegetable oil spray. Set aside. In a bowl, take rolled oats and chopped walnuts. Toss gently. In a saucepan, combine brown sugar, canola oil, pumpkin puree, salt and other spices. Heat stirring occasionally till brown sugar melts a bit and combines with the rest of the ingredients in the pan. It doesn't have to boil. Pour this on to the granola and walnut mixture and stir to combine. There will be lot of lumps, leave them as is or break them into smaller lumps. Spread on the two baking sheets and bake for 50 minutes to an hour stirring once midway and rotating the baking sheets. If you have spread it thin enough, it should be ready in 50 minutes. If you have too many big lumps, it will take up to an hour. Remove from the oven and let cool slightly. I would suggest you to break the lumps into smaller ones since it will add texture uniformly through out the cereal. Add sweetened dried cranberries and mix. Once cooled completely, store in an air tight container. This should be good for two weeks if not eaten by then. I prefer to eat this with warm milk instead of cold milk.

Notes:
You could reduce the spices if you don't like the spices or omit them altogether. In that case, add about 2 tsp of vanilla to pumpkin mixture.

Enjoy.
Pin It

Thursday, November 29, 2012

Yeasted Oatmeal Waffles (Vegan)

It is not so nice to eat cold cereal in the morning in winter. At least not for me and I feel kids feel the same. They ask for toast, pancakes and waffles more often these days. I had tried giving them hot oatmeal cereal but they never liked it for some reason. Then, long before I started blogging, I had made oatmeal pancakes. They refused to eat it because they could see the oats and didn't like the crunch. So, this time I made a batch of overnight yeasted oatmeal waffles. Since oats are soaked in boiling water, they are do not add to the texture of the finished product and kids didn't complain about oats.
One Year Back - Easy Fudge
Two Years Back - Peanut butter Blondies
Ingredients: 
Rolled oats - 1 cup (old fashioned oats)
Whole Wheat flour - 1 cup
Salt - 3/4 tsp
Active dry yeast - 1 1/2 tsp (Or use 1 tsp instant yeast)
Cinnamon - 1/2 tsp - 3/4 tsp
Flax seed meal - 1 TBSP mixed with 3 TBSP of warm water (or use 1 large egg)
Boiling water - 1 3/4 cups (boil and measure)
Sugar - 1/4 cup (Could use less)
Oil - 1/4 cup

Method:
In a bowl, add rolled oats. Pour boiling water on it. Let it cool down to luke warm. Then add all the rest of the ingredients. (If using egg, don't add it at this point, but just before making the waffles) Stir to combine. Cover and either refrigerate overnight or let it sit for an hour or two till bubbly. If refrigerating, remove the batter from the fridge and let it come to room temperature. Stir the batter and make waffles as per your waffle iron's specifications. This makes about 14 waffles of size 4" square. Serve with syrup or fruit compote.

Notes:
You could use part of the liquid as non dairy milk.You can get perfectly square ones by adding more batter but my waffle iron makes a mess even if I add a tsp more. I prefer to have less and no mess and that is the reason you see all waffles have broken edges.

Enjoy.
Pin It

Monday, November 19, 2012

Vegan Pumpkin and Cranberry Sauce Bread

I was looking for the recipe of a cake which uses cranberry sauce and I came across a recipe on Taste of Home site. But, it used mayonnaise which I neither have at home nor wanted to use. So, I had this idea of using pumpkin puree in its place and to compensate for the fat in mayonnaise, I used a bit of oil. But, I wouldn't and couldn't call it a cake. It was more of a bread and this could be very easily considered as a weight watcher's cake if you use whole wheat pastry flour. This is not for you if you want to enjoy the rich, buttery, sugary treat. This is for you if you want to eat something sweet and not rich. This tastes great with a cup of coffee or tea.
One Year Back - Homemade Cake Mix
Two Years Back - Coconut Chocolate Rolls/Buns
Adapted from - Taste of Home
Ingredients:
All purpose flour - 3 cups
Sugar - 1 cup (Can use up to 1 1/2 cups)
Cranberry sauce - 1 can of 14 Oz (I used whole berry cranberry sauce)
Salt - 1 tsp
Baking Soda - 1 tsp
Oil - 1/4 cup
Pumpkin Puree - 1 cup
Orange juice - 1/3 cup
Orange extract - 1 tsp (Or use about 1 TBSP of orange zest)

Method:
Preheat the oven to 350 F. Grease and flour a 10" tube pan with shortening and flour. In a bowl, whisk together flour, salt, baking soda. In another bowl, beat sugar, oil, cranberry sauce till smooth. Add pumpkin puree and orange juice till everything is mixed well. Add orange extract and dump the dry ingredients. Continue to beat at very low speed till no streaks of flour is left. Batter will be very thick. Pour into the prepared pan and bake for 55 - 60 minutes or until a toothpick inserted in the center comes out clean.
Cool in the pan for 10 minutes and then turn on to the wire rack to cool completely. 

Notes:
You can make this into two 8 X 4 loaves or about 20 muffins. If you like a sweeter bread, do use 1 1/2 cups. I liked it with this much sugar but my husband and kids felt it was bland. You could add a glaze made with powdered sugar and orange juice to make it pretty.

Enjoy
Pin It

Sunday, November 18, 2012

Overnight Whole Wheat Yeast Pancakes

Weather is showing all signs of winter knocking on the door pretty soon. Mornings are pretty cold which make it hard to get out of bed some days. It is a vicious circle; if you wake up late, everything has to be done in a hurry to make sure kids go to school on time and my work starts on time. In such a condition, it is wonderful to have something to serve in a jiffy for breakfast. These yeast raised whole wheat pancakes are just that. These freeze very well and if you make the batter on a Saturday night and make these for Sunday breakfast, you are covered for the next week or two depending on how often you need to serve these.
One Year Back - Pumpkin Chocolate Chip Bars, Banana Spice Cake
Two Years Back - Pumpkin Pound cake and Chocolate cake recipes, Apples to Applesauce to Applebutter
Ingredients: 
Whole Wheat Flour - 2 cups
Sugar - 2 TBSP
Salt - 3/4 tsp
Oil - 2 TBSP
Warm water - 1 1/4 cup (If you use all purpose flour instead of WWF, use only 1 cup)
Warm Milk - 1 cup
Active dry yeast - 2 1/4 tsp or 1 packet
Eggs - 2 large beaten (Flax eggs work fine as a replacement)
Vegetable oil spray for the griddle or butter to cook the pancakes.

Method:
In a bowl, take water, milk, salt, sugar, oil. Add yeast and let it froth for 5 minutes. Add all of the flour and mix well. Batter will look thin, but don't worry. It will thicken as the yeast works. Cover with a lid or plastic wrap and keep in the refrigerator for 8 hours or overnight. In the morning, take out the batter and let it sit for 20 - 30 minutes at room temperature. Beat eggs in a small bowl and mix it to the batter. Mix well till smooth. Heat the griddle and pour 1/4 cup of batter to make pancakes flipping to cook both sides. This is not very sweet, so serve with generous serving of maple syrup or pancake syrup. I could get about 18 - 20 pancakes of size 4" - 5" .

Enjoy.

Pin It

Sunday, November 11, 2012

Yeasted Chocolate Bread with Cranberries and White Chocolate Chips

Even after baking so many breads, I cannot resist a new bread recipe when I see it. I have been wanting to make Chocolate Cherry bread for a very long time now. For some reason, I always miss buying the pack of dried tart cherries. Few days back, I got the urge to bake a bread and the moment I opened this book, my eyes fell on the bookmarked page. Since I had neither time nor the patience to go to the store, I replaced cherries with dried cranberries. And because cranberries and white chocolate chips go hand in hand, I threw some in the dough and here comes this delicious bread.
One Year Back - Pumpkin Cranberry Bread
Two Years Back - Cream Cheese topped Pumpkin Bars
Makes 2 loaves - adapted from Good Housekeeping Baking book
Ingredients:
Warm water - 1 1/4 cups (Or use part Brewed coffee and part water)
Active dry yeast - 2 1/4 tsp or 1 pack
Sugar - 1/3 cup (You could use brown sugar too)
Dutch processed cocoa - 1/3 cup (Regular cocoa works but dutch processed cocoa gives a better color)
Oil - 4 TBSP or melted butter
Salt - 1 1/2 tsp
All purpose flour - 3 1/2 cups (May need 1 or 2 TBSP more)
Egg - 1 large (See Notes)
Sweetened dried cranberries - 3/4 cup
White chocolate chips - 1 cup
Method:
To make the dough using bread machine:
Place the ingredients in the bread machine pan in this order - Water, oil, egg, salt, sugar, cocoa, all purpose flour, yeast. Set the machine on dough setting and start. Check the dough when it beeps. It should be soft but a little tacky. If not, add 1 or 2 TBSP more flour. When the cycle completes, remove the dough from the pan and add the cranberries and chocolate chips and work it into the dough. Divide the dough into two parts. Grease two 8 X 4 loaf pans with vegetable oil spray. Place the dough in the pan. It is sticky dough, so spray your hands with vegetable oil spray and shape the dough into a log and place in the pan. Cover with greased foil or plastic wrap and let it rise till the edge of the pan. It took almost an hour for me since it is cold here.

To make the dough by hand:
Refer to any of the numerous bread posts on this blog - example this one. 
To bake:
Preheat the oven to 375 F towards the end of rising time. Just before placing the pans in the oven, slash the loaves in the center. I forgot to do it and the loaf cracked at the top edge. Place in the oven and bake for 20 minutes. Turn down the temperature to 325 and bake for another 10 - 15 minutes or until the internal temperature measures 190 F or the bottom of the loaf sounds hollow when tapped. Remove from the pan and cool on the wire rack. Slice when completely cool. Serve with some cream cheese or buttery spread or with some milk. This makes a great breakfast bread or a snack bread.

Notes:
Egg can be replaced by yogurt in this recipe without compromising the taste or texture. Another point to remember is to work the white chocolate chips inside the dough. I was in a hurry and didn't make sure no white chocolate chips were on the top of the dough. They got toasted. They were fine, but next time, I would work them into the dough more.

Enjoy.

Pin It

Thursday, November 8, 2012

Vegan, Glutenfree Butternut Squash Pancake Puffs

Few months back, I wanted to try out some gluten free baking. I bought different kinds of gluten free flours but never got around to bake anything with them. When I was organizing the pantry, I found an unopened pack of Amaranth flour and wanted to try making something using it. When I opened the pack, I found the smell a bit too overwhelming. Almost all gluten free flours except for oat and rice flour have some significant smell that need getting used to. That is the reason behind the combination of rice and amaranth flour.  I was chopping butternut squash to make something and used some of it to make these Aebleskiver or pancake puffs. (This is nothing but paniyaram or gundu pongal or appe in different languages.) This batter can easily be used to make pancakes.

One Year Back - Chocolate Chip Bread
Two Years Back - Pita Chips with green peas and ricotta dip
Ingredients: 
Rice flour - 1 cup
Amaranth flour - 3/4 cup (Or any other gluten free flour or more rice flour)
Salt - a pinch
Very warm water - 2 cups
Sugar / Brown Sugar - 1/2 cup
Grated butternut squash - 1 cup (you could use grated carrots or apples too)
Baking Soda - 1/4 tsp
Five spice powder - 1/2 tsp or use just cinnamon or a combination of cinnamon and nutmeg or pumpkin spice.
Oil to cook the pancake puffs or pancakes

Method:
Mix both the flours, salt, sugar with very warm water. Whisk so that there are no lumps. Add grated butternut squash and mix. Cover and let sit for 20 minutes. After this time, prepare your Aebleskiver pan or pancake puff pan. Use few drops of oil in each cup. To the batter, add the baking soda and mix well. Fill each cup with the batter and cover with a lid. When the edges have started browning, flip the puffs and cook the other side. These don't puff up as much as the regular glutenous puffs. Serve with maple syrup or agave nectar.

Notes:
If you don't care about keeping it gluten free, use whole wheat flour or all purpose flour for all the flours. Use about 1 1/2 cups of water and add more if needed to get the correct consistency and proceed.

Enjoy.
Pin It

Wednesday, July 11, 2012

Zucchini Chocolate Bread

Two years back, when I first started the vegetable bed, zucchini was one of the things I planted. I had no clue that it is going to grow so wild. Without that knowledge, I had sowed 4 of them and had plenty of zucchini growing that year. They were growing faster than I could cook with. Even when I gave some to my neighbors, colleagues, it was so much that I cooked almost everyday using this squash. I made chutney, cake, bread, rice, curry and what not. This year, when I started getting ready to plant the seeds, one of the things my husband said to me was "Please don't grow Zucchini" - he was tired of this vegetable. And I didn't, but that didn't stop me from buying it and using it. Something to do with summer and squash. You have to make use of them. This bread is a bit on sweeter side. You could reduce the sugar to just 1 cup if you want a less sweeter bread. This bread also doesn't rise much and is more towards a dense bread. But is very moist and delicious.
One Year Back - Vegan Carrot bread
Two Years Back - Chocolate Zucchini Cake
Adapted from - Smitten Kitchen
Makes two loaves
Ingredients: 
All purpose flour - 2 1/2 cups
Unsweetened Cocoa - 1/2 cup (I used dutch processed, but natural works too)
Sugar - 1 1/2 cups
Baking powder - 1/2 tsp
Baking Soda - 1 tsp
Salt - 1 tsp
Oil - 3/4 cup
Egg - 3 large or 4 egg whites (I used egg whites) - See Notes
Vanilla - 2 tsp
Zucchini - peeled and shredded with medium grater - 2 cups (about 1 medium zucchini)
Mini chocolate chips - 1/2 cup  - 1 cup (optional)

Method:
Preheat the oven to 350 F (In my case, 325 F since I was using dark pans). Grease two 8 X 4 or 9 X 5 pans with vegetable oil spray. Set aside. In a bowl, whisk together all purpose flour, cocoa, sugar, baking powder, baking soda and salt. Set aside. In another bowl, whisk together oil and egg or egg whites. Stir in vanilla. Make a well in the center of dry ingredients and pour the liquid mixture. Stir slowly so that it mixes evenly. Stir in zucchini and chocolate chips if using. This is a very thick batter until you add zucchini. It almost looks like a dry mix. But once you add the shredded zucchini, it loosens up a bit. Even then, it is quite a thick batter. Pour into the prepared pans and bake for 55 - 60 (will be less if you use 9 X 5 pans and at 350 F) minutes or until a toothpick inserted in the center comes out clean. Cool in the pan for 10 minutes and then turn it on to the wire rack to cool completely.  This bread doesn't rise much, so keep that in mind when you fill the pans.

Notes:
I have made this couple of times using flax meal as egg substitute. It comes out great. I had to use up a carton of egg whites, so used that in this.

Enjoy.
Pin It