Showing posts with label Indian. Show all posts

Saturday, May 2, 2015

Nutty Doodh Peda / Nutty milk fudge


If you google microwave doodh peda, you will get  many hits. Most of them use milk powder, butter, condensed milk. When I made it for the first time some time back, I had added shredded coconut to it for a change and I liked it very much. Recently, I ate a burfi in someone's place. People ask me to guess what it is and when I said milk peda, the host said I am wrong and it is badam burfi. I couldn't believe it so asked her the recipe. What she told was the recipe of microwave doodh peda but with almonds added. I added cashews for a change. My whole family loved it. This is an easy recipe, so you can make it in a jiffy. But beware, this is addictive. Since it is one of those sweets which is not sickeningly sweet, it is hard to stop eating it.

Ingredients: 
Condensed milk - 1 can (You could use low fat or fat free)
Non fat dry milk powder - 2 cups
1 cup of nuts toasted, powdered - I used cashews here. Use nuts of your choice
Butter - 1 stick or 1/2 cup
Cardamom powder - 1/2 tsp
Saffron - few strands (optional)

Method:
Take a deep microwavable bowl. Melt butter in it. Take the toasted, cooled nuts in a blender jar.
Add dry milk powder to it and pulse. It need not be a fine powder. Coarse powder adds a texture to the end product. Go ahead and powder it fine if that is how you like it. Add the condensed milk to the melted butter and dump all the dry mix to it. Mix well and microwave for 5 minutes at 1 minute intervals. (My microwave is not a very powerful one, stop microwaving when you see color change in the mixture. It took 5 minutes in mine, but might be more or less in yours.) Stir between each interval. Add powdered cardamom, saffron if using and mix well. Let it cool for 10 minutes.

To shape:
Either you can grease your hands with some ghee and shape into pedas. I used the easier method of pouring into a 8" square pan lined with wax paper. Smooth and let it set for about 30 minutes before cutting. It actually becomes easier to cut if you put it in the refrigerator for some time. Either make them into squares or use cookie cutters to get pretty shapes. Keep it refrigerated.

Enjoy.
Pin It

Wednesday, September 18, 2013

Aloo Methi Bhath (Potato fenugreek rice dish)

Inspiration can come from anywhere - source unknown.
I don't know where I had read this line but it is so true. I was familiar with the dish Aloo Methi (Potato and fenugreek leaves side dish), I was familiar with aloo paratha, methi paratha. I had no idea that people make aloo methi paratha as a different dish altogether. I was watching a show and in that they serve aloo methi paratha for breakfast. The moment I saw that, this idea came and since I had the main ingredients on hand, I converted it as a rice dish. I might not know rocket science but I can make rice out of anything and everything that is vegetarian. This was delicious. The bunch of fenugreek leaves I used was small. Unless it is huge, you can actually use two bunches to enhance the flavor of methi or fenugreek.
One Year Back - Pumpkin Chocolate Bread
Two Years Back - Vegan Sourdough Chocolate Cake with peanut butter glaze
Three Years Back - Sourdough Pumpkin Spice CakeIngredients: 
Rice -  1 1/2 cups
Potatoes - 2 medium sliced into long thin slices (like french fries cut)
Red Onion - 2 medium sliced thin
Fenugreek leaves - 1 bunch cleaned and leaf and tender stem chopped (Or you could use any other greens of your choice)
Oil - 3 TBSP
Ginger - 1" piece peeled and grated
Cumin seeds - 1 tsp
Cashews - 3 TBSP
Salt - to taste
Red Chilli powder - 1 1/2 tsp (Or to taste)
Cumin powder - 1/2 tsp
Amchoor powder / Dry mango powder - 1 tsp
Turmeric - a generous pinch
Sugar - 1 TBSP

Method:
Wash and rinse the rice. Cook and cool. Fluff with a fork to separate the grains and spread it on a plate. In a pan, heat oil. When hot, add cumin seeds. When they splutter, add ginger followed by cashews. When the cashews turn a little golden, add onions. Sprinkle some salt, turmeric and let it cook. When onions are almost cooked, add potatoes and mix well. Cover a lid and let the potatoes cook till soft but not mushy (5 - 8 minutes based on your pan and how big you have cut them). Keep an eye on it since they will they stick to the pan and burn easily. When potatoes are tender, add the fenugreek leaves. Mix well. Now, add the red chilli powder, sugar, cumin powder, amchoor powder and give it another mix. Greens should cook in less than 5 minutes. When they have wilted, add the cooled rice and mix well. Check for salt and adjust if needed. Cover with a lid and lower the flame to the lowest and let it sit untouched for 4 - 5 minutes. Turn off the heat. Serve as is or with a bowl of yogurt.

Enjoy.
Pin It

Monday, September 9, 2013

Whole Wheat Banana Aebleskiver / Gundu Pongal / Paniyaram

Now that the school has started, dilemma of what to pack for lunch has become a routine. It is very easy if I have bread on hand. It can be turned into some kind of sandwich even if there isn't lot of time. But since I have decided not to buy bread, that means I have to keep baking bread twice a week so that we have bread on hand or come up with something else that kids would eat. Today was one such day where there was no bread and not too much time. I packed these as lunch since they are not that sweet. I thought they taste less sweeter than the nutella sandwich that my kids love.

One Year Back - Pumpkin Chocolate Chip Bread
Two Years Back - Vegan Sourdough Chocolate Cake with peanut butter glaze
Three Years Back - Sourdough Pumpkin Spice Cake
Ingredients:
Whole Wheat Flour -1 cup
Fine Soji / Semolina - 1/2 cup (See Notes)
Sugar - 1/2 cup
Milk - 1 cup (Use almond milk for vegan version)
Banana - 1 large ripe
Water - 1/2 cup - 3/4 cup (depending on how large the banana is and how much water the wheat flour absorbs)
Cardamom - 4 pods crushed into powder (You could use cinnamon instead)
Baking Soda - 1/4 tsp
Oil - for cooking

Method:
Mix the flour, soji, sugar in a bowl. Add the mashed banana along with milk to make a batter. Slowly start adding part of water and mix gently. It should be like a pancake batter, easily scoopable but does run down. Set it aside for 10 minutes. Flour will have absorbed some liquid. Add the remaining water to make the correct consistency batter. Add baking soda and cardamom powder and mix gently.

Heat the Aebleskiver pan / Pancake puff pan and add at least 1/4 tsp of oil to every cup. You might have to use a bit more if your pan is not a non-stick one. Pour the batter and cover with a lid. When you start seeing the steam and the top of the batter has crusted at the edges, gently flip and let the other side cook. Remove and serve with a glass of milk or if more sweetness is desired, with some maple syrup.
This post is written for weekend cooking post that I write with Srivalli  and  Vaishali.      

Notes:
If you cannot get soji, you could use fine ground cornmeal or even quick oats.

Enjoy.
Pin It

Wednesday, August 21, 2013

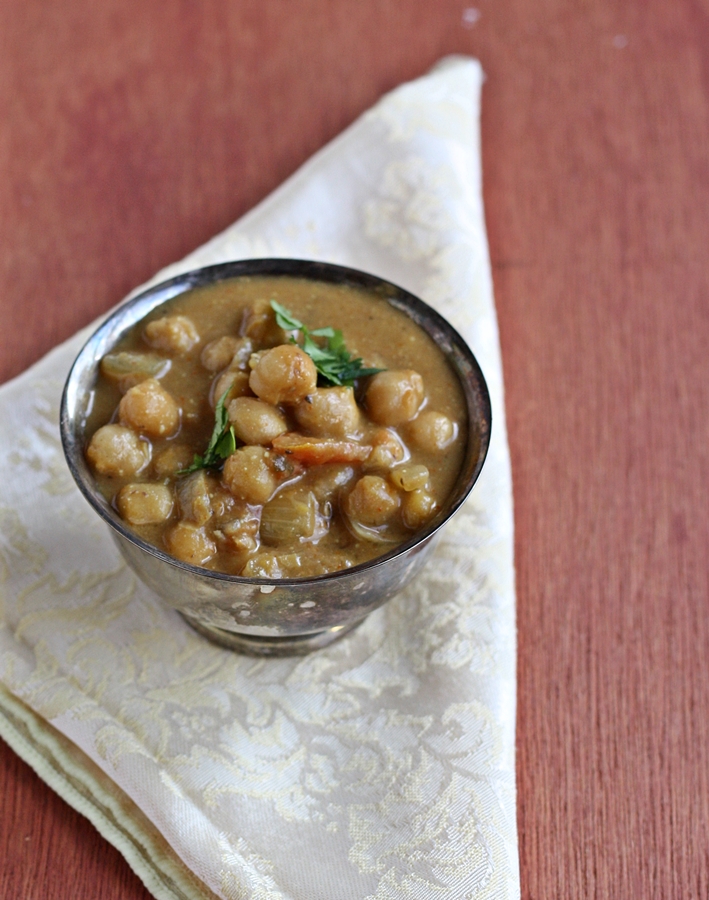
Sweet and Sour Chickpeas Curry (To serve with Rice)

I had eaten chickpeas curry as part of a South Indian Thali in a restaurant long time ago. That chickpeas curry was a bit watery than the traditional chana masala and didn't smell of ginger and garlic. This is an attempt to recreate that curry. I was very happy with how it turned out and was even more glad that everyone in the family loved it.
One Year Back - Brownie Biscotti
Two Years Back -  Poppy seed drink / Gasagase Payasa
Three Years Back -  Craisins and White chocolate chip biscottiIngredients: 
Chickpeas - 2 cups (dry)
Oil - 2 TBSP
Cumin Seeds - 1 tsp
Red Onion - 1 large chopped
Tomatoes - 2 medium chopped
Salt - to taste
Turmeric powder - a generous pinch
Red Chilli powder - 1 - 1 1/2 tsp or to taste
Jaggery or Brown Sugar - 1/3 - 1/2 cup as per taste
Tamarind extract - 1 heaping tsp (Or extract juice from a lemon sized tamarind soaked in enough water)
Cilantro - chopped 2 TBSP
To powder:
Almonds - 1/4 cup (or cashews)
Cardamom - 2 whole
Cinnamon - 1" stick

Method:
Soak chickpeas in enough water for 8 hours or overnight. Drain all the water and add fresh water to it. Pressure cook the chikpeas till soft. In a pan, heat oil. When hot, add  cumin seeds. When they splutter, add onions and stir. Sprinkle some salt, turmeric and stir. Let the onions cook. When onions are cooked, add the tomatoes to it. Add chilli powder, brown sugar or jaggery, tamarind and let the tomatoes cook. It will turn like a sauce.
Meanwhile, take the almonds, cardamom and cinnamon in a blender jar and make a powder. To this powder, add about a cup of cooked chickpeas with enough water and make a paste. You can use the water of the cooked chickpeas to it. Pour this paste to the pan and add the chickpeas reserving the water. Add the reserved water enough to get the correct consistency. Adjust the salt and garnish with cilantro. Let it come to a boil and then turn off the heat. This goes very well with rice. If you want to serve this with rotis, you will have to make it a bit thicker.

Enjoy.
Pin It

Sunday, August 11, 2013

Lentil and Squash stir fry / Bele Palya

It is not easy to be a blogger. It definitely is not easy being a food blogger unless you have a house full of people who are ready to eat the outcome of all the experiments that you do in the kitchen. How much can a house of two adults and two kids consume food wise? So, here is a post that is a simple, every day dish that was not made specifically for a blog post. This shows how we add lentils to almost everything to get part of our protein in an Indian Vegetarian cuisine.
One Year Back - Brownie Biscotti
Two Years Back - Poppy seed drink / Gasagase Payasa
Three Years Back - Craisins and White chocolate chip biscotti
Ingredients: 
Chana dal / dehusked split chickpea lentil - 1 cup
Chayote Squash - 3 peeled and pit removed and chopped into thin chunks
Oil - 2 tsp
Mustard seeds - 1/2 tsp
Curry leaves - few
Hing / Asafoetida - a generous pinch (optional)
Chana dal/ split dehusked chickpea lentil - 1 TBSP (for garnish)
Coconut - 1/4 cup grated (optional)
Red chillies - 4 - 5 broken
Cilantro - 2 TBSP chopped (optional)

Method:
Wash and rinse the lentil. Take it in a pan with enough water and cook it till tender. You could use pressure cooker for a quick cooking. Drain the water when it is cooked (don't throw away the water - use it in sambar, rasam or even soup).
In a pan, heat oil. When hot, add mustard seeds. When they splutter, add broken red chillies, hing if using, curry leaves, 1 TBSP of chana dal. When the dal gets toasted, add the cut chayote squash. Sprinkle some salt and stir and let it cook till tender. You will have to stir it often to prevent burning. When the squash is cooked, add the drained cooked dal, coconut and mix well. Adjust the salt if needed and add cilantro if desired. Lower the heat and cover with a lid and let it sit on low flame for 3 - 5 minutes and then turn it off. Traditionally it is served with rice and sambar or rasam. But this goes very well with roti, chapathi.
This post is written for weekend cooking post that I write with Srivalli  and  Vaishali.  

Notes:
You could use yellow squash or zucchini instead of chayote squash. Just cook it till tender and not mushy.

Enjoy.
Pin It

Monday, August 5, 2013

Badam Halwa / Almond Pudding

Sometime back, one of my friends had a birthday party at her place. She had made her husband drive an hour to get few dishes from a known restaurant. I told her it is not worth driving so much until she uncovered the Badam Halwa from that restaurant. I tasted one spoon and declared it was worth it to drive that distance for that halwa. But, what I didn't like was the quarter inch ghee floating on the top. Here is a version that doesn't have too much ghee but tastes delicious. If you are one of those lucky skinny ones who can eat like a horse and not gain weight, add 1/4 - 1/3 cup more ghee.

One Year Back - Peanut Butter Cookies
Two Years Back - Avocado Brioche, Roasted Banana Ice cream
Three Years Back - Deep fried cracker ( Nippattu )Ingredients:
Almonds (whole) - 2 1/2 cups (You could already blanched almonds)
Milk - 3/4 - 1 cup
Sugar - 2 cups (You can use 2 1/2 cups but I don't like overly sweet dessert)
Ghee - 1/2 cup (You could use up to 3/4 cup)
Saffron - few strands
Food coloring - few drops (optional. Use yellow or orange)
Cardamom - 10 powdered

Method:
Blanch the almonds: (If using blanched almonds, skip this step)
Take all the almonds in a saucepan. Cover with enough water so that water is an inch above the almonds. Place it on the heat and let the water come to a boil. Let it boil for 3 minutes or so. Turn off the heat and drain all the hot water and add cold water to the same pan. Let it sit for 5 - 10 minutes. You will see the skin wrinkle up and it will be very easy to peel just by pressing the almond between the fingers. Drain the almonds in a colander.

Making the Halwa:
Take the blanched almonds in a blender and add little by little milk to make a coarse paste. Try to get the coarse cornmeal or Rawa kind of a texture. Set aside.
In a nonstick pan, heat 2 TBSP of ghee. To this, add the ground paste and keep on stirring to prevent sticking and burning. Add sugar, saffron and mix well. It will splatter every where so keep the heat medium and keep on stirring continuously. After about 10 minutes, you can add the rest of the ghee and continue stirring. When the halwa is done, it will be the consistency of the thick pudding and the mixture will ooze out ghee. It also will stop sticking to the pan. Add Cardamom powder and few drops of food coloring if desired and mix well and turn off. Transfer the contents to a different dish to cool. Serve at room temperature. You could mold them into different shapes if you have the cute molds. Or spread between two sheets of wax paper and cut them into desired shape. They won't be hard as burfi. They are more like soft peda consistency.

Notes:
I did initial cooking in the microwave. Take 2 TBSP of ghee, ground paste and sugar and mix well in a microwave safe bowl. Microwave on high heat for 20 minutes in the interval of 5 minutes. Then transfer the contents to the non stick pan and proceed with the stove top method.

Enjoy.

Pin It

Sunday, August 4, 2013

Okra Buttermilk Curry / Bendekayi Majjigehuli

We learn many things every day of our lives. But the ones we learn by making a mistake is something we never forget. Cooking with okra is one such thing for me. I was about 12 years old and I was left in charge of cooking for the grand parents who, couldn't do much around the house. Even though I knew how to cook the usual stuff, I didn't know the finer details of how to handle different vegetables. I had planned on making okra sambhar and I added okra to the washed lentils and cooked it in the pressure cooker. Boy, was I surprised when I opened the lid of the pressure cooker. When I complained about why it is so slimy to my grand mother, she explained that okra needs to be cooked in tamarind water. Every time I pick okra to cook, I remember her.

I have made two variations to my regular buttermilk curry. I used toor dal instead of chana dal just for a change. My mother-in-law had made me use toor dal once to make this curry. I also took a suggestion of a reader who said she adds few corns of coriander seeds to grind the masala paste to intensify the coriander taste. Use whichever recipe suits your palate.

One Year Back - Peanut Butter Cookies
Two Years Back - Avocado Brioche, Roasted Banana Ice cream
Three Years Back - Deep fried cracker ( Nippattu )

Ingredients: 
Okra -  1 pound chopped into chunks(I used frozen already cut okra)
Split Pigeon pea lentil/ Toor dal - 2 TBSP
Salt - to taste
Tamarind - A big marble sized or 1/2 tsp of extract
Turmeric - two generous pinches
Green chillies - 7 -8 as per taste
Cilantro - 1/2 cup chopped
Coconut - 1/2 - 3/4 cup scraped
Cumin - 1 tsp
Coriander seeds - 8
Asafoetida /Hing - two generous pinches
Yogurt -  1 1/2 - 2 cups (depending on the thickness desired)

For tempering:
Oil - 2 tsp
Mustard seeds - 1/2 tsp
Curry leaves - few
Red chillies - 2 broken

Method:
Soak toor dal in water for about an hour. Take the soaked dal, coconut, green chillies, cilantro, turmeric, cumin, coriander seeds and asafoetida in a blender jar and blend adding water as needed. Make a nice paste and set aside. Soak tamarind in enough water to extract the juice from it. In a saucepan, take the okra and cover with tamarind water. Add more water just enough to cover the okra pieces and cook. When the okra is cooked, add the ground paste, salt and more water as needed to bring it to a thick chunky soup consistency. Don't add too much water since the yogurt addition will thin it more than what it is at this stage. Keep it stirring frequently to prevent sticking and burning. Let it boil for 5 minutes. Lower the flame to the lowest setting and add the yogurt slowly. Mix well and you can increase the heat after a minute or two but keep it to medium heat. When it comes to a slow simmer, turn off the heat. Check the salt and adjust if needed.

Heat oil in a small pan and when it is hot, add mustard seeds. When they splutter, add broken red chillies and curry leaves. When the chillies are toasted, turn off the heat and add it to the curry. Mix well. Serve with rice.
This post is written for weekend cooking post that I write with Srivalli  and  Vaishali. 

Enjoy.
Pin It

Tuesday, July 30, 2013

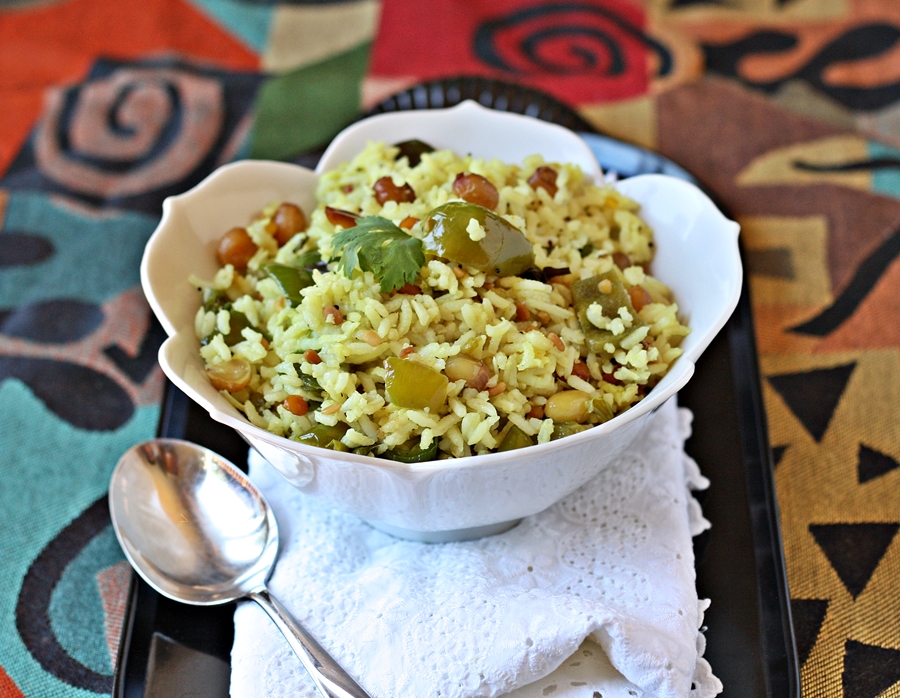
Lime Rice with Bell Pepper

Lime Rice or Lemon rice as it is called is a common dish in Southern Indian households.  It was invented to use the left over rice and it had nothing but the garnish of few lentils, peanuts and some lime juice with a bit of heat added. Even when it is so common, it is different from house to house. Some people add onions, garlic and some don't. My mother made it in an entirely different way - rich with mustard and coconut. When I started cooking by myself, I made a point not to make this without adding some vegetables every time I made it. I add at least frozen peas to it if not anything. This time, I had to use the bell peppers from the vegetable garden and here comes this dish.
One Year Back - Orange Creamsicles
Two Years Back - Salsa Vinaigrette
Three Years Back - Zucchini Chutney
Ingredients: 
Rice - 2 cups (if using sona masoori, use 1 1/2 cups)
Bell pepper - 6 seeded and chopped into chunks
Oil - 3 TBSP
Mustard seeds - 1/2 tsp
Green chillies - 10 slit lengthwise (or to taste)
Curry leaves - few
Asafoetida/hing - generous pinch
Turmeric - couple of generous pinches
Bengal gram dal / chana dal - 1 TBSP
Urad dal / Black gram dal - 1 TBSP
Peanuts - 2 - 4 TBSP
Salt - to taste
Lime - 1 if very juicy or 1 1/2
Grated coconut - 4 TBSP (optional)
Cilantro - 3 TBSP chopped

Method:
Wash and rinse rice. Cook with enough water ( 1:2 ratio). Let cool and fluff with a fork to separate the grains.  In a  pan, heat the oil. When hot, add mustard seeds. When they splutter, add slit green  chillies, curry leaves followed by bengal gram dal, black gram dal, hing and peanuts. Let the peanuts get toasted. Add the bell peppers, turmeric, little bit of salt. Stir often to prevent burning. When the bell peppers are cooked, add coconut, and cooled rice. Mix well. Add cilantro and check and adjust the salt if needed. Turn off the heat. After about 10 minutes, squeeze the juice of lime and mix. Serve as one pot meal.
This post is written for weekend cooking post that I write with Srivalli  and  Vaishali.

Notes:
If using Sona Masoori rice, use 3 cups of water per cup of rice.

Enjoy.
Pin It

Monday, July 15, 2013

Spiced Buttermilk

Every Indian household has a different way of making buttermilk. Thick yogurt used to be luxury in olden days whereas buttermilk is what the lower middle class and poor drank/ate. If I think about it now, it was a smarter way of living. Less calories in buttermilk and it hydrates the body too. I usually make this during summer and we have it instead of drinking coffee or tea since it is so hot. It is not a recipe to call it one. Just a thinned yogurt to which some flavoring has been added. For fun, these can be frozen as popsicles. In that case, reduce the water by half.
One Year Back - Maddur Vada/Deep fried onion crackers
Two Years Back - Vegan Soudough Applesauce Pancakes
Three Years Back - Roasted Red Bell pepper Soup
Ingredients: 
Yogurt - 4 cups (I used homemade using 2 % milk - See Notes)
Water - 2 - 3 cups (depending on how thin you like the buttermilk)
Ginger - 1" piece grated (remove fibres)
Cilantro - 4 TBSP (You could use part mint too)
Green chilli - 1 small (It just adds a flavor, not the heat)
Salt - to taste
Ice cubes to serve
 

Method:
In a mortar and pestle, take ginger, green chilli and cilantro and make a paste. Add the paste to a pitcher. Add yogurt and salt and beat vigorously. Add water cup after cup beating till you get the desired consistency. Adjust the salt if needed. Chill and serve with ice cubes.

Notes:
This is best made with home made yogurt. If you want to use the store bought yogurt, you might need more water. Preferably use greek yogurt. You can add a clove of garlic to change the taste.
Enjoy.
Pin It

Sunday, July 14, 2013

Vegetable Biriyani

One good thing about cooking at home is the ability to change the dish and make it your own. I love vegetable biriyani. Particularly when it is made in Hyderabad style. But there are few things I don't like. The fried onions they use in it is not appealing to me. Plus the amount of veggies is so minimal that you will be fishing for vegetables in a restaurant biriyani. So, I tweaked it to suit my taste. Go ahead and use about a cup of fried onions if you like them in this recipe. Use it while layering the vegetables and rice before baking or cooking for the second time. I added the nuts while toasting the spices so that they are crisp and not soggy.
One Year Back - Maddur Vada/Deep fried onion crackers
Two Years Back - Vegan Soudough Applesauce Pancakes
Three Years Back - Roasted Red Bell pepper Soup
Ingredients: 
For the Rice part:
Basmati rice - 2 cups soaked for an hour in enough water
Oil - few drops
Salt - 1 tsp
Black Cumi / Shah Jeera - 1/2 tsp
Green cardamom - 2 whole
Black cardamom - 1
Cinnamon - 1/2" stick

For the Vegetables part:
Potatoes - 3 medium peeled and chopped into large chunks
Carrots - 3 medium peeled and chopped into long thick sticks
Cauliflower - florets from a small head
Green peas - 1 cup frozen (optional - See Notes)
Cilantro and Mint leaves - chopped about 1 generous cup together
Oil - 4 TBSP
Shah jeera / Black Cumin - 1 tsp
Green cardamom - 2 whole
Black cardamom - 2
Cinnamon stick - 1"
Cashews - 1/4 cup (You could add some almonds too if you like)
Ginger - 1" piece peeled and grated
Garlic - 5 pods minced
Green Chillies - 5 - 6 chopped into big chunks (or make a paste of it)
Yogurt - 1 cup divided use
Salt - to taste
Sugar - 1 TBSP 
Biriyani Masala - 2 - 3 TBSP depending on how strong you want the flavor to be (you can use store bought)

Method:
To make the vegetable masala:
In a pan, heat oil. When hot, add black cumin, green cardamom, black cardamom, cinnamon stick, cashews, green chillies, ginger and garlic. Saute till cashews are lightly golden and add potatoes, carrots. Mix well and sprinkle some salt. When potatoes and carrots are cooked for 5 minutes, add cauliflower. Mix well. Aim is to cook vegetables until they are tender but still have a bite to them. About 75 % of cooking. After 5 minutes of adding cauliflower, add green peas. Mix well and add biriyani masala. Stir well to coat all the vegetables with it and then add half a cup of yogurt. Mix well. Add sugar and cook till most of the water has evaporated from the vegetable mixture. Turn off the stove.

To make the rice:
In a pan, bring about 6 cups of water to a boil. Add few drops of oil, salt, and the whole spices mentioned in the For the Rice part: above. Add the drained rice that you had soaked in water and stir. When the rice is boiled for about 5 - 6 minutes, check if you can cut grain of rice. You should not be able to mash it. If you can mash it, you have over cooked the rice. Drain the rice reserving about 1/2 cup of the liquid.

To assemble:
Take a shallow dish (See Notes). Add the remaining 1/2 cup of yogurt to the vegetable mixture. Lay a layer of the vegetables in the shallow dish. Top it with a handful of cilanthro and mint leaves. Top it with a layer of rice. Do this until you finish all your vegetables and rice. Add the 1/2 cup of reserved rice water to the dish and cover with a tight lid. You can either bake in the oven at 400 F for 30 minutes or you can create a water bath on the stove and place this dish in it and cook for 20 - 25 minutes. When done, you should have a fluffy rice and after few minutes, mix it with a fork so that the whole masala and vegetables get mixed very well. Check for salt and adjust if needed. Serve with raita or your favorite side dish.
This post is written for weekend cooking post that I write with Srivalli  and  Vaishali,  

Notes:
Traditionally, people don't use peas in it. I like peas so used it. Also, the ratio of vegetables to rice that I have given is towards more vegetables. You get few pieces here and there in a restaurant biriyani. If you follow the method of using the oven to cook the final part, make sure the dish you are using along with handles is oven safe. Lot of people place fried bread pieces before baking or cooking for the second time. It just adds extra calories to the dish and I avoid such things.

Enjoy.
Pin It

Sunday, July 7, 2013

Methi Thepla (Gujarathi flat bread using fenugreek leaves)

Thepla is a Gujarathi flat bread or roti. It has chick pea flour or besan added to the whole wheat flour which makes it very soft. I like to try different kinds of rotis since it adds variety to the food. Plus, this particular recipe uses greens which is an added bonus. My kids ate these happily with yogurt and it was one of the easier way to make them eat fenugreek leaves. Traditionally this recipe has lot of oil, but I used very minimal amount. It still tastes good. I prefer to eat this as a snack with some tea.
One Year Back - Shahi Pulav
Two Years Back - North Indian Cucumber salad - Chucumber
Three Years Back - Homemade vegetable broth
Ingredients:
Whole Wheat flour - 2 cups
Chickpea flour / Besan - 1/2 cup
Salt - 1 1/2 tsp or to taste
Red chilli powder - 2 tsp or to taste
Fenugreek leaves - just the leaves and tender stems about 2 cups
Turmeric - a generous pinch
Yogurt - 1/2 cup
Oil - 2 TBSP for the dough and more for cooking ( I brush both sides with oil lightly using a pastry brush)
Water to make the dough

Method:
Mix all the ingredients and make a soft dough. Cover and let it sit for 20 - 30 minutes. Knead the dough and dusting with more flour, roll into thin rotis or tortillas. Cook on the hot skillet smearing some oil on both sides. Serve with plain yogurt and pickles. This will taste good with any dal or curry that is not very spicy.

This post is written for weekend cooking post that I write with Srivalli  and  Vaishali, 
Enjoy.
Pin It

Monday, July 1, 2013

Cabbage Rice - Version II

My mother cooked a lot with cabbage. Not because it was someone's favorite vegetable or it is good for health. She cooked cabbage at least once a week because it was one of the cheap vegetables we could get at that time. I still remember my sister complaining that mom made cabbage again. For some reason, I never get bored of eating this veggie. Be it as a stir fry or as  sambar. I am notorious for making different kinds of rice dishes. There probably isn't any vegetable that I cannot convert into a rice dish. Here is one such recipe that got created without any thought. It was delicious I should say.
One Year Back - Vegan Applesauce Cranberry Bread
Two Years Back - Chocolate Strawberry Muffins, Honey Cardamom Ice cream
Three Years Back - roken Wheat Pongal
Ingredients:
Cooked Rice - 2 1/2 cups (completely cooled)
Oil - 3 TBSP
Cumin - 1 tsp
Cashews - 1/4 cup
Cabbage - chopped fine 2 1/2 cups
Salt - to taste
Turmeric - two generous pinches
Lime juice - from half a lime (or use one whole if not juicy enough)

To grind:
Garlic - 2 cloves
Cilantro - 1/3 cup
Mint leaves - 1/3 cup
Green chillies - 8  (as per taste)

Method:
Heat oil in a pan. When hot, add cumin seeds. When they splutter, add cashews and fry them till golden. Add cabbage, salt and turmeric. Mix well and let it cook. Meanwhile, take all the ingredients mentioned in "To Grind" above and grind to a paste without adding any water. When cabbage is half cooked, add the ground paste to it and mix well. Lower the heat and let the cabbage cook completely. When the cabbage is cooked, add the cooled rice and mix well. Add lime juice, adjust the salt if needed and cover with a lid and let it sit on the lowest flame for 3 - 4 minutes. Turn off the heat. Either serve as is or with some yogurt or raita on the side.

Notes:
I used the left over jasmine rice which, I could not really separate the grains of. Use basmathi or sona masoori rice and separate the grains to make it look more presentable. This looks more like a kichadi because of the type of rice I used.

Enjoy.
Pin It

Wednesday, June 26, 2013

Majjige Huli / Buttermilk curry

Majjige Huli or Mor Kuzhambu is a southern Indian curry which is of the same consistency of Sambar. One of the main ingredients of this dish is yogurt and it does not have lentils in a large quantity in it. It is mixed with cooked rice and eaten and is a part of the meal on any festival or a special occasion. If you are used to north Indian cuisine, you can relate Kadhi to this dish. One main difference being the use of coconut. I love this dish but for some reason, most of my family is not crazy about it. That was just until few weeks ago. My younger one loved it when I served this to her and she has asked me to make it once a week (it is a different thing that I had to feed her the first few morsels until she developed the taste for it).

Notes:
I have used spinach here, but you could use any kind of squash, cucumber, okra, ash gourd etc.  If using okra, cook it in water mixed with little amount of tamarind juice / extract. Some people add a small piece of ginger while grinding the masala paste. My mother didn't and I like it without ginger. If you are a ginger lover, go ahead and add a 1/2" piece of ginger to this recipe.
One Year Back - Tomato Garlic Flat Bread
Two Years Back - Onion Creamcheese spread
Three Years Back - Quinoa Chickpeas Pulav
Ingredients: 
Vegetables -  huge bunch of spinach cleaned and chopped (See Notes)
Split chick pea dal / Bengal gram dal - 2 TBSP
Salt - to taste
Turmeric - two generous pinches
Green chillies - 7 -8 as per taste
Cilantro - 1/2 cup chopped
Coconut - 1/2 - 3/4 cup scraped
Cumin - 1 tsp
Asafoetida /Hing - two generous pinches
Yogurt -  1 1/2 - 2 cups (depending on the thickness desired)

For tempering:
Oil - 2 tsp
Mustard seeds - 1/2 tsp
Curry leaves - few
Red chillies - 2 broken

Method:
Soak bengal gram dal or chana dal in water for about an hour. Take the soaked dal, coconut, green chillies, cilantro, turmeric, cumin and asafoetida in a blender jar and blend adding water as needed. Make a nice paste and set aside. In a saucepan, take the spinach (or other vegetables) and cover with just enough water and cook. When the veggies are almost cooked, add the ground paste, salt and more water as needed to bring it to a thick chunky soup consistency. Don't add too much water since the yogurt addition will thin it more than what it is at this stage. Keep it stirring frequently to prevent sticking and burning. Let it boil for 5 minutes. Lower the flame to the lowest setting and add the yogurt slowly. Mix well and you can increase the heat after a minute or two but keep it to medium heat. When it comes to a slow simmer, turn off the heat. Check the salt and adjust if needed.

Heat oil in a small pan and when it is hot, add mustard seeds. When they splutter, add broken red chillies and curry leaves. When the chillies are toasted, turn off the heat and add it to the curry. Mix well. Serve with rice.

Enjoy.
Pin It

Thursday, June 20, 2013

Kosambari / Southern Indian Salad

Every cuisine has salads in it. Southern Indian cuisine calls it 'Kosambari' in Kannada, where I am from. Recently, I had made this salad and my neighbor happens to visit. I, being me (did I ever tell you that I fed the flooring guys every single day? no wonder they took few extra days to finish the job) had to offer her some and she loved it. She found it unusual for us to use lentils in a salad that too in raw form. That prompted me to write this post. Otherwise, this is no recipe at all and every Indian will know how to make it.
One Year Back - Super thick Tomato Garlic flat Bread
Two Years Back - Onion Creamcheese spread
Three Years Back - Quinoa Chickpeas Pulav
Ingredients: 
Carrots - 3 large peeled and grated
Mung dal / Dehusked, split mung beans - 1/2 cup
Salt - to taste
Green chillies or red chillies - 3 or as per taste (chopped if green chillies, broken if red chillies)
Lime - 1
Oil - 2 tsp
Mustard seeds - 1/2 tsp
Asafoetida / Hing - a generous pinch (optional)
Curry leaves - few
Cilantro - chopped 2 TBSP
Coconut scrapings - 3 TBSP (optional, I have not used it)

Method:
Soak the mung dal in enough water for 45 minutes to an hour till soft. Rinse and drain completely. In a bowl, take the grated carrots. Add the drained mung dal to it. In a small pan, heat oil. When hot, add mustard seeds. When they splutter, add asfoetida/hing, curry leaves, green or red chillies. When they get toasted, turn off the heat and add the contents of the pan to the bowl containing carrots and dal mixture. Add salt, lime juice, cilantro and coconut if using. Mix well and adjust the salt if needed. Serve at room temperature or chilled.

Notes:
This can be made using cucumber too. Either use mung dal or use chana dal / dehusked, split chickpea dal.

Enjoy.
Pin It

Monday, June 10, 2013

Biriyani Masala (Powder)

Biriyani is one of the famous rice dishes of Southern India. Rice mixed with either vegetables or meat that is cooked in a rich array of spices make a meal by itself. This is one of those recipes which is a little elaborate to make but well worth the time and effort. All of a sudden, I wanted to eat it. I made this masala and ended up making the biriyani also. But, I shared it with my neighbors and didn't have any left by the time I decided to take pictures. So, that will follow soon when I make it again.
One Year Back - Overnight Yeast Waffles
Two Years Back - Roasted Red Bell Pepper Dip, Kitchen Survival Tips for a host
Three Years Back -  Easiest Lemonade
Adapted barely from Vahrehvah Chef
Ingredients: 
Mace / Japathri - 1/4 tsp (not powder)
Turmeric powder - 1/4 tsp
Bay Leaf - 3 whole
Black Cumin / Shah Jeera - 1 tsp
Kasoori Methi - 1/2 tsp
Black Cardamom - 4
Cinnamon Sticks - 4 of length 2"
Cloves - 10 - 12
Coriander - 3 TBSP (whole)
Cumin - 1 1/2 TBSP
Green Cardamom - 10
Black Pepper corns - 10 - 12
Red Chilli Powder - 1 TBSP

Method:
Grind all the whole spices together in a coffee grinder or a dry grinder into as fine as you can get. Mix in the turmeric powder and red chilli powder. Mix well. Store in an air tight container and use within 3 months.

Use this powder as the masala. You will need about 4 tsp of this powder for every cup of rice you use in your biriyani.

This post is written for weekend cooking post that I write with Srivalli  and  Vaishali, 

Enjoy.
Pin It

Monday, May 6, 2013

Poori / Deep fried, puffed bread

This weekend, I made Poori Saagu for brunch. Best part was the kids wanted to help and my two girls alternately pressing the dough balls (I have a poori press) made it so easy for me to fry them. And they thought it was so much fun that they want me to make pooris every weekend so that they can help.
Sometimes, kids have funny questions and my older one asked "Mommy, does every Indian know how to make poori?" and to that I did reply a "Yes". So, technically, this is not an innovative or even a new recipe at all. But, there are certain things when followed, you make a very good poori and not just an ordinary one. The trick is to use fine soji or chiroti rawa. It makes the pooris retain their shape longer. I always made it with equal parts of whole wheat flour, fine rawa and all purpose flour or maida. I skipped using maida in this just to make it a little better nutrition wise. Also, people use flour to roll pooris and that leaves the dry flour in the oil and sometimes on the top of the fried poori. Try using oil instead and you will see how clean they look. They are of course greasy but once in a while it is alright to eat such food in moderation.
One Year Back - Garlic Toast
Two Years Back - Vegan Sourdough Scallion Pancakes
Three Years Back - Fenugreek Curry / Menthyada Gojju
You can find the recipe for Saagu with which this is served generally here.
Ingredients: 
Whole Wheat flour - 2 cups
Fine Soji - 1 cup
Salt - 1 tsp or to taste
Oil - 2 TBSP for the dough and more for frying
Water - 1 1/4 - 1 1/2 cups

Method:
Mix Whole wheat flour, soji, salt and oil. Add water a little by little and make a soft dough. Cover and let it sit for half an hour at least. When ready to make pooris, heat oil in a pan. Knead the dough for couple of minutes and divide into small lemon or lime sized balls. You should be able to make 24 - 26 pooris out of this dough. Roll the balls smoothly and spray lightly with vegetable oil spray or you could brush them with oil.
For rolling, do not use flour as we do for rotis. Apply a little oil on the surface that you are rolling the dough. Take the dough and flatten it a little thicker than what we make for rotis. Oil has to be moderately hot for the pooris to puff up. Gently slide the flattened dough into the oil. With a slotted skimmer or a ladle, press the disc when it starts coming up in the oil. This is the way to make them puff up evenly and nicely. Gently turn over and let the other side become brown. Remove and drain on the paper towel. Serve hot with potato subzi or Saagu.

This post is written for weekend cooking post that I write with Srivalli  and  Vaishali,  

Enjoy.
Pin It

Monday, April 22, 2013

Pav Bhaji / Indian Sloppy Joes

Recently, I had been to a birthday party where, I met someone who knows about my blog. He asked how the blogging was going and I had to admit that I haven't been baking too many things lately and not blogging. Reason? diversion. Many to mention I should say. That probably explains how I had posted the Pav Bun recipe almost 3 years back and never posted the dish that is served with - Bhaji or vegetable gravy. When I did make it this weekend, I did not have enough time to make the buns myself so used the store bought Kaiser rolls. This is one of the street foods of India particularly Mumbai/Bombay area that is comparable to sloppy joes.
One Year Back - Spicy Whole What Onion Batter Bread
Two Year Back - Apricot Chutney
Three Years Back - Whole Wheat Savory Tomato Scallion Bread
Ingredients:
Potatoes - 3 medium
Cauliflower - 1 medium head cut into florets
Green Bell Pepper - 3
Red Onions - 2 medium
Tomatoes - 4 medium
Green Peas - 2 cups (I always use frozen)
Optional - You can add few more kinds of vegetables like beans and carrots
Oil - 3 TBSP (You can add even more)
Ginger - 1" piece grated
Garlic - 3 - 4 cloves grated or minced
Salt - to taste
Turmeric - two generous pinches
Red Chilli powder - 1 heaping tsp (depends on how hot you like)
Coriander powder - 1 tsp
Pav Bhaji masala powder - 3 - 4 TBSP depending on how strong it is. (I use store bought any brand will do)
Amchoor powder / Dry mango powder - 3/4 - 1 tsp
Cilantro - 4 TBSP chopped.

Method:
Boil potatoes in a pressure cooker. Peel the skin and mash coarsely. Chop all the rest of the vegetables very finely. I use a food processor fitted with chopping blade to make it easier. I even run the green peas through it for few pulses. Heat oil in a pan. When hot, add ginger and garlic followed by chopped onions. Sprinkle some salt, turmeric and let it cook. When onions are cooked, add green bell pepper. Mix well and give it few minutes to soften. Then, add all the other chopped vegetables except tomatoes and potatoes. Mix often and add about a cup of water or more if needed. Keep stirring frequently to prevent burning (or use twice the amount of oil and it will not stick so easily). When all the vegetables are soft, add tomatoes, red chilli powder, amchoor powder, coriander powder and pav bhaji masala powder. Mix well and bring it to a simmer. Add mashed potatoes, mix well. Adjust the salt if needed. Simmer for 5 minutes and garnish with cilantro. Turn off the heat. Serve with toasted Pav or hamburger buns.
If not for committing to post on weekend cooking with  Srivalli  and  Vaishali, 
I would not have posted this either like many other recipes. You can't blame when I worked in the yard for 5 hours building brick edges around the trees. Could you?

Enjoy.
Pin It

Monday, April 15, 2013

Hayagreeva / Lentil and poppy seeds dessert

This weekend, I had company. On the top of it, it was Tamil New Year on Sunday. Since I had to cook a few different dishes for a few more people than usual, I choose this as the quick and easy dessert. This is actually a dessert that is famous in Madhwa community in Karnataka. Very similar to Akki Kadalebele Payasa but with few additions, few deletions.

One Year Back - Gulab Jamun - easier version, Science of Baking - Cookies
Two Years Back - Honey Cardamom Snack Cake
Three Years Back - Baklava, Eggless Pumpkin Brioche
Ingredients: 
Bengal gram dal/dehusked split chickpea lentil - 1 1/2 cups
Jaggery - 1 1/2 - 2 cups (depending on how sweet the jaggery is and your taste preference)
Clarified butter / Ghee - 1/4 - 1/3 cup
Cashews - 1/4 cup (you can use more)
Raisins - 1/4 cup (you can use more if you prefer)
Poppy seeds - 3 TBSP
Cardamom - 8 crushed into powder
Dry coconut grated/ Kobbari / Copra - 3/4 cup (you could use up to 1 cup)

Method:
Wash and rinse the bengal gram dal. Add 4 1/2 cups of water to it and pressure cook till soft and mushy. When the pressure cooker is getting cooled, heat jaggery with little water to make a syrup. Let it boil and start frothing. Add the cooked dal/lentil to the jaggery syrup and stir well. If there is a lot of water along with the cooked lentil, it will take some time for it to thicken. Add grated dry coconut to it once it has thickened a little. When the mixture is at the consistency of your liking, heat ghee/clarified butter in a different saucepan. Toast cashews and raisins in it. After raisins are plumped up, add poppy seeds to ghee. Mix well and let the poppy seeds pop. It will pop in few seconds. Turn off the heat of the sauce pan and add the contents to the lentil jaggery mixture and stir well. Add cardamom powder and after few minutes, turn off the heat. Consistency of this dessert should be more like a soup when hot. You should be able to ladle it very easily. It thickens a little after it cools down.

Check out what my two friends are cooking as weekend special - Srivalli , Vaishal.
Enjoy.
Pin It

Monday, April 8, 2013

Green Beans and Lentil stir fry / Matodi Palya

Almost everyone loves their mother's cooking. I am no exception. My mother happens to be one of the best cooks I know. There are a few things I would rather do a little differently than her. She used to be liberal when it comes to using oil. Oil makes it tasty, yes but can I afford to eat that extra TBSP of oil? probably not. No, make it most definitely not. Just because a dish has quite a good amount of fat doesn't mean you cannot make it with less of fat. That is exactly what I did in this dish. My mother used to make it with lot of oil and oil is needed if you use the stove top method to cook since the lentil paste sticks to the bottom. I have cut down on the oil but cook it a little differently and it is also less time consuming compared to my mother's method.

I have been obsessed with few other things than cooking, baking and blogging recently. So, to keep me motivated and post regularly, I and Srivalli came up with this weekend cooking concept where we will post something that we made on weekends. Another blogger friend Vaishali joins us in this venture. Now, for some people, weekend cooking can be special, but for me, it is the total opposite since I plan on getting lot of other work done during those two days. So, meals are actually simple on weekends unless there is company.

One Year Back - Sweet and Sour Tomato Chutney
Two Years Back - Wholegrain Savory Pancakes, No Sugar added applesauce Muffins
Three Years Back - Savory Onion Tart, Sourdough Banana Loaf with almond butter
Ingredients:
Green Beans - 2 Pounds cleaned and chopped into small lengths
Coconut - 1/2 cup grated
Red Chillies - 8 - 10  (depending on how hot you like your food)
Bengal Gram dal / Kadale bele / Dehusked split chickpeas - 1 cup
Asafoetida / Hing - Few generous pinches
Cumin - 1 tsp (optional)
Turmeric - a generous pinch
Salt - to taste

For Tempering:
Oil -  3 TBSP (You can use much more than this, but this is sufficient for the method given in this recipe)
Mustard seeds - 1/2 tsp
Red chillies - 2 broken
Bengal gram dal - 1 TBSP
Method:
Soak the bengal gram dal in enough water for about an hour or so. Drain all the water. Take this in a food processor fitted with chopping blade or a blender (chutney jar) and blend with coconut, hing, red chillies, cumin, turmeric. Do not add any water and try to make a coarse paste. In a pressure cooker, cook the green beans in enough water to which a little salt is added. When done, drain the water. Use the water in soup or rasam or sambar.
Heat oil in a skillet. When hot, add mustard seeds. When they splutter, add broken red chillies, bengal gram dal (1 TBSP given in 'for tempering' section). When they get toasted, add the ground lentil coconut paste and stir. Keep the flame to low and keep stirring for about 5 minutes. Add the cooked and drained green beans and mix well. Make sure there are no huge lumps of the lentil paste and keep on stirring. Adjust the salt if necessary and turn off the heat. Take the entire contents into a microwave safe bowl. Cover with a microwave safe plate or cover with saran wrap and microwave for 5 to 10 minutes until the lentil paste is cooked and the mixture doesn't have huge amount of moisture. Another option is to steam cook it for 5 minutes. Enjoy with rice and rasam or even chapathis, rotis.

Notes:
Lot of people use Toor dal or pigeon pea lentil for this recipe. I have also seen people using half toor dal and half chana dal. I prefer to use chana dal since on a regular basis, we cook with toor dal and this lentil gives a different variation. 
Pin It

Sunday, January 20, 2013

Rasam Powder / Saarina Pudi / Menasina Pudi

This is something that is staple in every Southern Indian household. Each family has its own recipe and differ in taste. This is my mother's recipe. Many women that I know of who live in U.S are privileged to get this powder from home every time they visit home or through someone. Not me though. It has been few years since I used this powder made by my mother since she is not able to move around and do anything let alone make this powder for me. But, I can smell the same powder every time I open the box of this powder to make rasam or any other dish that uses this powder. And this recipe is something I will never ever change even if the other person's recipe gives a better Saaru or rasam than mine. Some of my friends who have tasted my rasam ask me for the recipe long time back but I kept on postponing this post.
One Year Back - Maple Sesame Dressing
Two Years Back - Vegan Mango Cake
Three Years Back - Butternut squash Pasta, Eggless Blueberry Coffee cake, Chewy Granola Bars
Ingredients: 
Coriander seeds - 4 cups
Fenugreek seeds - 1 cup
Cumin Seeds - 1 cup
Black mustard seeds - 1/3 cup
Black Pepper corns - 1/2 cup
Curry leaves - About 1 cup (you can use more if you want without affecting the end product)
Turmeric - 2 TBSP or few dried roots
Asafoetida/Hing - 1 TBSP (See Notes)
Red chillies - 14 cups loosely packed (See Notes)
Oil - 1 tsp

Method:
Method 1:
Dry roast coriander seeds, fenugreek seeds, cumin seeds, black mustard seeds, black pepper corns separately one by one. Combine them after they are roasted. When they are still hot, add turmeric to it if using the powdered form. If using the dried roots, you can roast it with any of the spice. Dry roast curry leaves and add it to the mixture. Take the oil in the pan and at very low heat, roast the red chillies. This is the slowest process of the entire recipe. Take care not to burn and blacken them. When the red chillies are roasted, add them to the mixture. When all of them have cooled down a bit, take them in blender jar in batches and grind them to fine powder. Sieve through the fine mesh sieve and grind the coarse ones again to get a fine powder. Add hing and mix well and store in an air tight container.

Method 2:
Take a very large rimmed baking sheet. Spread all the ingredients mentioned except oil, turmeric and hing. Spread so that the contents are in single layer. Place in the oven that is preheated to 200 F. Keep it for an hour and a half stirring every 30 minutes. Remove and make sure all the ingredients are toasted. If not, keep for 30 more minutes. Let it cool and then grind into powder adding turmeric and hing.

To Use:
For every cup of dal (uncooked measure), use about 2 - 3 tsp of this powder depending on how strong you like your rasam. Amount of tamarind needed also depends on how much you have used. That recipe in a different post will follow soon.
Notes:
Measurement of red chillies:
My mother would roast everything (spices) and place it in a shallow dish. Use that as a measure to measure the red chillies. 1 measure of spices together - 2 measures of red chillies. If you use half byadagi (kind of red chillies that are not as hot but give a very nice color), you might want to increase this to 2 1/2 times.

Shortcut:
The hardest part of this process is slow roasting of red chillies and grinding them into fine powder. Other spices don't take as much time to become fine powder. So, my sister came up with this proportion and it works with less work. Dry roast all the spices and grind them into fine powder. Mix well and measure the combined powder. Measure equal amount of red chilli powder (by volume) and add it to the spice powder mixture. You will have to boil the rasam for 5 minutes more if using this shortcut.

Enjoy.


Pin It