Showing posts with label gluten free. Show all posts

Wednesday, September 18, 2013

Aloo Methi Bhath (Potato fenugreek rice dish)

Inspiration can come from anywhere - source unknown.
I don't know where I had read this line but it is so true. I was familiar with the dish Aloo Methi (Potato and fenugreek leaves side dish), I was familiar with aloo paratha, methi paratha. I had no idea that people make aloo methi paratha as a different dish altogether. I was watching a show and in that they serve aloo methi paratha for breakfast. The moment I saw that, this idea came and since I had the main ingredients on hand, I converted it as a rice dish. I might not know rocket science but I can make rice out of anything and everything that is vegetarian. This was delicious. The bunch of fenugreek leaves I used was small. Unless it is huge, you can actually use two bunches to enhance the flavor of methi or fenugreek.
One Year Back - Pumpkin Chocolate Bread
Two Years Back - Vegan Sourdough Chocolate Cake with peanut butter glaze
Three Years Back - Sourdough Pumpkin Spice CakeIngredients: 
Rice -  1 1/2 cups
Potatoes - 2 medium sliced into long thin slices (like french fries cut)
Red Onion - 2 medium sliced thin
Fenugreek leaves - 1 bunch cleaned and leaf and tender stem chopped (Or you could use any other greens of your choice)
Oil - 3 TBSP
Ginger - 1" piece peeled and grated
Cumin seeds - 1 tsp
Cashews - 3 TBSP
Salt - to taste
Red Chilli powder - 1 1/2 tsp (Or to taste)
Cumin powder - 1/2 tsp
Amchoor powder / Dry mango powder - 1 tsp
Turmeric - a generous pinch
Sugar - 1 TBSP

Method:
Wash and rinse the rice. Cook and cool. Fluff with a fork to separate the grains and spread it on a plate. In a pan, heat oil. When hot, add cumin seeds. When they splutter, add ginger followed by cashews. When the cashews turn a little golden, add onions. Sprinkle some salt, turmeric and let it cook. When onions are almost cooked, add potatoes and mix well. Cover a lid and let the potatoes cook till soft but not mushy (5 - 8 minutes based on your pan and how big you have cut them). Keep an eye on it since they will they stick to the pan and burn easily. When potatoes are tender, add the fenugreek leaves. Mix well. Now, add the red chilli powder, sugar, cumin powder, amchoor powder and give it another mix. Greens should cook in less than 5 minutes. When they have wilted, add the cooled rice and mix well. Check for salt and adjust if needed. Cover with a lid and lower the flame to the lowest and let it sit untouched for 4 - 5 minutes. Turn off the heat. Serve as is or with a bowl of yogurt.

Enjoy.
Pin It

Tuesday, July 30, 2013

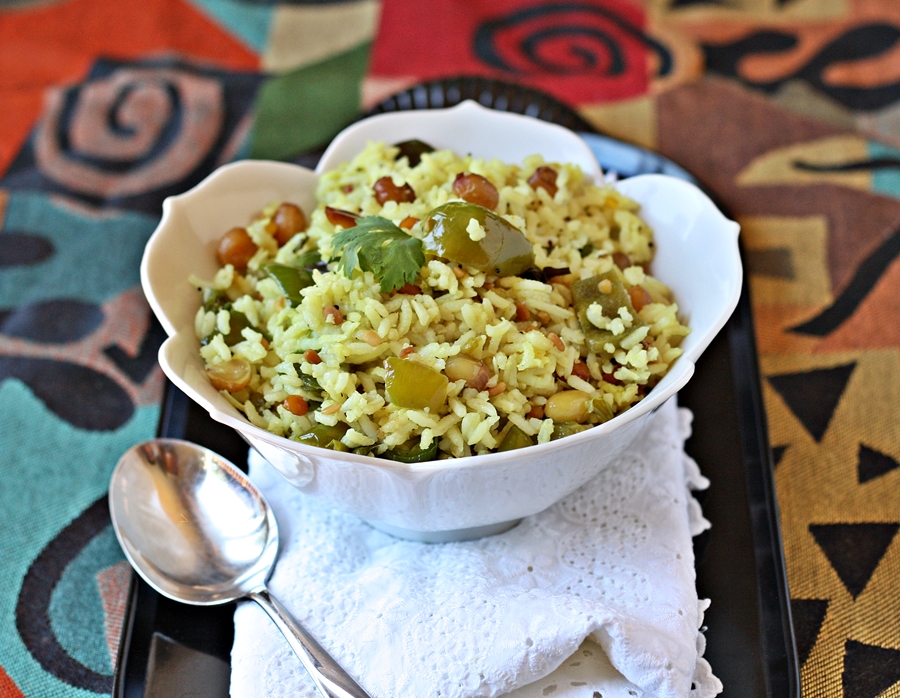
Lime Rice with Bell Pepper

Lime Rice or Lemon rice as it is called is a common dish in Southern Indian households.  It was invented to use the left over rice and it had nothing but the garnish of few lentils, peanuts and some lime juice with a bit of heat added. Even when it is so common, it is different from house to house. Some people add onions, garlic and some don't. My mother made it in an entirely different way - rich with mustard and coconut. When I started cooking by myself, I made a point not to make this without adding some vegetables every time I made it. I add at least frozen peas to it if not anything. This time, I had to use the bell peppers from the vegetable garden and here comes this dish.
One Year Back - Orange Creamsicles
Two Years Back - Salsa Vinaigrette
Three Years Back - Zucchini Chutney
Ingredients: 
Rice - 2 cups (if using sona masoori, use 1 1/2 cups)
Bell pepper - 6 seeded and chopped into chunks
Oil - 3 TBSP
Mustard seeds - 1/2 tsp
Green chillies - 10 slit lengthwise (or to taste)
Curry leaves - few
Asafoetida/hing - generous pinch
Turmeric - couple of generous pinches
Bengal gram dal / chana dal - 1 TBSP
Urad dal / Black gram dal - 1 TBSP
Peanuts - 2 - 4 TBSP
Salt - to taste
Lime - 1 if very juicy or 1 1/2
Grated coconut - 4 TBSP (optional)
Cilantro - 3 TBSP chopped

Method:
Wash and rinse rice. Cook with enough water ( 1:2 ratio). Let cool and fluff with a fork to separate the grains.  In a  pan, heat the oil. When hot, add mustard seeds. When they splutter, add slit green  chillies, curry leaves followed by bengal gram dal, black gram dal, hing and peanuts. Let the peanuts get toasted. Add the bell peppers, turmeric, little bit of salt. Stir often to prevent burning. When the bell peppers are cooked, add coconut, and cooled rice. Mix well. Add cilantro and check and adjust the salt if needed. Turn off the heat. After about 10 minutes, squeeze the juice of lime and mix. Serve as one pot meal.
This post is written for weekend cooking post that I write with Srivalli  and  Vaishali.

Notes:
If using Sona Masoori rice, use 3 cups of water per cup of rice.

Enjoy.
Pin It

Sunday, July 21, 2013

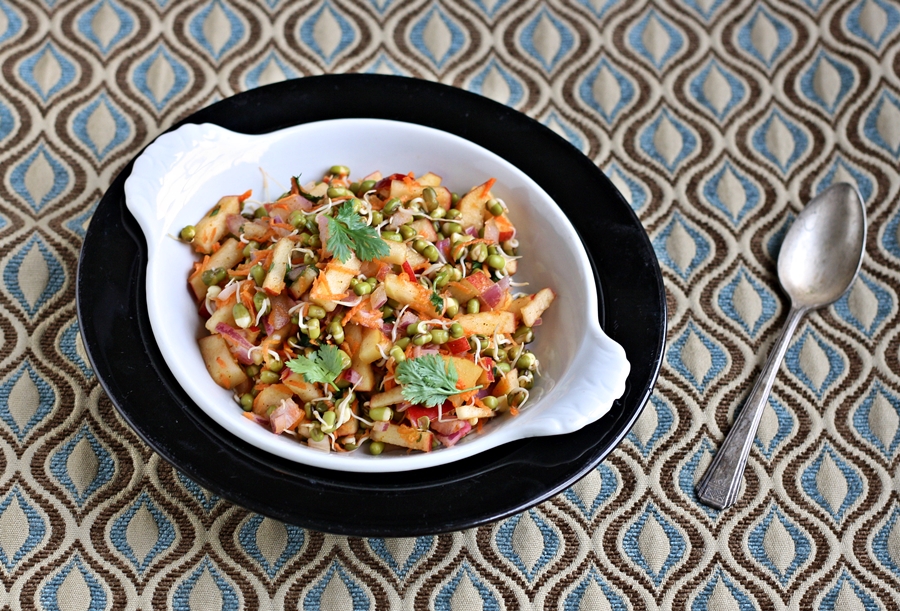
Sprouted Moong bean salad with apples (Vegan, fat free)

Even after running the kitchen all by myself for 15 years now, I still love to stand in front of gadgets of kitchen section in any store. Even though I love gadgets, I sometimes feel old methods work better and with no complications. Example is food processor. When I bought it, I was so excited to use it for chopping all the vegetables. But, I figured it out that it takes more time to clean the gadget after using that I prefer a good knife and a cutting board for chopping most of the veggies. Recently, one of my friend gave me a gadget meant for sprouting the different grains. I haven't opened it even to this day. I prefer the simpler and easier way of sprouting any of the grains. This salad is filling, healthy, refreshing and easy to make after you have sprouted the beans. This post is written for weekend cooking post that I write with Srivalli  and  Vaishali.
One Year Back - Carrot Rice
Two Years Back - Chocolate Chip Chocolate Bread
Three Years Back - Zucchini Bread
Ingredients: 
Dry whole Moong beans - 3/4 cup
Apples - 2 cored and diced fine
Carrots - 2 medium peeled and grated with fine grater
Red onion - 1 medium chopped fine
Lime - 1 juiced (divided use)
Salt - to taste
Green chillies - 2 minced fine (Or use 1/2 tsp red chilli powder)
Chaat masala - 2 tsp (See Notes)
Cilantro - chopped 3 TBSP 

Method:
To sprout the moong beans:
Rinse the moong beans and soak in enough water overnight. In the morning, drain all the water and spread it on a shallow dish or a plate so that the moong beans are in single layer. It is to ensure that all the beans sprout at the same time and evenly. Cover with a lid (not a tight fitting lid)  and let it sit. You will see tiny sprouts in 6 hours and if you keep them longer, they grow. You can decide when you want to stop its growth and at that stage, you can refrigerate them. In winter, it takes longer to sprout them and if it takes more than a day, rinse with clean water and drain and cover and repeat. Or leaving it in the oven with the light on works very well too.

Making the salad:
To a bowl filled with water, add few drops of lime juice. To it, add the chopped apple pieces. Make sure all the apple pieces are immersed. Let it sit like that for 15 minutes. Meanwhile, take the sprouts, red onions, carrots in another bowl. Add salt, lime juice, chaat masala, green chillies and cilantro. Drain the apples and add it to the bowl. Mix everything gently and check for the salt and adjust if needed. Serve immediately or serve chilled.

Notes:
If you cannot find chaat masala, you can use some garam masala. If you don't like that, you could just use some chilli powder along with cumin. That gives enough flavor to the salad without using oil.

Enjoy.
Pin It

Monday, July 1, 2013

Cabbage Rice - Version II

My mother cooked a lot with cabbage. Not because it was someone's favorite vegetable or it is good for health. She cooked cabbage at least once a week because it was one of the cheap vegetables we could get at that time. I still remember my sister complaining that mom made cabbage again. For some reason, I never get bored of eating this veggie. Be it as a stir fry or as  sambar. I am notorious for making different kinds of rice dishes. There probably isn't any vegetable that I cannot convert into a rice dish. Here is one such recipe that got created without any thought. It was delicious I should say.
One Year Back - Vegan Applesauce Cranberry Bread
Two Years Back - Chocolate Strawberry Muffins, Honey Cardamom Ice cream
Three Years Back - roken Wheat Pongal
Ingredients:
Cooked Rice - 2 1/2 cups (completely cooled)
Oil - 3 TBSP
Cumin - 1 tsp
Cashews - 1/4 cup
Cabbage - chopped fine 2 1/2 cups
Salt - to taste
Turmeric - two generous pinches
Lime juice - from half a lime (or use one whole if not juicy enough)

To grind:
Garlic - 2 cloves
Cilantro - 1/3 cup
Mint leaves - 1/3 cup
Green chillies - 8  (as per taste)

Method:
Heat oil in a pan. When hot, add cumin seeds. When they splutter, add cashews and fry them till golden. Add cabbage, salt and turmeric. Mix well and let it cook. Meanwhile, take all the ingredients mentioned in "To Grind" above and grind to a paste without adding any water. When cabbage is half cooked, add the ground paste to it and mix well. Lower the heat and let the cabbage cook completely. When the cabbage is cooked, add the cooled rice and mix well. Add lime juice, adjust the salt if needed and cover with a lid and let it sit on the lowest flame for 3 - 4 minutes. Turn off the heat. Either serve as is or with some yogurt or raita on the side.

Notes:
I used the left over jasmine rice which, I could not really separate the grains of. Use basmathi or sona masoori rice and separate the grains to make it look more presentable. This looks more like a kichadi because of the type of rice I used.

Enjoy.
Pin It

Wednesday, April 10, 2013

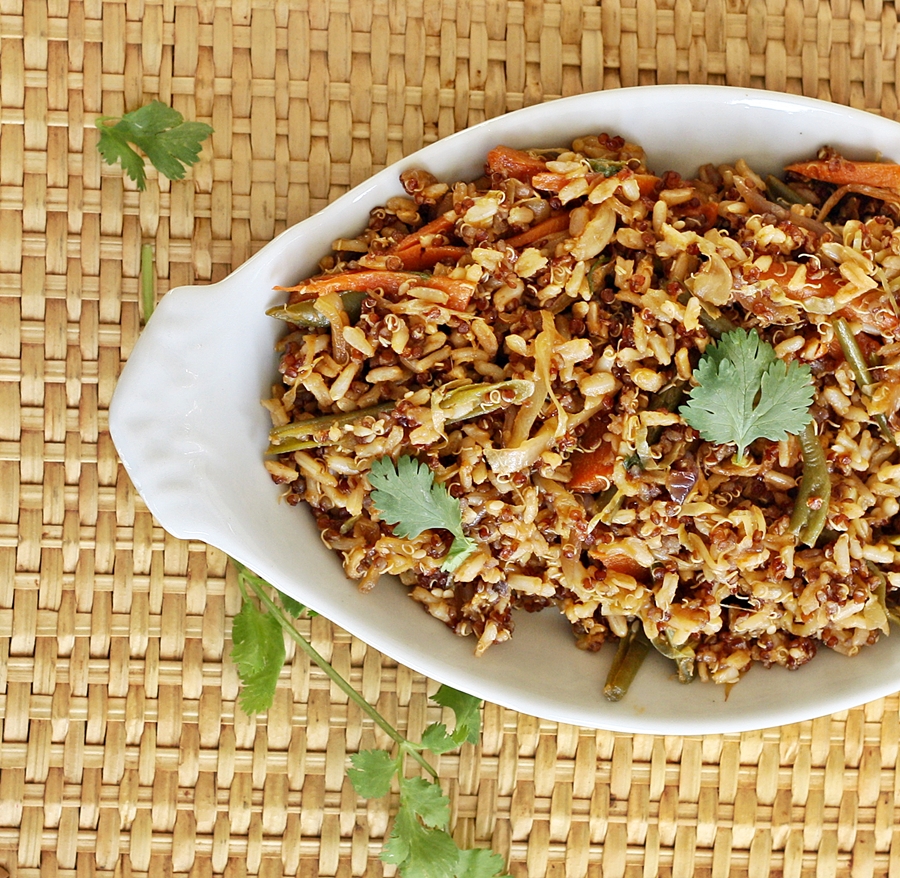
Fried Brown Rice and Quinoa - Chinese Style (Vegan, glutenfree)

I don't know what it is with the names of ingredients that can repel people from even trying it. Quinoa, Brown Rice, Zucchini, Broccoli, Oats, Tofu are in the list so far in our house. Problem is I like almost every one of these and if I cook with these, I will end up eating it alone and I have to cook something else for others which is not something I want to do on a daily basis. I had some spare time between work and on an impulse, I made this dish. Inspired by a noodle recipe on the back of Nasoya Tofu - I was planning on adding tofu, but realized that the tofu had expired and I didn't want to use it.
One Year Back - Whole Wheat Orange Bread
Two Years Back - Eggless Chocolate chip oat cookies
Three Years Back - Making of mermaid cake
Ingredients: 
Quinoa - 1/2 cup (I used Red Quinoa)
Brown Rice - 1 cup
Oil - 2 TBSP (Use peanut oil or sesame oil or canola oil)
Garlic - 2 pods grated
Ginger - 1 " piece peeled and grated
Sesame seeds - 1 TBSP
Red Onion - 1 medium sliced to thin strips
Cabbage - Thinly shredded about 1 1/2 cups
Green beans - 1 cup french cut
Carrot - 2 medium peeled and sliced into thin long strips
Salt - to taste
Rice Vinegar - 3 TBSP
Soy sauce - 4 TBSP
Brown Sugar - 1 - 2 TBSP
Hot sauce like Sriracha - 1 - 2 TBSP as per the taste (I used 2 TBSP)
Cilantro - 1/4 cup chopped

Method:
Wash and drain brown rice and quinoa. Add 3 cups of water and cook it in a rice cooker. When done, turn off and let it cool. Have all the vegetables chopped and ready. In a skillet or a wok, heat oil. When hot, add grated ginger, garlic followed by sesame seeds. When the seeds pop, add the onions and sprinkle some salt and let it cook. When onions are half cooked, add the rest of the vegetables in the order of green beans, cabbage and carrot. Stir and let them cook. You will have to frequently stir to make sure they don't stick to the bottom and burn. Add a TBSP or two of water if it starts to stick to the pan. When the vegetables are half way cooked, add the brown sugar, soy sauce, rice vinegar and hot sauce. Stir and let the vegetables cook to your level of crunchiness preference. Add the rice and quinoa mixture and mix well. Adjust the salt and garnish with cilantro. Serve hot, warm. Left over heats up very well .

Notes:
You can add green onions as part of the garnish. I didn't have any. You can add cubes of tofu that are sauteed.
Pin It

Monday, February 4, 2013

Orange Jam

If summers are for making jams using berries and peaches, fall and winter are for making marmalade, orange jelly and probably orange jam. I don't really know why orange jam is not easily available as orange marmalade but here is an attempt to make the jam at home. Needless to say it goes very well with bread or crackers.
One Year Back - Vegan Puttanesca Sauce
Two Years Back -  Applesauce Breakfast Bread, Penne with Spicy Coriander Pesto
Three Years Back -  Ricotta Cheese Doodh Peda
Ingredients: 
Navel or Florida Oranges - 5 (they were pretty big)
Sugar - 1 1/4 cup (I used 1/4 cup per orange but you can increase it to 1/3 cup per orange too)
Agar Agar powder - 1 1/2 tsp
Zest of Orange - from 2 oranges

Method:
Keep a stainless plate in the freezer. Peel the skin of all the oranges. Remove the skin and use only flesh discarding seeds. Place them in a blender or food processor fitted with chopping blade. Make a coarse puree out of it. Take it into a microwave safe bowl that can hold twice the amount of puree you have. Microwave on high for 5 minutes. Stir and microwave again for 15 minutes in intervals of 5 minutes. Add sugar, orange zest, agar agar powder. Mix and microwave at intervals of 3 minutes stirring after every 3 minutes. When the mixture has thickened considerably and can coat the back of a spoon, take out the plate from freezer and drop a spoon of the hot jam. It should get the consistency of the jam and form a thin skin at the top. That means the jam is done. If not, keep microwaving at intervals of 3 minutes and keep testing. My not so powerful microwave took about 30 minutes total. It also depends on what material bowl you are using. I was using a heavy glass bowl.

You can make it using the stove top method too. Store in a clean jar in the refrigerator for 1 month.

Notes:
This was not a very sweet jam and I made it less sugary on purpose. You can increase the sugar to your liking. Lot of people use pectin for making this kind of jam but I did not have any and agar agar worked perfectly.

Enjoy.
Pin It

Monday, November 12, 2012

Vegan Butternut Squash Sweet drink / Payasa

It is Diwali or Deepavali this week for those who celebrate it. For those who do not know much about this festival, it is a festival of lights which is celebrated in different ways in different parts of India. But three things are common however this festival is celebrated. Oil lit lamps, new clothes and sweets. Most of the sweets are made so that they can be packed nicely and given to each other. Since we don't do those things here (try driving for an hour to go to one friend's place to give a box of sweets), I decided to make a not so rich sweet drink or what we call 'payasa'  in kannada language just for the house. It is very similar to carrot kheer that most of the people make.
Wishing all of you a happy diwali, I share this dessert drink virtually with all of you and of course its recipe.
One Year Back - Pumpkin Cranberry Bread
Two Years Back - Party Cooking Tips
Ingredients:
Butternut squash - 1 medium peeled, cleaned and chopped into chunks
Water - 4 cups
Coconut milk - 1 cup (Use plain milk for non vegan version  or use almond milk)
Cashews - 1/2 cup (Or almonds)
Sugar - 1 - 1 1/2 cups
Cardamom - 8 - 10 pods crushed into powder

Method:
In a pan, take all the butternut squash pieces. Pour two cups of water, cashews or almonds and cover with a lid and let it cook till soft. Turn off the heat. When cool enough to handle, take the contents in a blender and blend to get smooth puree. Don't add any water. Pour the puree back into the pan. Add 2 more cups of water and stir well. Turn on the heat. Add coconut milk or almond milk. Stir and bring it to a slow boil on a low flame. Add sugar (start with 1 cup and increase if needed) and let it simmer for few minutes stirring occasionally. Add cardamom powder and stir and turn off the heat. This can be served warm/hot in colder weather and cold in hot weather.

Notes:
Depending on how big the butternut squash is, you might have to adjust the water to get the desired consistency. It also depends on whether you like thick drink or thin one.

Enjoy.
Pin It

Saturday, November 10, 2012

Lime Rice (Lemon Rice) / Kayi Sasuve chitranna

If Mac N Cheese, PBJ sandwiches are common in every household in U.S, lemon rice is one of the common dishes in Southern Indian households. This is actually Lime Rice and in India, limes are called lemons. (There were no lemon in India back then.) Anyways, most of the people make this in the same manner, but for my mother. I have seen people garnishing the lemon/lime rice with grated coconut, but never grinding the masala for it. It is actually derived from another recipe which is based on coconut and mustard seeds. But, this is the best lemon/lime rice that I have tasted in my life. - I meant the recipe. The ground paste adds tons of flavor and because of that reason, I never make the simpler version of this.
One Year Back - Chocolate Chip Bread
Two Years Back - Cream Cheese Sweet Bread, Pumpkin Soup
Ingredients:
Rice - 1 cup uncooked ( you can use sona masoori, basmati or any long grain non sticky rice)
Water - 2 cups or more to cook the rice (Most sona masoori takes 2 1/2 - 3 cups for every cup of rice)
Turmeric - a generous pinch
Salt - to taste
Oil - 1 - 1 1/2 TBSP (Use only flavorless oil or peanut oil)
Mustard seeds - 1/2 tsp
Red chillies - 2 broken
Curry leaves - few
Chana dal/Kadale bele / dehusked split chickpeas - 1 tsp
Urad dal/Uddina bele / Black gram dal - 1 tsp
Peanuts - 2 - 3 TBSP (Or use cashews)
Lime - half of a big juicy one or 1 small one
Cilantro - 2 TBSP chopped 

To grind:
Coconut - 1/2 cup grated
Mustard seeds - 1/2 tsp
Asafoetida / hing - generous pinch
Green chillies - 5 - 6 or as per taste

Method:
Cook rice in enough water by adding the turmeric. Rice should be cooked but not mushy. Fluff it with a fork and spread on a platter to cool. Take all the ingredients mentioned under 'To Grind:' in a blender and make a paste without adding water. If it is too hard, you can use not more than 2 tsp of water.
Take the ground paste and place it on the cooled rice as a heap in the center. Heat oil in a pan. When hot, add mustard seeds. When they splutter, add red chillies, curry leaves followed by the dals and peanuts. Let the dals and peanut get toasted well. Turn off the heat and pour the entire content of the pan on the ground paste sitting on the rice. Add salt to the entire mix and mix well with two spatula so that the whole thing gets mixed very well. Squeeze the lime juice and mix one more time. Adjust the salt if needed and add the cilantro and mix. This tastes better an hour or two after it was made. Serve as is or with yogurt rice and pickle.

Notes:
I sometimes add vegetables to the same base. My favorite ones to add are green peas. You can either cook the peas along with rice or saute it in a bit of oil and add.

Enjoy.
Pin It

Thursday, November 8, 2012

Vegan, Glutenfree Butternut Squash Pancake Puffs

Few months back, I wanted to try out some gluten free baking. I bought different kinds of gluten free flours but never got around to bake anything with them. When I was organizing the pantry, I found an unopened pack of Amaranth flour and wanted to try making something using it. When I opened the pack, I found the smell a bit too overwhelming. Almost all gluten free flours except for oat and rice flour have some significant smell that need getting used to. That is the reason behind the combination of rice and amaranth flour.  I was chopping butternut squash to make something and used some of it to make these Aebleskiver or pancake puffs. (This is nothing but paniyaram or gundu pongal or appe in different languages.) This batter can easily be used to make pancakes.

One Year Back - Chocolate Chip Bread
Two Years Back - Pita Chips with green peas and ricotta dip
Ingredients: 
Rice flour - 1 cup
Amaranth flour - 3/4 cup (Or any other gluten free flour or more rice flour)
Salt - a pinch
Very warm water - 2 cups
Sugar / Brown Sugar - 1/2 cup
Grated butternut squash - 1 cup (you could use grated carrots or apples too)
Baking Soda - 1/4 tsp
Five spice powder - 1/2 tsp or use just cinnamon or a combination of cinnamon and nutmeg or pumpkin spice.
Oil to cook the pancake puffs or pancakes

Method:
Mix both the flours, salt, sugar with very warm water. Whisk so that there are no lumps. Add grated butternut squash and mix. Cover and let sit for 20 minutes. After this time, prepare your Aebleskiver pan or pancake puff pan. Use few drops of oil in each cup. To the batter, add the baking soda and mix well. Fill each cup with the batter and cover with a lid. When the edges have started browning, flip the puffs and cook the other side. These don't puff up as much as the regular glutenous puffs. Serve with maple syrup or agave nectar.

Notes:
If you don't care about keeping it gluten free, use whole wheat flour or all purpose flour for all the flours. Use about 1 1/2 cups of water and add more if needed to get the correct consistency and proceed.

Enjoy.
Pin It

Wednesday, November 7, 2012

Tomato and Peanut chutney

I know I have been missing in action lately. Let's just say I got preoccupied with some other stuff. Some important, and some not so much. But as I tell others, I might jump from one hobby to another but cooking, baking and food passion never really leaves me. And I realized that today when I made four new stuff in a row. Obviously I have to write about the whole thing which takes time, but watch out for some cool things I whipped up today.
This chutney was half impressed by a north karnataka chutney recipe and half my own imagination and the necessity of using up the stuff. I don't like raw garlic that much so I sauteed it. You can use it raw and add favorite herbs like cilantro or mint.

One Year Back - Vegan Butternut squash muffins
Two Years Back - Asian Style Dill Rice
Ingredients:
Crushed tomatoes - 28 Oz can or use about 1 1/2 lb of tomatoes (If using fresh tomatoes, chop them into chunks)
Pineapple - about 1 cup cubes (optional - I had it so I used it)
Red Onions - 3 medium chopped into chunks
Garlic - 4 pods crushed
Green chillies - 10 - 12 whole, stalks removed
Peanuts - 1/2 cup - 3/4 cup
Cumin - 1 tsp
Sesame seeds - 1 TBSP
Jaggery or Brown sugar - 1/3 cup or to taste
Oil - 2 tsp
Salt - to taste

Tempering:
Oil - 1 tsp
Mustard seeds - 1 tsp
Curry leaves - few

Method:
In a pan, heat 2 tsp of oil. When hot, add cumin seeds. When they pop, add garlic, green chillies and peanuts. Stir frequently to toast the peanuts well. After few seconds, add sesame seeds and stir well so they get toasted too. When peanuts are toasted, add chopped onions and sprinkle some salt. When onions are cooked, add tomatoes, pineapple if using and jaggery or brown sugar. Mix well and let the tomatoes get soft. Turn off the heat and let it cool a bit. Take the contents and grind into a paste. You will not need any water so don't use any. Adjust the salt if needed. Heat the remaining 1 tsp of oil. When hot, add mustard seeds. When they pop, add curry leaves and pour it on to the chutney. Serve with idlis, dosas or it is delicious mixed with rice too.

Enjoy.
Pin It

Thursday, July 19, 2012

Carrot Rice

I love cooking. Duh, why else would I write a food blog?  But there are days I don't feel like doing any cooking/baking. This recipe is for such days. Since I cook every day, some times twice, I usually don't have any left overs. And if I don't feel like cooking, we will all have to eat either frozen naan and some curry or have to go out. This kind of recipe comes in handy for such days. You can add any vegetable you want as long as it cooks fine in a rice cooker along with the rice.
 
One Year Back - Chocolate Chip Chocolate Bread
Two Years Back - Zucchini Bread
Ingredients: 
Rice - 1 cup uncooked (Sona masoori or basmati is preferred)
Oil - 2 TBSP
Cumin - 1 tsp
Cinnamon - 1 stick of 2"
Cloves - 6 - 8
Green Chillies - 6 - 8 chopped fine
Cashews - 2 TBSP
Carrot - 6 - 8 medium peeled and chopped
Peas - 1 cup (frozen peas or pre cooked peas if using the dry ones) - optional
Salt - to taste
Cumin powder - 1 tsp
Coriander powder - 1/2 tsp
Coconut - 1/2 cup grated
Cilantro - 2 TBSP chopped
Method:
Wash and rinse rice. Add drained rice and 2 cups of water to the pot of rice cooker. In a pan, heat oil. When hot, add cumin. When it splutters, add green chillies, cloves, cinnamon and cashews. When the cashews are toasted, add carrot pieces, green peas and mix well. Sprinkle salt and the spice powders. Mix well. After a minute or two, add coconut, cilantro and mix one more time. Add this entire mixture to the rice cooker in which water and rice are soaking. Mix and add enough salt for the final dish. Turn on the rice cooker. When it is done, turn it off and fluff the entire mixture. Add more cilantro if required. Serve warm or at room temperature.

Linking it to Srivalli's Blogging Marathon

Enjoy.
Pin It

Wednesday, July 18, 2012

Eggplant Coconut Rice

I don't know much about vegetable gardening or gardening in general. I have been growing vegetables for the past 3 years or so. There is one thing that I have been growing every year - Tomatoes. But apart from that, I try different things every year. This year was a trial of growing eggplants and Bell peppers. Needless to say, we are eating a lot of eggplant nowadays. Here is one rice using this veggie.
One Year Back - Easy Pineapple Coconut Cake
Two Years Back - Zucchini Bread
Ingredients:
Rice - 1 1/2 cups uncooked (I used sona masoori, you could use basmati too)
Oil - 2 TBSP
Red Onion - 2 large
Eggplant - Long thin ones 3 sliced (Or use one medium big eggplant)
Dry Coconut / Kobbari - 1/2 cup  (If you can't find it, use dessicated unsweetened coconut flakes instead)
Garlic - 2 pods
Green Chillies - 5 - 6
Jaggery or brown sugar or white sugar - 1 TBSP (don't skip this)
Tamarind paste - 1 tsp (See notes if using regular tamarind)
Mustard seeds - 1 tsp
Red chillies - 2 broken
Turmeric - a generous pinch
Curry leaves - few
Chana dal / Bengal gram dal - 1 TBSP
Raw peanuts - 2 TBSP
Salt - to taste


Method:
Wash and rinse rice. Cook with enough water ( 1:2 ratio). Let cool and fluff with a fork to separate the grains. Slice one onion into chunks and the other one into thin slices. In a pan, heat 1 tsp of oil. When hot, add the onion chunks, garlic, green chillies and coconut. Sprinkle some salt and let it cook. When cooked, set aside. To the same pan, add the remaining oil. When hot, add mustard seeds. When they splutter, add broken red chillies, curry leaves followed by bengal gram dal and peanuts. Let the peanuts get toasted. Add the sliced onions, turmeric, little bit of salt. When onions are half cooked, add the eggplant slices and mix well. When this is getting cooked, take the contents you have set aside into a blender and blend into a coarse paste without adding any water. When eggplant is cooked, add the ground paste, tamarind paste, jaggery or sugar and mix well. After two minutes, add the cooled rice and mix well. Check and adjust the salt if needed. Turn off the heat. Serve as one pot meal.


Notes:
If you do not have tamarind paste, you can add about a small lime sized tamarind when you grind the onion, coconut and garlic mixture.

Linking it to Srivalli's Blogging Marathon.
Enjoy.
Pin It

Tuesday, July 17, 2012

Lentil Pulav / Masoor Pulav

Lot of people can do a lot of things. Some are natural at swimming or arts or music. Me? I am a natural when it comes to food. Not just the eating part, but making part of it. Oh yes, I love food. If not for the consciousness of getting wide and wider, I could live to eat good food. My mother and grand mother used to say that there is something in a person's hand that whatever they cook, becomes great tasting. I don't think it has anything to do with the hand. It has everything to do with mind - understanding flavors and understanding the math of how much to use for what. Here is a simple rice and lentil dish that serves as a main dish. A one pot meal to be exact.
One Year Back - Oatmeal Bread
Two Years Back - Zucchini Bread
Ingredients:
Whole Masoor / Red or Green lentils - 1/2 cup
Basmati rice - 1 cup soaked in water for 30 minutes
Oil - 2 TBSP
Cumin - 1 tsp
Red onion - 3 medium or 2 large sliced thin
Garam masala - 1 tsp
Red chilli powder - 1/2 - 3/4 tsp
Amchoor powder / Dry Mango powder - 1/2 tsp (See Notes)
Cumin Powder - 1/2 tsp
Salt - to taste
Cilantro - 1/4 cup chopped
Method:
Wash and rinse masoor. Add enough water and start cooking it till cooked but not mushy. Turn off the heat and drain the excess water. Save it for using while cooking the rice.
In a pan, heat oil. When hot, add cumin followed by onion. Sprinkle some salt and let it wilt. When onions are almost cooked, add red chilli powder, amchoor powder, cumin powder. Mix all well and add drained rice, cooked lentil. Mix one more time and add enough water to the reserved water to make 2 cups. Pour it into the pot and bring to a boil. Add more salt if required. When there is a full boil and most of the water has evaporated, add cilantro and lower the flame and cover with a lid. Cook for 5 - 10 more minutes till rice is completely cooked. Turn off the heat and fluff the rice after 10 minutes. Serve with raita or plain yogurt.

Notes:
If you cannot get dry mango powder, when the rice is done, add the juice of a lime and mix well.

Linking it to Srivalli's Blogging Marathon.

Enjoy.
Pin It

Monday, July 9, 2012

Shahi Pulav

I am a South Indian. For me, Pulav means only one thing. It is rice with ground onion and cilantro paste with other spices, cooked with lot of veggies. You can read my regular pulav recipe here. When I heard of this pulav, which is more like fried rice, I thought let me try that. Not because of anything, but it gave me a reason to use my wildly growing mint. I am very pleased with this recipe though. This is actually perfect for parties to go with different kinds of dals or curries.
One Year Back - North Indian Cucumber salad - Chucumber
Two Years Back - Homemade vegetable broth
Recipe adapted from - Vahrehvah Chef.
Ingredients: 
Basmati rice - 2 cups soaked in enough water for 30 minutes
Water - 4 cups (Use 3 cups if using new rice and not aged basmati)
Oil - 4 TBSP
Shah jeera or kala jeera/ black cumin / caraway seeds - 1 tsp
Cashews - 3 TBSP
Golden or Indian green raisins - 3 TBSP
Cinnamon - 2 sticks of 1"
Cardamom - 2 - 3 whole
Cloves - 5 - 6
Sugar - 1 TBSP
Salt - to taste
Red Onions - 2 medium sliced into strips of 1"
Ginger - 1" piece
Garlic - 2 pods
Green chillies - 5 - 8 as per taste
Cilantro - 1/2 cup chopped
Mint leaves - 1/2 cup chopped

Method:
In a pan, heat oil. When hot, add black cumin. When they pop, add cinnamon sticks, cardamom, cloves followed by cashews and raisins. Stir and add sugar. Stir and once the cashews are toasted, add onions and mix. Let it wilt. Take ginger, garlic and green chillies in a blender and crush them without adding any water. You could also mince them fine with a knife instead. Add it to the pot and mix. When onions are half done, add mint and cilantro. Add salt and mix well. When onions are done, add 4 cups of water. Drain the rice and add it to the pot and mix once or twice. Check for the salt. Increase the heat until the mixture starts boiling and has most of the water evaporated. Turn down the heat to very low and cover with a lid. Let it cook completely. It will take 5 - 8 minutes after you have covered with the lid. Turn off the heat and after 10 minutes, fluff with a fork. Serve warm with any curry of choice or raita. By the time I took pictures, I was not left with any raita, so here is a plain shahi pulav picture.
Notes:
You could make this in rice cooker too. After the onions are cooked, transfer the contents to a rice cooker, add water and rice and turn it on.
Enjoy.
Pin It

Monday, July 2, 2012

Almond Poppy Seed veggie rice

I know what you are all thinking. Another rice dish? Trust me when I say this, I didn't even want to post this recipe when I started making it. I thought people come to my blog to see baking recipes not some plain old rice dish. But, after eating it, I changed my mind about not posting. This was so awesome that I took a picture in a hurry to post it before the whole pot went empty.
One Year Back - Honey Cardamom Ice cream
Two Years Back - Spicy Dill Biscuits
Ingredients: 
Basmathi rice - 2 cups uncooked
Oil - 4 TBSP divided use
Turmeric - a generous pinch
Salt - to taste
Poppy Seeds - 3 TBSP
Whole raw almonds - 1/2 cup
Green chillies - 10 or per taste chopped roughly
Cinnamon - 2" piece
Garlic - 4 cloves
Ginger - 2" piece peeled and chopped roughly
Onions - 2 large sliced into 1" strips
Veggies - any combination (I used 4 large carrots and a 10 Oz bag of spinach)
Lime - 1 juiced (optional - you could add about 2 tomatoes chopped instead)

Method:
Cook rice (I use 2 parts water to 1 part rice) and fluff it with a fork to separate the grains. Let it cool. In a pan, take 1 TBSP of oil. When hot, add cinnamon, almonds, ginger, garlic and green chillies and saute till almonds are toasted. Towards the end, add poppy seeds. They start to pop within seconds. Turn off the heat. When cool, take them into a blender jar and using as little water as possible, make a paste. Set aside.
To the same pan, add the remaining 3 TBSP of oil. When hot, add onions and add turmeric. Sprinkle some salt and let it wilt. When onions have cooked, add the other cut vegetables. When those veggies are almost cooked, add the ground paste. Mix well. Add the cooled rice and mix well. Adjust the salt if needed. Cover with a lid and keep on the low flame for 5 minutes. Turn off the heat and add lime juice if using. Mix and serve warm or at room temperature. Left over can be warmed up. There was no need for any accompaniment for this dish, but you could always serve it with raita if you wish.

Enjoy.


Pin It

Tuesday, June 26, 2012

Chickpeas and Tomato Rice

I know I have been missing in action. Kids don't have school and it is not easy to entertain them 24/7. Too many play dates, co-ordinating, dropping, picking them up and other summer stuff is keeping me busy. I do know most of you want to read just baking recipes, but this is something that is quick and easy to make for those who like one pot meals. I made a big batch to give it to my neighbor who is getting her kitchen flooring done and has no kitchen for a week.
One Year Back - Bisibelebhath, Savory Sourdough Aebleskiver, Minty Coconut Rice
Two Years Back - Sourdough Applesauce Spice Cake
Note: This is a big batch recipe. Scale it down as per your needs.
Ingredients: 
Dried chickpeas - 1 1/2 cups soaked overnight (Or use rinsed and drained 3 cans of chickpeas)
Basmathi rice - 3 cups
Oil - 4 - 5 TBSP
Onions - 3 large sliced thin into 1" strips
Tomatoes - 2 large diced
Salt - to taste
Turmeric - generous pinch
Garam masala - 1 tsp
Amchoor powder / dry mango powder - 1/2 tsp
Cumin seeds - 1/2 tsp
Cashews - 1/4 cup (optional)
Tomato paste - 4 TBSP (Or use 1/2 cup ketchup)

To paste/grind/mince:
Mint leaves - generous 1 cup
Green chillies - 20  or as per taste (I used thai green chillies)
Ginger - 2" piece peeled
Garlic - 4 cloves

Method:
Pressure cook the chickpeas in enough water till soft. Let it cool and drain. Cook the rice, cool and fluff with a fork to separate the grains. Set aside. Take all the ingredients mentioned above in 'To Paste/Grind/Mince' section and without adding any water, mince them in a blender jar. In a pan, heat oil, when hot add cumin followed by the paste, cashews. When cashews are toasted, add onions. Sprinkle some salt and let it wilt. Add turmeric and mix. When the onions are cooked, add tomatoes, tomato paste or ketchup, garam masala, amchoor powder and mix. After a minute or two, add the drained chickpeas and mix everything together. When the mixture starts bubbling, add the cooked and cooled rice and mix well. Adjust the salt if needed and cover with a lid and place on low heat for 5 minutes. Turn off the heat.
Serve hot, warm or at room temperature either as is or with some yogurt or raita.

Enjoy.
Pin It

Wednesday, May 23, 2012

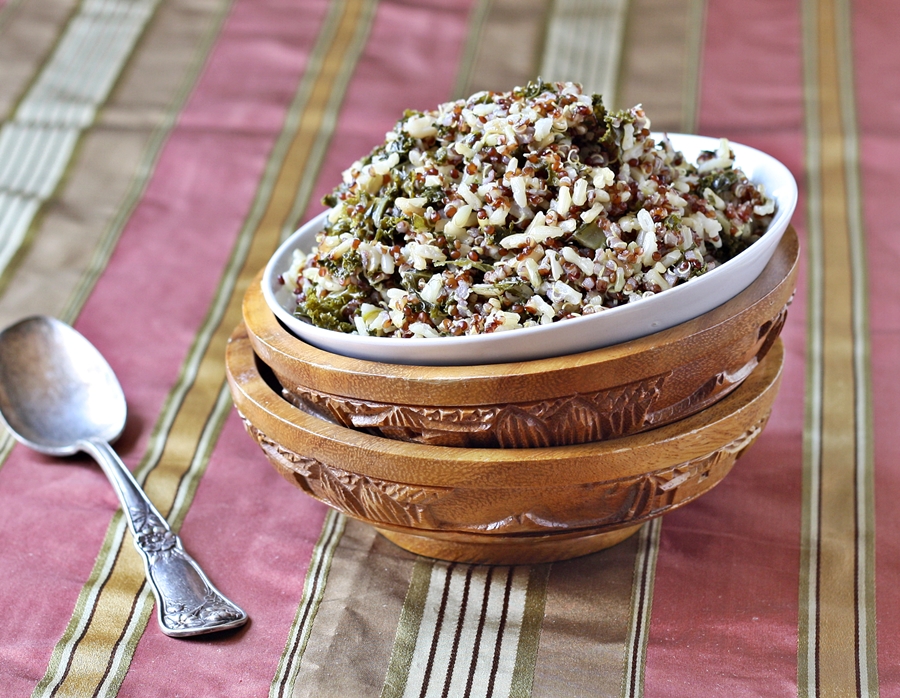
Garlicky Quinoa and Brown Rice

I have a bad habit. I can spend hours together in the grocery store. Whether I want it or not, I sometimes pick it up and see what it is. No wonder nobody wants to go grocery shopping with me at home. But, that is perfect too. I get 'me' time like that. One day, I was at costco and saw a box of garlicky Quinoa with brown rice. It was the kind where you add water and microwave to get the stuff ready. I was wondering who would buy it if it is so easy to make it yourself. You are not really doing anything except adding a few things to the rice cooker. This way, you control the ingredients as per your taste and is lot lighter on your wallet too. Don't forget the freshness of the end product. So, here is my attempt to mimic that but with my few twists. I added kale to it. Quinoa and kale are super foods, so why not? The only down side is I am the only one who is eating it so I have left over for tomorrow too.
One Year Back - Dal Makhani
Two Years Back - Methi Malai Mutter
Ingredients: 
Quinoa - 1/2 cup uncooked
Brown Rice - 1/2 cup uncooked
Oil - 1 TBSP (I used olive oil)
Salt - to taste
Garlic - 4 - 5 pods minced or grated
Green chillies - 5 chopped very fine (optional)
Any leafy vegetable - 2 cups (I used chopped kale) this too is optional
Lime juice - from half a lime
Method:
Wash and rinse quinoa and brown rice together. Drain. Add 2 cups of water to it. Add the leafy vegetables, salt and place in a rice cooker. Heat oil in a small sauce pan. When hot, add garlic and green chillies if using. Add this oil to the pot of quinoa and rice. Close the lid and let it cook. When done, turn off the cooker and add lime juice and mix well. Add salt if needed and serve with some yogurt or any kind of dal or curry.

This not only can be eaten as is, but makes a very nice filling for the wraps too. If you don't have a rice cooker, you can make this in a pressure cooker or on stove top too. Just cook it the way you would cook rice but a little longer since quinoa takes some time to cook well.

Enjoy.
Pin It

Wednesday, May 16, 2012

Mixed Lentil Paniyaram / Aebleskiver

I have always had Aebleskiver or paniyaram (gundu pongal, paddu are different names for this dish) that is made either with left over dosa batter or the batter they would make using rice and black gram dal. Many years ago, I had this kind at a friend's place. Her mother had made it and it tasted so different than the traditional one that I was used to. From that day onwards, I have always made these kind only. My friend's mother added coconut scrapings and few green chillies to the batter but I have left them out in this.
 
One Year Back - Sourdough Chocolate Zucchini cake
Two Years Back - Hawaiian Cobbler
Ingredients: 
Par Boiled Rice - 2 cups (See Notes)
Urad dal / Black gram dal - 1/4 cup
Chana dal / Dehusked split black chick pea - 1/4 cup
Toor dal / Dehusked split pigeon pea - 1/4 cup
Moong dal / Dehusked split mung beans - 1/4 cup
Salt - to taste
Oil - to cook

Method:
Soak rice and all the dals together for 4 - 6 hours. Drain and wash the rice, lentil mixture couple of times. Grind them in a blender/mixie or a grinder adding enough water to help the process but don't make it too thin. End product should be like pancake batter. You will have to grind them to a fine coarse grind. Nothing will happen if you grind them smooth, but very coarsely is not good. Add some salt and mix well. Let it ferment covered at room temperature for 8 - 10 hours (preferably overnight).  When the batter is ready, mix it vigorously and check for salt. Add if needed and you might have to add some water to thin it down to the pancake batter consistency.

Heat the Aebleskiver pan or pancake puff pan. When hot, add few drops of oil to each compartment. Pour the batter just under the rim of the compartment. Cover and let it cook. When you see holes and the batter looks set on the top, gently turn them around using chop sticks or a fork. Cook on the other side till you get a nice golden brown color. Serve with any kind of chutney or sauce. My kids always eat these with ketchup.

Notes:
Instead of parboiled rice, you could use regular rice. In that case, add a handful of soaked poha/avalakki/beaten rice to get a nicer color.

Enjoy.
Pin It

Tuesday, April 17, 2012

Tovve / South Indian Dal

Legume/Lentil preparation is almost a daily routine in any Indian kitchen. Be it in the form of Sambar or legume based curry or this simple dal. For some reason, North Indian style preparation of dal is pretty famous every where. People associate dal with garlic, onion, tomatoes. That is not really the case in reality. Every state of India has its own way of preparing dal. This one is from Karnataka where I come from. This is a very simple dish, but very flavorful.
One Year Back - Thomas the train Cake
Two Years Back - Pav Buns
Ingredients: 
Toor Dal / Red Lentils - 1 cup
Water - 2 1/2 - 3 cups
Turmeric - two generous pinches
Salt - to taste
Lime juice - from half a lime
Cilantro - 2 TBSP chopped
Veggies of choice - About 1 - 2 cups of chopped vegetables precooked (I have used about 4 cups of spinach here) optional
Coconut - 3 - 4 TBSP grated

For tempering:
Oil - 2 TBSP divided use
Mustard seeds - 1/2 tsp
Red Chillies - 2 broken
Cumin - 1/2 tsp
Ginger - Grated about 1 generous TBSP
Cumin powder - 1/2 tsp
Red Chilli powder - 1/2 - 1 tsp as per taste
Black Pepper powder - 1 tsp
Asafoetida/hing - generous pinch
Curry leaves - few

Method:
Wash and rinse the lentils. Add water, turmeric and a drop of oil. Pressure cook till soft but not mushy. When the pressure is released, prepare for the tempering - heat the remaining oil in a small saucepan. When hot, add mustard seeds. When they splutter, add broken red chillies, curry leaves, asafoetida, cumin. When the cumin pops, add grated ginger, black pepper powder, cumin powder, red chilli powder. Add the cooked dal and mix well. Now add the spinach or cooked vegetables, salt and let it simmer. Adjust the water if required. When it comes to a slow boil, check for the salt and adjust. Add coconut, cilantro and mix well. Turn off the heat. After 10 - 15 minutes, add the lime juice and mix well. Serve warm with rice. This can be eaten with chapathi or rotis too.

Notes:
If you use spinach or any other greens like I did, there is no need to precook it. It gets cooked pretty fast unless it is a tough green like kale.

Enjoy.
Pin It

Thursday, April 12, 2012

Potato Patty / Aloo Tikki

There are too many appetizer recipes that are based on potatoes. If you think about it, these are really versatile and their advantage is the ability to absorb flavors. And they are cheap too if you want to feed a crowd. For some reason, I had never made aloo tikki before. We South Indians prefer to make bonda or deep fried fritter using potato stuffing rather than this. I made this since it consumes lot less oil and gets done very fast too.
One Year Back - Honey Cardamom Snack Cake, Chutney Powder Version 1
Two Years Back - Baklava
Ingredients: 
Potatoes - 3 medium
Frozen peas - 1 cup
Red Onion - 1/2 of a medium one chopped fine
Oil - 3 TBSP divided use
Ginger - 1/2" piece grated
Cumin powder - 3/4 tsp
Coriander powder - 3/4 tsp
Garam Masala - 1/2 tsp
Green Chillies - 3 - 4 sliced very thin
Turmeric powder - a generous pinch
Salt - to taste
Lemon/Lime juice - 1 - 2 TBSP
Chickpea flour / besan - 2 TBSP
Cilantro - 2 TBSP chopped

To Serve:
Tamarind Date Chutney

Method:
Boil potatoes with skin. Peel and mash when it is still warm. In a small pan, heat 1 TBSP oil. When hot, add grated ginger, chopped chillies followed by onion. Sprinkle a bit of salt. Add turmeric, spice powders, garam masala. Mix well. Let the onions cook. In the meantime, microwave the peas for 2 - 3 minutes. Add the peas to the onion and mix well. Add cilantro and turn off the heat. When it is cool enough to handle, add this mixture to the mashed potatoes. Add besan/chickpea flour, lemon/lime juice and mix with a fork or by hand. Check for the salt and add if needed. Divide them into 12 lime sized balls.
Take a shallow skillet. Heat it on medium. Brush the whole skillet with 1 TBSP of oil. Take the balls of veggie mixture and flatten a bit to make them patties. Place them on the skillet and let it stay for 2 minutes or so. Flip them and repeat the process on the other side too.

Everything is already cooked in the mixture except for the chickpea flour. Reason for toasting is to get the char and make it stay as one piece. Repeat with the remaining. I had to do it in two batches but I didn't use 2 TBSP of oil at all for that. Many people use lot more oil than what I have mentioned here. Serve hot with the chutney or even ketchup.

Enjoy.
 
Pin It