Showing posts with label appetizer. Show all posts

Monday, April 22, 2013

Pav Bhaji / Indian Sloppy Joes

Recently, I had been to a birthday party where, I met someone who knows about my blog. He asked how the blogging was going and I had to admit that I haven't been baking too many things lately and not blogging. Reason? diversion. Many to mention I should say. That probably explains how I had posted the Pav Bun recipe almost 3 years back and never posted the dish that is served with - Bhaji or vegetable gravy. When I did make it this weekend, I did not have enough time to make the buns myself so used the store bought Kaiser rolls. This is one of the street foods of India particularly Mumbai/Bombay area that is comparable to sloppy joes.
One Year Back - Spicy Whole What Onion Batter Bread
Two Year Back - Apricot Chutney
Three Years Back - Whole Wheat Savory Tomato Scallion Bread
Ingredients:
Potatoes - 3 medium
Cauliflower - 1 medium head cut into florets
Green Bell Pepper - 3
Red Onions - 2 medium
Tomatoes - 4 medium
Green Peas - 2 cups (I always use frozen)
Optional - You can add few more kinds of vegetables like beans and carrots
Oil - 3 TBSP (You can add even more)
Ginger - 1" piece grated
Garlic - 3 - 4 cloves grated or minced
Salt - to taste
Turmeric - two generous pinches
Red Chilli powder - 1 heaping tsp (depends on how hot you like)
Coriander powder - 1 tsp
Pav Bhaji masala powder - 3 - 4 TBSP depending on how strong it is. (I use store bought any brand will do)
Amchoor powder / Dry mango powder - 3/4 - 1 tsp
Cilantro - 4 TBSP chopped.

Method:
Boil potatoes in a pressure cooker. Peel the skin and mash coarsely. Chop all the rest of the vegetables very finely. I use a food processor fitted with chopping blade to make it easier. I even run the green peas through it for few pulses. Heat oil in a pan. When hot, add ginger and garlic followed by chopped onions. Sprinkle some salt, turmeric and let it cook. When onions are cooked, add green bell pepper. Mix well and give it few minutes to soften. Then, add all the other chopped vegetables except tomatoes and potatoes. Mix often and add about a cup of water or more if needed. Keep stirring frequently to prevent burning (or use twice the amount of oil and it will not stick so easily). When all the vegetables are soft, add tomatoes, red chilli powder, amchoor powder, coriander powder and pav bhaji masala powder. Mix well and bring it to a simmer. Add mashed potatoes, mix well. Adjust the salt if needed. Simmer for 5 minutes and garnish with cilantro. Turn off the heat. Serve with toasted Pav or hamburger buns.
If not for committing to post on weekend cooking with  Srivalli  and  Vaishali, 
I would not have posted this either like many other recipes. You can't blame when I worked in the yard for 5 hours building brick edges around the trees. Could you?

Enjoy.
Pin It

Friday, December 28, 2012

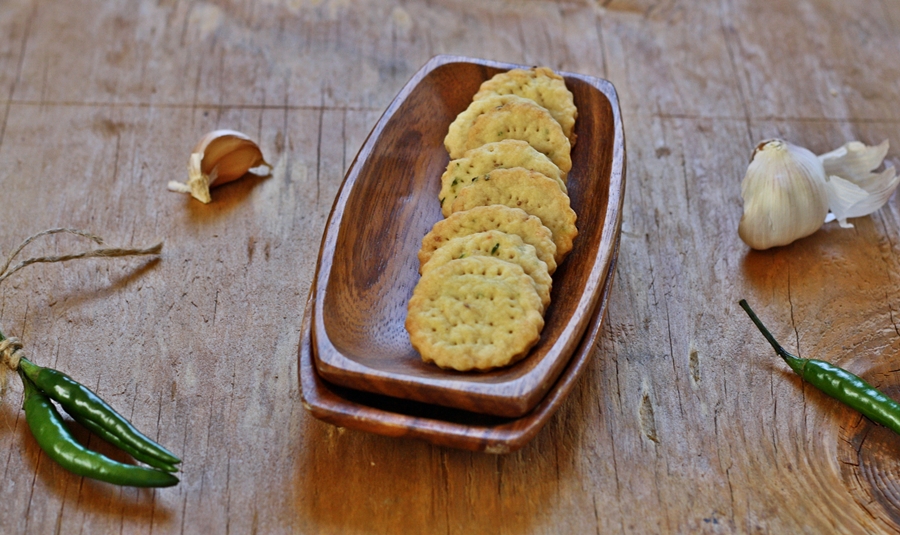
Chilli Garlic Crackers

This year's bake-a-thon has not been hectic because I decided to post just 3 times a week. But, it has been hectic in another way and hard for me to manage. Too many people went on vacation at work and I had to share their load of work with others who were working. Along with that, I took few projects at home and got busy with them.  With all these activities, I managed to bake whatever I found easy and didn't put too much creativity into them. Here is one of them where I took time and used the base of a tart dough recipe and converted them into a savory cracker.
One Year Back - No Knead Bread Sticks, Vegan Banana Chocolate Cake (lowfat)
Two Years Back - Rava Laddoo
Three Years Back - Cake Decorating Basics - Part 9
Ingredients: 
All purpose flour - 1 1/4 cups
Sugar - 2 tsp (optional but brings the flavors well)
Baking powder - 1/2 tsp
Salt - 1/4 tsp + a generous pinch
Butter - 3 TBSP cold cut into few cubes
Canola or Olive oil - 2 TBSP
Cold Water - 3 TBSP (Start with 2 TBSP and add the final TBSP if necessary)
Green chillies - 4 - 5 (I used 4 and they weren't that spicy for an Indian palate)
Garlic - 2 pods

Method:
Make the dough:
Take flour, salt, green chillies, garlic, baking powder, sugar into the bowl of a food processor fitted with chopping blade. Pulse till garlic and chillies are minced and mixed uniformly. Add butter cubes and oil. Pulse to get butter incorporated. Do not pulse too much and make sure there are tiny flakes of butter left as chunks. Add water and pulse till you get the crumbly dough. If you can make a ball out of it (not a smooth one though), it is done. Take it out and flatten it into a disc. Cover with plastic wrap and refrigerate for at least 3 hours or overnight. I felt the dough was easy to handle when it had chilled overnight in the refrigerator.

To Bake:
Preheat the oven to 350 F. Adjust the oven racks into the lower most and middle ones. Take out the dough from the refrigerator and let it sit 5 minutes at room temperature. Line two large baking sheets with parchment paper. On a lightly floured surface, roll the dough fairly thin. You can dust the top surface with flour if it is sticking to the rolling pin. Roll it thinner than 1/4" almost to 1/8" thickness. Cut with biscuit cutter or any other cookie cutter. You can also just cut them into squares or rectangles if that is easy for you. Dip a fork in flour and pierce it uniformly all over the cut cracker dough. Gently transfer them to the baking sheet and bake for 12 - 15 minutes. You will be baking the crackers at the lower most rack for the first 12 minutes. Then transfer it to the upper rack for the remaining 3 minutes. It all depends on how thin you have rolled the crackers and how big the area of the cracker is. Do a test batch and go from there. Cool on the wire rack and you can either serve them warm or cold. They become flaky and perfect to go with a cup of coffee or tea. Great for cocktail parties or topped with cheese for those cheese lovers out there.

Notes:
You could add your choice of herbs here if you wish but I kept them simple. For cheesy crackers, fold in half a cup of Parmesan cheese while making the dough.

Check out what my friends are baking -  Preethi, Veena, Priya, SrivalliSumana and Jayasri.

Enjoy.
Pin It

Sunday, July 15, 2012

Maddur Vada / Deep fried Spicy Onion crackers

Every place is well known for something or the other. It could be 'Taj Mahal' of Agra, could be 'White House' of Washington. At the same time, every place is (most of them at least) famous for some kind of food. Philadelphia is famous for Cheesecake, Bombay/Mumbai is famous for Pav Bhaji, Vada Pav. Mysore that is my home town (used to be, not anymore) is famous for 'Mysore Masala Dosa' and this place called 'Maddur' which is the center point of the route between Mysore and Bangalore is famous for these Maddur Vada or deep fried onion crackers. Can you believe that a handful of people make a living out of making these and selling at train stations and bus stands in this town.

There could be a number of recipes of the same floating around. I have worked on this recipe for few years now to get the perfect consistency I like basing my Father-in-laws's recipe. His recipes are one in kilograms, one in handful, one in numbers. I have come up with this fool proof recipe where the measure of ingredients is an easier one. And whoever has eaten this at my parties have loved it. I am posting this on the request of a reader. If not, I wouldn't have made them for no reason. These are quite addictive. You cannot stop at one. I can bet on that. One of my neighbors who doesn't care much about Indian food loves this so much, she remembers this more than any other food I have fed her.

One Year Back - Vegan Soudough Applesauce Pancakes
Two Years Back - Roasted Red Bell pepper Soup
Ingredients: 
Butter - 1/2 cup melted (1 stick)
All purpose flour - 1 cup
Fine Soji / fine semolina - 1 cup
Rice flour - 1/2 cup
Coarse Soji / Upma rava - 1/2 cup
Red onion - finely chopped and measured 2 cups
Green chillies - 30 chopped fine (Yes, no typo. You need this much and is not very spicy - See Notes)
Salt - 2 - 2 1/2 tsp or per taste
Cilantro - 1 cup chopped and measured
Oil - for deep frying

Method:
Add all the flours to the melted butter. Mix with a fork. Add green chillies, onions, cilantro, salt and mix. The whole mixture will be very crumbly. Add little bit little water about 1 TBSP at a time and make a stiff dough. Heat oil in a pan. It is better to take a wide pan instead of a deep one for this. Heat to medium heat. You don't want to fry these in very hot oil so it cooks on top and stays raw inside. On a wax paper or a ziploc cover, spray vegetable oil spray. Make small lime sized balls of the dough and place on the greased wax paper. Flatten it using the palm. You can make them thick but I like them thin. Make them as per your taste. Gently remove them from the wax paper and slide it into oil from a side. Deep fry few at a time and turn once or twice. When they are golden, remove them and drain them on a paper towel. Lot of people serve this with coconut chutney, but I like it as is. This can be used for up to 3 days at room temperature in a closed container if you can really save it till then. For this batch, I got about 40 vadas and if you make them thicker and bigger, you might get just 30.

Notes:
When you fry chillies, it loses quite a bit of spiciness. Frying behaves the same way pickling process does to any chillies. I used thai peppers I grew at home. If you use different kinds of peppers, use accordingly. You might need same amount of cayanne pepper (fresh ones, not the powder) and less of Jalapeno or serrano. You could use very hot oil in place of butter if you want to make a vegan version of it.

Enjoy.

Pin It

Tuesday, July 10, 2012

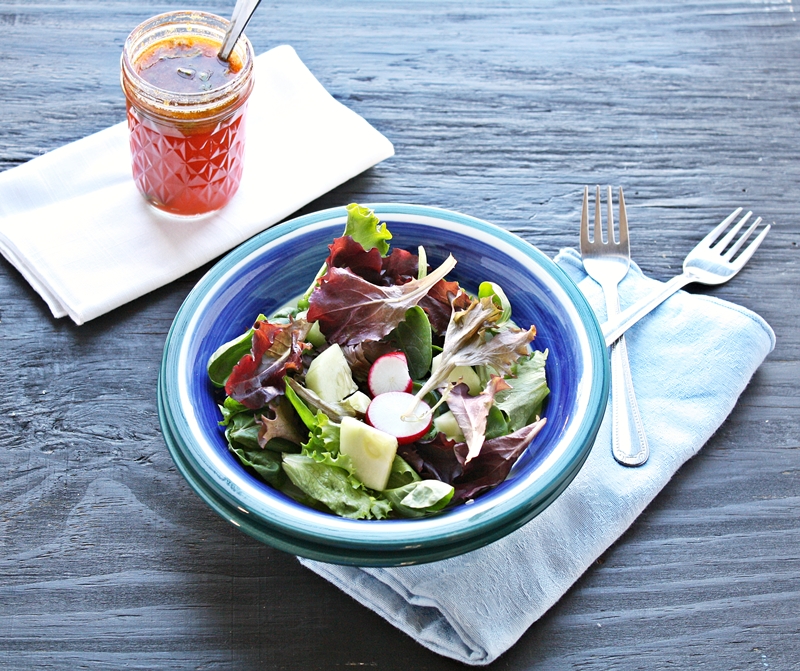
Strawberry Balsamic Vinaigrette

My 7 year old reads a lot. To encourage her reading passion, I go every week to the library and get her different books. Last week, I got her Harry Potter - the first book in the series. It is quite big for a 7 year old to read and to encourage her, I started reading her one chapter every day. I realized how much I enjoyed reading before having kids and getting busy with work and other stuff. When I told her that I probably should stop spending time on this blog and read regularly, she said, do half and half. That was very sweet of her saying not to stop writing this blog. Don't you think?

Anyway, coming to the point of this post, I had seen a bottle of raspberry vinaigrette at my work refrigerator. Someone had kept it there and it caught my attention because it said it was fat free. When I checked the ingredients, it was so high in sugar that I thought it was not healthy at all. Fat in moderation actually is good for us. I made this vinaigrette using the famous combination of strawberries and balsamic vinegar and used the strawberry preserve in it. You will find that this has half the fat as a regular vinaigrette. In any vinaigrette, oil is twice the quantity of acid but I have used equal quantities in this more like a marinade.
One Year Back - Vegan Carrot Quick Bread
Two Years Back - Chocolate Zucchini Cake
Ingredients: 
Extra virgin Olive Oil - 1/4 cup
Balsamic Vinegar - 1/4 cup
Salt - to taste
Hot sauce - 1 tsp (or black pepper to taste)
Strawberry Preserve - 1 heaping TBSP
Orange juice - 1 TBSP (Or water, apple juice anything works)
Method:
Mix all the ingredients and whisk to combine. Use with your favorite salad.
You could use fresh strawberries instead of the strawberry preserve. In that case, omit orange juice completely. Mash about 1 1/2 TBSP of strawberries chopped fine and add about 2 tsp of sugar.

Enjoy.
Pin It

Wednesday, June 20, 2012

Super Thick Tomato Garlic Flat bread

To use up a bottle of tomato juice that was opened, I made this bread. Not that I have not made a tomato flat bread before, but with slight variations. This is a variation of Tomato Mint Focaccia. Goes very well with a bowl of soup or as a savory accompaniment for evening Tea.
One Year Back - Onion Creamcheese spread
Two Years Back - Quinoa Chickpeas Pulav
Ingredients:
All purpose flour - 3 3/4 - 4 cups (Start with 3 3/4 cups)
Tomato Juice - 1 1/4 cup (Canned or bottled warmed)
Salt - 1 tsp (See Notes)
Olive Oil - 1/2 cup divided use
Active dry yeast - 2 1/4 tsp or 1 packet
Garlic powder - 1 tsp
Italian seasoning - 2 tsp rubbed between the palms
Red chilli flakes - 1 tsp (optional)
Method:
Place all the ingredients reserving 1/4 cup of olive oil in a bread machine and set the dough cycle. The dough should be tacky at the end of the first kneading cycle. If it is sticky, use more flour. When it completes, turn off the machine. Take a 13 X 9 pan and brush it with 1 TBSP of olive oil. Place the dough on and spread it to cover the entire pan. This actually is a lot of dough for the 13 X 9 pan. If you want thinner flat bread, use a 15 X 10 pan. Poke holes to make lot of ridges and drizzle the remaining 3 TBSP of olive oil.  Cover and let rise for about 30 - 45 minutes or until puffy.

Towards the end of the rise period, preheat the oven to 400 F. Bake for 20 minutes. Cover loosely with aluminum foil and bake for another 10 - 15 minutes at 350 F. Remove from the oven and let it cool on the wire rack. Make sure you remove the bread from the pan within 10 minutes to prevent soggy bottom.

To make the dough by hand:
Follow the instructions given in this post. Make the dough and let the dough double in bulk before starting to pat it to the pan. And then proceed as explained above.

Notes:
If you are using fresh tomato juice, you will have to add about 2 TBSP of sugar and increase the salt to 1 3/4 tsp for this recipe. Also, you might have to adjust the flour to get the correct consistency since the canned tomato juice is pretty thick.

Enjoy.
Pin It

Sunday, June 17, 2012

Chickpeas & Cucumber salad with mint and garlic dressing

I love chickpeas. It can be in any form and I would eat it without hesitation. And one of the things chickpeas is used the most in Southern Indian households is in the use of salad called 'Sundal' in Tamil or 'Guggari' in kannada. I make quite a few of these since it is a nice source of protein for us vegetarians.
The moment I received the package of Roasted Garlic O Olive Oil and White Balsamic vinegar, courtesy of O Olive Oil , I knew I am making a salad out of the two products. This product review organized by 'Erecipecards' had to have a recipe using the products given. So, here is the easy, one pot meal kind of salad that is not only filling but has all the goodness of veggies and beans.
One Year Back - Eggless Coconut Bundt Cake
Two Years Back - Easy Mango milk shake
Ingredients: 
Chickpeas - 2 cups dried (Or use 4 cans of 15 Oz rinsed and drained)
English Cucumbers - 2 chopped into chunks (if using regular cucumbers, peel and seed before chopping and use about 3 - 4)
Olives - 1/2 cup halved

For the dressing:
Roasted garlic O Olive Oil (Or extra virgin olive oil) - 4 TBSP
White Balsamic vinegar (or vinegar of your choice) - 4 TBSP
Salt - 1 tsp
Sugar - 1 TBSP
Garlic - 2 pods (Increase it to 5 if using regular extra virgin olive oil)
Mint leaves - Loosely packed 1/4 cup
Green chillies - 3 - 4 (Or black pepper to taste)


Method:
If using dried chickpeas, soak them overnight in enough water. Drain and add fresh water and pressure cook till soft. Drain and place it in a bowl. When the chickpeas have cooled to room temperature, add cucumbers and olives to the same bowl.
To make the dressing, take all the ingredients mentioned in 'For the dressing' section in a small jar of a blender. Turn it on to get a paste consistency. Pour it on the salad ingredients and toss. Adjust the salt if required. Let it sit for an hour in the refrigerator before serving.

Notes:
You can add red onions and even tomatoes to it. Dressing was perfectly balanced with flavors. You could use up to 1/2 cup of olive oil as per the general dressing formula. I didn't want so much fat in the dressing so used the same quantity as the vinegar. If you are using canned chickpeas, go easy on salt.

Enjoy.
Pin It

Sunday, May 6, 2012

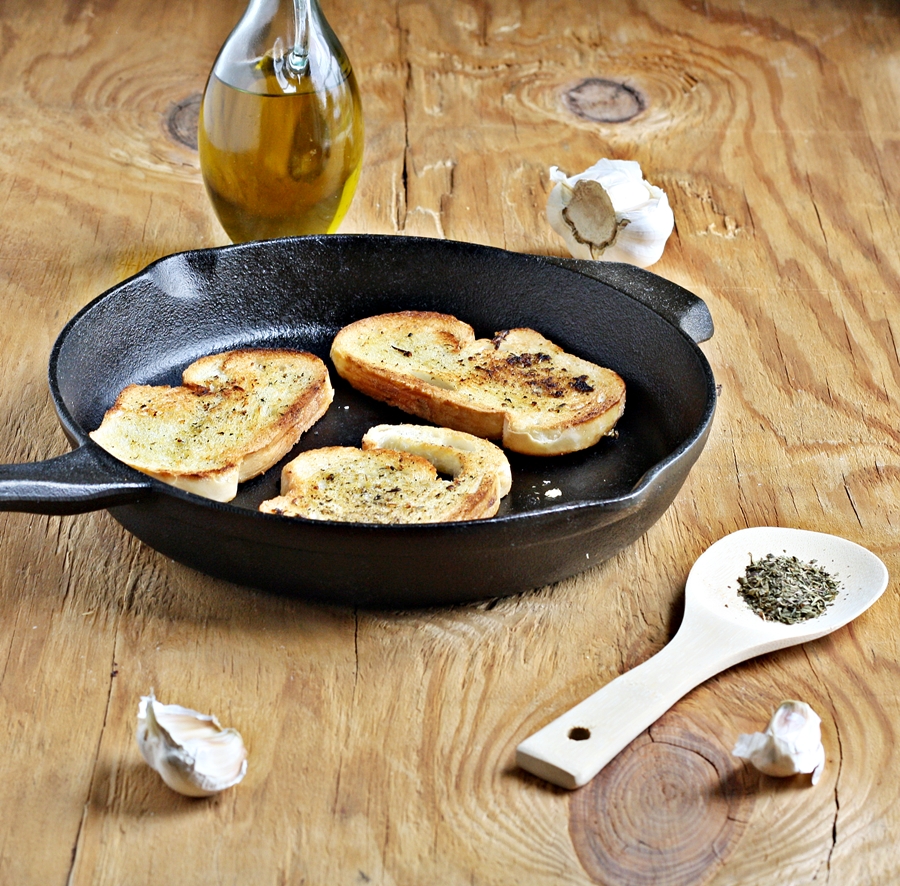
Garlic Toast

It was at my brother-in-law's place that I ate Texas Toast for the first time. It was salty, it was buttery, it was garlicky. I fell in love with that. For some reason, Texas is associated with everything big. This is my attempt to get the same taste, but with fewer calories than a traditional Texas toast. When you see how easy it is to make, one has to wonder why people buy these things frozen instead of making it fresh.
One Year Back - Vegan Sourdough Scallion Pancakes
Two Years Back - Fenugreek Curry / Menthyada Gojju
Ingredients: 
Olive Oil - 1/4 cup
Salt - to taste (little more than 1/4 tsp should be perfect)
Black pepper powder - 1/2 tsp or to taste
Cayanne pepper - 1/2 tsp or to taste
Italian seasoning - 1 tsp
Garlic - 5 cloves finely grated
Italian or french bread - 8 slices (Or you could use white bread) - See Notes

Method:
In a bowl, mix all the ingredients except the bread slices. Whisk to combine. Heat a skillet at medium high heat. Brush one side of all the slices with the mixture. When the skillet is hot, place the bread slices on the skillet so the side that is brushed with the mixture is facing down. Brush the top of the slices with the same mixture. After 2 - 3 minutes, flip and toast on the other side till golden. Repeat with all the slices. If you like it, you can toast it in the oven. At 375 F for about 10 - 12 minutes. I used the skillet to do it faster since I was just toasting few slices. If you do use the oven, make sure you flip them half way through to get the toast on both sides evenly.

Notes:
Since I was using baguette kind of bread, I got 8 slices for this proportion. If you use store bought white bread slices, you might find the mixture sufficient only for 5 - 6 slices.

Enjoy.
Pin It

Thursday, April 12, 2012

Potato Patty / Aloo Tikki

There are too many appetizer recipes that are based on potatoes. If you think about it, these are really versatile and their advantage is the ability to absorb flavors. And they are cheap too if you want to feed a crowd. For some reason, I had never made aloo tikki before. We South Indians prefer to make bonda or deep fried fritter using potato stuffing rather than this. I made this since it consumes lot less oil and gets done very fast too.
One Year Back - Honey Cardamom Snack Cake, Chutney Powder Version 1
Two Years Back - Baklava
Ingredients: 
Potatoes - 3 medium
Frozen peas - 1 cup
Red Onion - 1/2 of a medium one chopped fine
Oil - 3 TBSP divided use
Ginger - 1/2" piece grated
Cumin powder - 3/4 tsp
Coriander powder - 3/4 tsp
Garam Masala - 1/2 tsp
Green Chillies - 3 - 4 sliced very thin
Turmeric powder - a generous pinch
Salt - to taste
Lemon/Lime juice - 1 - 2 TBSP
Chickpea flour / besan - 2 TBSP
Cilantro - 2 TBSP chopped

To Serve:
Tamarind Date Chutney

Method:
Boil potatoes with skin. Peel and mash when it is still warm. In a small pan, heat 1 TBSP oil. When hot, add grated ginger, chopped chillies followed by onion. Sprinkle a bit of salt. Add turmeric, spice powders, garam masala. Mix well. Let the onions cook. In the meantime, microwave the peas for 2 - 3 minutes. Add the peas to the onion and mix well. Add cilantro and turn off the heat. When it is cool enough to handle, add this mixture to the mashed potatoes. Add besan/chickpea flour, lemon/lime juice and mix with a fork or by hand. Check for the salt and add if needed. Divide them into 12 lime sized balls.
Take a shallow skillet. Heat it on medium. Brush the whole skillet with 1 TBSP of oil. Take the balls of veggie mixture and flatten a bit to make them patties. Place them on the skillet and let it stay for 2 minutes or so. Flip them and repeat the process on the other side too.

Everything is already cooked in the mixture except for the chickpea flour. Reason for toasting is to get the char and make it stay as one piece. Repeat with the remaining. I had to do it in two batches but I didn't use 2 TBSP of oil at all for that. Many people use lot more oil than what I have mentioned here. Serve hot with the chutney or even ketchup.

Enjoy.
 
Pin It

Wednesday, March 28, 2012

White Bean Dip/Spread with Indian spices

Majority of my guests in a party are Indians. Very rarely I invite some of my neighbors for the birthday party and at that time, I make at least couple of dishes with very less heat or non Indian dishes. But this time, everyone was Indian, so I went for all Indian menu except for a few desserts. When I made this dip along with the other dip, I made them have Indian flavor and a nice heat. Yes, this is very much similar to hummus, I agree. But, it is not. I have Indian spice powders in it and that makes a big difference in taste. Cream cheese makes it rich, but not overpoweringly so.
One year back - Granola Bars
Two years back - Avocado Focaccia, Vegan Rice crispy Treats
Ingredients:
Navy beans -1 cup (dry soaked overnight or two cans of cannelini beans rinsed and drained)
Garlic - 2 pods
Salt - to taste
Red chilli powder - 1 tsp or to taste
Chat masala - 2 - 3 tsp as per taste and heat of the powder
Cilantro - 1/4 cup chopped
Lime juice - from half a lime (about 2 TBSP)
Cream Cheese - 1 block of 8 Oz. I used 1/3 fat one but fat free works too
Water or buttermilk - 1/4 cup or as needed

Method:
If using dry beans, soak overnight. Pressure cook till soft. When cool enough to handle, drain all the water from it. You could reserve some of it to use while grinding. If you are using canned beans, rinse and drain the beans. Take all the ingredients except water or buttermilk and run it in food processor to get a smooth paste. Add water or buttermilk to loosen up as per the requirement. If you keep it thick, this can be used to make sandwiches. Refrigerate till serving. Serve with toasted pita bread or toasted bread or crostini. If you make this a little thin, you can use it as a dip for veggies.

Enjoy.
Pin It

Monday, March 26, 2012

Spicy Cashew, Cilantro Dip (For veggies and crostini)

In any party that has mainly Indian food, appetizer becomes a big thing. It is one of the difficult courses too since most of them are fried and if you are the host, you cannot really stand in front of the stove frying the appetizer. I usually have something that is baked for the appetizer just so I get to take care of other important things at the party. And when I usually cook for a party, there are at least two appetizers, 2 side dishes to go with rotis/flat bread, two to three different kinds of rice dishes and couple of desserts. And I make all of them myself without getting anything from outside. So, coming up with easy stuff to feed the crowd is as important as any aspect of the party or more than any I should say. This was one of the dips I served for my kids' birthday party. I made the dip the previous day and few hours before the party, toasted the italian bread and had the crostini ready.
One Year back - Swiss Chard Pasta with Indian spices
Two years back - Pasta with marinated, grilled tofu, Long beans in Peanut sauce
Adapted from here.
Ingredients:
Cilantro - 1 bunch or about 2 - 2 1/2 cups chopped (include stalk part too)
Cashews - 1 cup lightly toasted
Sour cream - 1/2 cup (I used fat free)
Ricotta cheese - 1 cup (I used part skim but fat free should work fine too)
Green chillies - 8 or as per taste (you could use Jalapeno peppers too about 1 or 2)
Sugar - 1 TBSP (optional, but gives a very nice balance)
Salt - to taste
Lime juice - from half a lime (about 2 TBSP)
Garlic - 2 pods

Method:
In a skillet, toast the cashews lightly. Set aside to cool down. In a food processor or a blender, take all the ingredients including cooled cashews. Run the machine till you get the paste. You can adjust the thickness by adding more water or sour cream. Check for the salt and adjust if needed. Refrigerate at least 2 hours before serving.

To serve:
You could serve this with pita bread or veggies or crostini. I toasted italian bread that was lightly brushed with olive oil at 375 F for 15 minutes to get the toast.

Enjoy.
Pin It

Monday, March 12, 2012

Vegan Potato Pot pie topped with Potato Biscuit

There are a few kitchen staples in almost every home. One such ingredient is 'Potato'. It is one of those vegetables which is not only versatile, but also absorbs flavors like a sponge. 
 
When I migrated from India 13 years back, the only potato I knew about was the kind they call 'White potatoes' here in the U.S. But only when I was invited to participate in thie month’s Kitchen PLAY Progressive Paryty did I learn that there are actually seven unique types  of potatoes. You can read all about different kinds of potatoes here.
Each potato type has its own use. For example, I have used two kinds of potatoes in this recipe. Red potatoes were used in the vegetable mixture because they can retain their shape even after cooking. I used white potatoes wherever I needed the potato mashed or pureed since they give a very creamy flesh when mashed.


I sometimes use a potato in soup to make it thick instead of using other thickeners. It is better in nutrition than adding flour to thicken the broth or soup. Potato flour makes an excellent egg substitute too. Use potato flour instead of corn starch to replace egg.
There is some confusion about the nutritional benefits of potatoes.  For instance, did you know that a medium potato eaten with its skin on provides nearly half your daily value of Vitamin C? And only 110 calories? I didn’t!  If you are interested in learning more about all potatoes have to offer, you can learn more about them here.
Coming to today’s recipe, I made this as an amuse bouche, baked in individual ramekins. If you want  to make it as an entree, bake the filling in a casserole topped with the potato biscuits. Either way, it is delicious!


Ingredients: (Makes 8 - 10 ramekin sized pot pies)
For the filling:
Olive oil - 2 TBSP
Red Onion diced - 1/2 cup
Celery - 1 rib sliced
Carrot - 1 medium peeled and diced
Garlic - 1 pod smashed or minced
Red Potatoes - 3 medium cut into 1" cubes
Frozen peas - 1/2 cup
White potato - 1 small boiled and peeled and mashed to get 1/2 cup mashed potato
Sage - 2 TBSP fresh or 1 TBSP dried (Or use your favorite herb)
Water or Vegetable broth - 1 1/2 cups - 2 cups
Salt - to taste
Pepper - 1 tsp crushed or as per taste (Or use red chilli flakes / Cayanne )

For the pastry:
All purpose flour - 1 1/2 cup + 1 TBSP divided use
Sugar - 4 tsp (optional)
Baking Powder - 4 tsp
Salt - 1/2 tsp
Cooked mashed potato - 2/3 cup (Use white potato)
Olive Oil - 4 TBSP
Water or milk - 2 - 6 TBSP as needed to make the dough
Red chilli flakes - 1/2 tsp (optional)
Method:
Make the filling:
Heat oil in a pan. When hot, add garlic, followed by chopped onions. Sprinkle some salt and let it wilt. Add celery, carrots, peas and red potatoes. Add crushed black pepper to taste, sage and water. Cover the pot and let all the veggies get tender but not mushy. When the vegetables are done, remove few TBSP of water from the pot and mix 1/2 cup of mashed potatoes and pour it back to the vegetable mixture. This acts like thickener and replaces the traditional roux. Bring it to a gentle simmer and adjust the water or vegetable broth if needed to get the gravy consistency that is needed. Pour into the small ramekins filling only 3/4 full. Mix remaining 1 TBSP of flour with 1 - 2 tsp of water to make a thin paste for the glue.

Make the dough for the biscuits:
Preheat the oven to 400 F. In a bowl, take all the ingredients mentioned above under 'For the pastry:' except milk. Using a pastry blender, mix all of them till the mashed potato is uniformly mixed with flour. Add water or milk 1 TBSP at a time to make the dough. Roll it on lightly floured surface 1/2" - 1/3 " thick. Cut with a biscuit cutter that is little larger than the ramekin you are using. I didn't have a biscuit cutter larger than the ramekin, so used the knife to cut it to the desired size.

Top the Ramekin with the cut dough. Brush the sides of the ramekins with the glue that you made with flour and water. Press the dough to the sides of the ramekin. Repeat with others. Cut the dough to vent the steam. Place all the ramekins on a cookie sheet. Bake in the oven for 15 - 20 minutes or until the biscuit top is golden. You could brush the crust with egg wash to make the crust look beautiful or brush with some milk. Serve hot.

Notes:
Since the pastry is low fat one and has baking powder in it, it is not crispy like a puff pastry is. Having said that, it is still flaky, but soft on the inside and crispy outside. Inspiration to making potato biscuit came from Paula Deen's sweet potato biscuit recipe.

You can subscribe to weekly recipes featuring potatoes here. Link to U.S Potato Board's facebook page can be found here.

Exciting Opportunity:
The US Potato Board is also sponsoring a wonderful giveaway here at Kitchen PLAY. Simply recreate any one recipe from this month’s Progressive Party, post about the experience on your blog and provide a link to your post on Kitchen PLAY to enter. All qualifying bloggers in each course will be entered to win $100 (6 prizes total).  The deadline is April 15, 2012. Please review the complete contest rules before entering. Good luck!

Disclaimer: I was compensated to write this post.

Pin It

Thursday, March 1, 2012

Cream of Tomato Soup in veggie base

There are a couple of things my kids request me to make often. There are some common to both requests like pizza, noodles and pasta. And then there are individual requests. My younger one requested for 'Tomato Soup'. Her request went something like this "Mommy, can you make soup today for lunch? Make sure it is tomato soup". I had no choice but to make tomato soup, but I added quite a few veggies to make it Vegetable tomato soup. I almost didn't want to post this since I couldn't get a decent picture. It has been raining for the past two days here and not much sunlight.
One year back - Sourdough Biscuits
Two years back - Hyacinth beans stir fry/ Chapparadavarekayi palya
Ingredients:
Red Onion - 1 large chopped
Celery - chopped 3/4 cups (2 ribs approximately)
Carrots - 3 medium peeled and chopped
Potato - 1 medium peeled and chopped
Tomatoes - 1 28 Oz can of whole peeled tomatoes with juice (Or about 2 pounds of tomatoes blanched and skin peeled)
Garlic - 3 pods crushed
Evaporated milk - 14 Oz can or about 1 1/2 cups of heavy cream
Water - 3 cups or as needed to get the desired consistency
Salt - to taste
Black pepper - 1 tsp - 2 tsp crushed or to taste
Olive oil - 2 TBSP
Sugar - 1 TBSP or as per taste (optional)

Method:
Heat oil in a pan. When hot, add garlic followed by onion. Stir and add a little bit of salt and let it wilt. When onions are half done, add celery, carrots, potatoes. Add about 2 cups of water and let all the vegetables become soft. Add the contents of the peeled tomatoes, sugar, black pepper. Let it all come to a simmer. You can crush the tomatoes with the back of the ladle to disperse them. When the mixture comes to a simmer, turn off the heat. When it is cool enough to handle, take the contents in a blender in batches and puree them. Transfer back to the pot and add the evaporated milk, 1 more cup of water and bring it to a slow boil. Adjust the salt and pepper if needed. Serve hot, warm with some sour cream on top if desired.

Enjoy.
Pin It

Monday, February 27, 2012

Green Peas Hummus

Some recipes intrigue because of the ingredients used. I came across such a recipe for Lentil Hummus in one of Martha Stewart's magazine. I have been making hummus for quite a while now. But, I had not seen the use of nut butter in any of them. This recipe used cashew butter with lentils. I made my own version of it using Green peas and used almond butter since that is what I had on hand. Nutritionally, it is better than traditional chick peas hummus since green peas has more fiber than chick peas. It tasted delicious and that is what matters the most. Don't you agree?
One year back - Sourdough Semolina Bread
Two years back - Vegan Apple Date Muffins
Ingredients:
Cooked green peas - 2 cups (Use canned or frozen cooked or dried, soaked and cooked)
Almond butter - 1/4 cup (Or any other nut butter without sugar)
Garlic - 2 pods crushed
Olive Oil - 1 TBSP
Lemon juice - 2 TBSP
Hot sauce - 1/2 tsp or to taste
Salt - to taste
Red chilli flakes - as per taste

Method:
Take all the ingredients in a food processor except red chilli flakes. Run it until smooth. Add chilli flakes and swirl once more. Serve with crackers or toasted pita bread.

Notes:
If using canned peas, rinse and drain well and use. Go easy on salt in that case. If it is hard to run the food processor, add more olive oil 1 TBSP at a time to get a smooth texture.

Enjoy.
Pin It

Thursday, January 19, 2012

Maple Sesame dressing

Couple of people at my work keep salad dressings in the office refrigerator. I am always curious about the ingredients on any processed, packaged foods since it is good to know what is alright to buy when pressed for time. This time, the bottle of salad dressing I picked to check the ingredients was a fat free raspberry dressing. It had so much sugar and ingredients that I could hardly pronounce, I was wondering what is the use of eating something like that and calling it healthy. Plus I don't understand how one can salad with the same dressing every day. Here is one more addition to the few salad dressings I have posted on the blog.
One year back - Vegan Mango Cake
Two years back - Butternut squash Pasta, Eggless Blueberry Coffee cake, Chewy Granola Bars
Adapted from - The book by Costco
Ingredients:
Sesame Oil - 4 TBSP
Rice Vinegar - 4 TBSP
Maple Syrup - 6 TBSP
Salt - 1 tsp or per taste
Hot sauce - 1 TBSP or per taste
Ground cumin - 1/2 tsp
Fresh cilantro - 1 TBSP chopped fine
Ginger - 1/2" inch grated and juice extracted

Method:
Grate ginger. Sprinkle tiny bit of salt on it. Let it sit for a minute or two. Take the grated ginger in your hands and squeeze the juice out of it. You should get about 1 tsp of juice roughly. Place it in a jar that you will be storing the dressing in. Add the remaining ingredients to the jar and cover and shake well. Use as needed. Refrigerator and use within a week.
Notes:
You could add about 2 TBSP toasted sesame seeds to the dressing.
Enjoy.
Pin It

Saturday, January 7, 2012

Quick and easy Salsa

Almost every person I have met in my life likes Salsa. It could be mild version or a fiery hot version, but they do like it. What's not to like in it anyway? Being used to moderately spicy food all my life, that is something I can enjoy when I am dining out. When I saw the title of Restaurant Style Salsa, it caught my attention. You might wonder why I haven't used the same title for this post. Because, I felt this salsa was way better than the restaurant one. It could be the addition of pineapple that did the trick or whatever, it was a big hit. Makes a huge amount, so unless you plan on eating two bags of chips to finish this salsa and gain few pounds, make it for company. All the folks who ate it loved it very much.
One year back - Sundried Tomato and Olive Bread
Two years back - Apple Butter Spice Bread
Adapted from Pioneer woman via Browneyedbaker
Ingredients:
28-ounce can whole tomatoes (peeled) with juice
1 14 1/2 ounce can diced tomatoes
1/4 cup chopped red onion ( 1 small red onion will do)
1 clove garlic, chopped
4 - 5 jalepeño, quartered and sliced thin or per taste
1/2 cup - 1 cup cilantro chopped roughly
Crushed Pineapple with juice - 1 cup or 8 Oz can
Juice from 1/2 a fresh lime
1/2 teaspoon salt
1/2 teaspoon granulated sugar
1/4 teaspoon ground cumin
Method:
Place all the ingredients in the bowl of a food processor fit with chopping blade. Pulse until desired consistency is required. Pulse less for chunkier salsa and more for a smoother version. Refrigerate for an hour before serving with chips. You might be tempted to add more salt, but when you are serving with chips which has quite a bit of salt, it balances out. So, eat with the chips and then adjust if required.

Notes:
Original recipe used two cans of diced tomatoes (10 Oz each). What I had was a 14 1/2 Oz can and I just added a cup of crushed pineapple to give that extra sweet and tangy taste along with compensating for the lack of 5 Oz of diced tomatoes. I also added more Jalapeno peppers since my tomatoes were not the kind with green chillies in them.

Enjoy.
Pin It

Saturday, December 31, 2011

Savory Onion, Apple Galette with yeast dough

Galette is nothing but a free form tart or single crusted pie. It is usually made with tart dough or sometimes pie dough, but there are recipes which use yeasted dough for galette. I wanted to use the dough that does not call for too much fat and here is what I have. You can vary the filling as per your taste.
One year back - Cake Decorating Basics - Part 10
Two years back - Rave Unde (Rava Laddoo)
Ingredients:
For the yeast dough:
All purpose flour - 1 cup + 1 TBSP (plus more for rolling)
Sugar - 1/2 tsp
Salt - 1/4 tsp
Instant or active dry yeast - 1 tsp
Warm water - 1/3 cup
Olive oil - 2 TBSP


For the filling:
Olive oil - 1 TBSP
Garlic - 1 clove minced
Red Onions - 2 medium sliced thin
Apples - 2 cored and sliced thin
Cilantro - chopped 1/4 cup or any other fresh herb of choice
Salt - to taste
Red chilli powder - 1/2 tsp or to taste (optional)
Red wine vinegar or lemon juice - 2 TBSP
Red chilli flakes to serve - optional
Method:
To make the dough:
Mix all the ingredients mentioned in the 'For the dough' section and knead for 4 - 5 minutes or until smooth. Add 1 TBSP more flour if needed to make a soft dough which is slightly tacky but not sticky. Cover and let rise for 45 minutes to an hour. Meanwhile, prepare the filling.

For the filling:
In a saucepan, heat oil. When hot, add minced garlic, sliced onions. Sprinkle some salt and let it wilt. When onions are almost cooked, add sliced apples, red chilli powder if using and mix. Let the apples cook till soft. Add the vinegar or lemon juice and lower the flame and let it all evaporate. Adjust the seasonings if required and add cilantro. Let it cool to room temperature.


To assemble:
Preheat the oven to 375 F. Divide the dough into two parts. Make a ball and let it rest covered for 10 minutes. On a lightly floured surface, roll each ball into 8 - 9 " circle. Circle need not be perfect. Top it with half the filling leaving 2" border around. Gather the ends and pleat and fold on the top of the filling so that the center is exposed.Place them on a baking sheet.

Bake in the oven for 25 minutes rotating half way or until golden. You could brush with egg wash to get a better looking crust, but I didn't do it. Cool on the wire rack and serve warm or at room temperature sprinkled with red chilli flakes if desired.

I am posting this as the post for bake-a-thon's day 29. My fellow bloggers doing it with me are - Preethi, Veena, Priya.
  
Enjoy.

Pin It

Friday, December 30, 2011

No Knead Bread Sticks

When I announced the Bake-A-Thon, I did not know that I would get sick with horrible cold and cough. Little did I know that I would need couple of visits to the dentist. So, I could not post for couple of days and catching up is not as easy as I thought. Here is the bread sticks that my kids love and good thing about this recipe is, it doesn't need any kneading.

One year back - Cake Decorating Basics - Part 9
Two years back - Rava Laddoo
Adapted from - King Arthur Flour
Ingredients:
Warm water - 3/4 cup
All purpose flour - 1 3/4 cup
Salt - 1/2 tsp plus more for sprinkling
Instant yeast - 1 1/2 tsp
Olive oil - 2 TBSP plus more for drizzling and for pan
Italian seasoning to sprinkle before baking (optional)

Method:
In a bowl, mix 2 TBSP olive oil, water, yeast, salt, flour with a wooden spoon. Mix till no dry flour is visible. This is a super sticky dough. Grease a 9 X 13 pan with olive oil. Dump the dough on to the pan and press to cover the entire pan. With a pizza slicer, score the dough into 8 or 10 pieces. Cover and let it rise for an hour or till puffy. Towards the end of rise time, preheat the oven to 375 F. Drizzle couple of TBSP of olive oil on the top, sprinkle with italian seasoning and coarse salt (optional). Bake for 25 minutes or golden. Remove from the oven and let it stand till it is easy to handle. Slice through the scored marks and stand the pieces on the cut side. Return to the oven to bake for 5 minutes for soft texture or 10 minutes for a little stiff bread sticks that is perfect for dunking in sauce. Serve warm with marinara sauce.

I am posting this as the post for bake-a-thon's day 27. My fellow bloggers doing it with me are - Preethi, Veena, Priya
Linking it up to Kid's delight - Vegan and egg less bakes hosted by Priya, started by Srivalli

Enjoy.
Pin It

Saturday, December 24, 2011

Chickpea crackers

Here comes a savory cracker recipe which is very easy to put together. You can flavor them the way you want and one good thing about these are they are not too rich.
One year back - Eggless peanutbutter swirled chocolate cake
Two years back - Cake decorating basics part - 3
Adapted from - King Arthur Flour
Ingredients:
All purpose flour - 3/4 cup
Chickpea flour / Besan - 1/4 cup
Sugar - 1 tsp
Salt - 1/4 tsp (See Notes)
Red chilli powder - 1/2 tsp or to taste
Garlic powder - 1/4 tsp - optional
Onion powder - 1/4 tsp - optional
Olive oil - 3 TBSP
Water - 2 - 3 TBSP as required


Method:
Preheat the oven to 325 F. Line a large baking sheet with parchment paper. Mix all the ingredients except water. Add water 1 TBSP at a time to make a dough. Dough need not be very smooth, a little bit crumbly will work too. On a lightly floured surface, roll the dough very thin (1/8") or make 12 X 12" square. Cut into 1 - 1 1/2" squares using a pizza cutter or a very sharp knife. Transfer on to the prepared baking sheet. These don't need too much space between them. As long as they are not touching each other, it should be fine. Bake for 10 minutes and then rotate the pan and continue to bake for 5 - 10 more minutes till lightly golden. They will get crisper after they cool down. Cool completely and store in an air tight container for several days.

Notes:
Original recipe suggested to sprinkle with some coarse salt which, I did not follow. I could have increased the salt by 1/8 tsp. Chilli powder was mild enough for us. You could add some herbs of your choice in addition to garlic and onion powder or instead of them.

24 days of the Bake-A-Thon are done. 7 more to go.  My fellow bloggers doing this are - Preethi, Veena, Priya

Enjoy.
Pin It

Sunday, December 4, 2011

Sweet and Spicy Almonds

You are standing in the line at the grocery store to pay. You see lot of candies, magazines on the rack next to the cashier. There lies small packs of different kinds of nuts. These are more noticeable during the holiday season. Have you ever picked them up? I have, and kept it back after checking the price. These glazed and toasted nuts are so easy to make at home, but cost quite a bit if bought. If you can make something in less than 5 minutes active time, I think you should never buy them, unless you are getting it for cheaper than the cost of the ingredients of course.
One year back - Dry Fruit Yeast Cake/Bread
Two years back - Eggless Pecan Pie Bars
Ingredients:
Whole Almonds - 1 1/2 cups
Sugar - 1/4 cup
Salt - 1/2 tsp
Water - 1 TBSP
Cayanne pepper - 1/2 tsp or to taste
Chat masala - 1 tsp or to taste (Optional, you could use any favorite spice powder instead)
Method:
Preheat the oven to 300 F. Line a large baking sheet with parchment paper or foil. If using the foil, lightly spray the foil with vegetable oil spray. In a saucepan, heat sugar, salt, cayanne, chat masala if using, water to a simmer. Stir so that sugar dissolves easily. When you start seeing bubbles at the edge of the pan, add almonds and stir with a wooden spoon so that all almonds get coated with the sugar spice mixture. When all the almonds are coated, turn off the heat and dump on the prepared baking sheet. Spread them so that they are in one layer. Bake for 12 - 15 minutes or until toasted. These don't taste good if they burn, so keep a close watch after 12 minutes. Cool in the pan on the wire rack completely. If clumped, break the almonds gently. Store in an airtight container. These are good on salads and they make great gifts for the holidays. These are good with some cold drink too or as a snack. You could make the same with walnuts, pecans or a combination of nuts.

Do drop in and check out what my Bake-A-Thon buddies are baking in their kitchens,
Susan of The WellSeasoned Cook,
Preethi of IsingCakes,
Veena Krishna Kumar of VeenasVegnation,
Priya Suresh of Priya's Easy N Tasty Recipes.

Enjoy.


Pin It

Friday, November 25, 2011

Caponata

Caponata is nothing but an italian side dish or cooked salad made with eggplants and capers. If you search for the recipe, you will get a lot of them with different variations. I looked up on foodnetwork website for this since I wanted to make it as a topper for the crostini. I did not use one recipe, but combined couple of them based on our taste preferences. We don't like celery and I omitted it. Among my visitors, there was someone who doesn't eat nuts, so omitted pine nuts. I however, increased the squash to compensate for not using celery. Overall, this recipe is based on Anne Burrel's Caponata recipe.

One year back - Coconut Chocolate Rolls/Buns
Two years back - Cake Decorating Basics - 1, Blondies from a Cake mix
Ingredients:
Eggplant - 1 large chopped into 1" cubes
Yellow squash or zucchini - 2 medium chopped into cubes (Or use part celery and just one squash)
Olive oil - 3 TBSP divided use
Salt - to taste
Red Onion - 2 medium chopped or sliced
Diced tomatoes - 1 15 Oz can with juice (Or use about 4 plum tomatoes)
Red chilli flakes - to taste (I used 1 TBSP and it was spicy and perfect for us)
Sugar - 2 tsp
Red wine vinegar - 3 TBSP
Capers - 1/3 cup
Green Pitted olives - 1/3 - 1/2 cup sliced
Golden raisins - 1/4 cups
Mint - chopped about 3 TBSP (Or use parsley)
Toasted pine nuts - 1/4 cup (I omitted since I wanted to keep it nut free)
Method:
In a skillet, heat 1 TBSP olive oil. Add eggplant chunks and stir. Sprinkle some salt and cover and let it cook stirring occasionally to make sure they don't burn. Set aside. In the same skillet or another one, heat the remaining two TBSP of olive oil. When hot, add chopped onions to the pan. Sprinkle some salt, add the squash pieces and celery if using and mix. Let it all cook. When the onions are cooked and squash is soft, add the eggplants, tomatoes, sugar, red wine vinegar, and chilli flakes. Let them simmer till almost all the water has evaporated. Add golden raisins, capers, olives. Mix well and adjust the salt if necessary. Add mint and mix well. Close the lid and turn off the heat after 2 minutes. When it cools to room temperature, store in the refrigerator. This actually tastes better after sitting in the refrigerator for a day. Heat lightly before serving. I served it on crostini as an appetizer.
Wondering what bread it is? it is an italian bread for which, I will post the recipe soon. And if someone wants to drool over this, here is another picture for you.

Enjoy.

Pin It