Showing posts with label snack. Show all posts

Monday, September 23, 2013

Pumpkin Chocolate Bars

My favorite time of the year has started. Autumn is my favorite time of the year. Even when the falling leaves leave the trees bare and the ground gets covered with dry leaves, it has its own beauty. Don't you think? And what other way to celebrate the start of the season by baking these pumpkin bars? For a foodie, it is perfect. These are soft cookie kind of bars but are a bit cakey. The original recipe was for the cookies with butter and different method of mixing and baking. I simplified the recipe and made them into a pan cookie recipe. However it was made, it turned out delicious.
One Year Back - Vegan Navaratna Kurma
Two Years Back - Sweet Couscous and Apple Salad
Three Years Back - Sweet Milk Rolls/BunsAdapted widely from the book 'the complete baking cookbook' by George Geary
Ingredients: 
All purpose flour - 2 1/2 cups
Sugar - 1 1/2 cups
Baking Soda - 1 tsp
Baking Powder - 1 tsp
Salt - 1/2 tsp
Egg - 1 large
Oil - 1/2 cup
Pumpkin puree - 1 cup (store bought or home made)
Vanilla extract - 1 tsp
Semi sweet chocolate chips or chunks - 1 cup
Optional - 1 cup nuts like walnuts or pecans (I didn't add any)

Method:
Preheat the oven to 350 F. Spray a 13 X 9 pan with vegetable oil spray. Set aside. In a bowl, whisk together flour, salt, baking soda, baking powder. In another bowl, whisk together oil, egg, sugar, pumpkin puree. Stir in vanilla. Slowly add the dry ingredients to wet and mix gently. Mix till there are no streaks of dry flour left. Stir in the chocolate chips and nuts (if using). Dump the contents to the pan and smooth with a spatula. Bake for 28 - 30 minutes or until a toothpick inserted in the center comes out clean. Cool on the wire rack in the pan. Slice when completely cool.
This post is written for weekend cooking post that I write with Srivalli  and  Vaishali.    
Enjoy.
Pin It

Tuesday, February 5, 2013

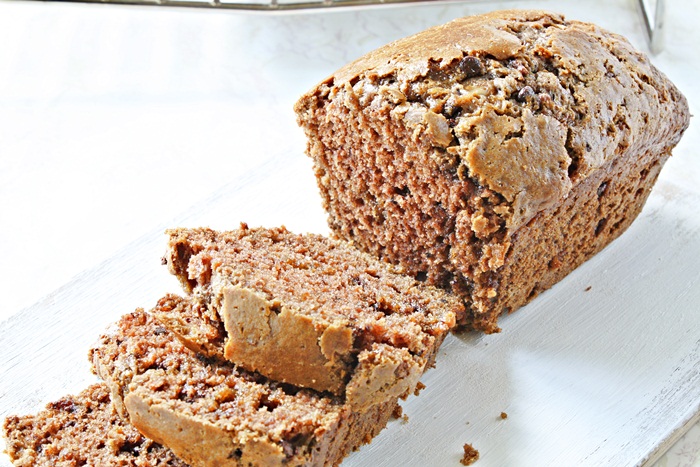
Beet Chocolate Bread

If you ask my older daughter to name a few vegetables, her list would be peas, green beans, lima beans and carrots. They are the vegetables that she would eat in any form without fuss. If you ask my younger one to list few vegetables, her list would be tomatoes, tomatoes, tomatoes and maybe spinach. Not that I stick to only those vegetables, I do make them eat other veggies, but it is not an easy task. I had beets and I thought I would turn them into a cake or muffin. But then, I didn't want the color to make my kids not eat it, so I hid it using cocoa and made this bread. They have no clue that there is beets in it and they are eating it happily as snack.
One Year Back - Simple Edamame and Greens Rice
Two Years Back -  Yeasted Olive Oil Pear Cake, Salad with italian dressing
Three Years Back - No knead Focaccia

Ingredients: 
All purpose flour - 1  cup
Whole Wheat flour - 1 1/2 cups
Unsweetened Cocoa - 1/2 cup (I used dutch processed, but natural works too)
Sugar - 1 cup (See Notes)
Baking powder - 1/2 tsp
Baking Soda - 1 tsp
Salt - 1 tsp
Oil - 3/4 cup
Egg - 3 large
Vanilla - 2 tsp
Beet- peeled and shredded with fine grater - 2 cups (about 1 large beet)
White chocolate chips - 1 cup (optional) 

Method:
Preheat the oven to 350 F (In my case, 325 F since I was using dark pans). Grease two 8 X 4 pans with vegetable oil spray. Set aside. In a bowl, whisk together all purpose flour, whole wheat flour, cocoa,  baking powder, baking soda and salt. Set aside. In another bowl, whisk together oil, sugar and eggs. Stir in vanilla. Make a well in the center of dry ingredients and pour the liquid mixture. Stir slowly so that it mixes evenly. Stir in shredded beets and white chocolate chips if using. This is a very thick batter.  Scoop into the prepared pans and bake for 50 - 55 (will be less if you use 9 X 5 pans and at 350 F) minutes or until a toothpick inserted in the center comes out clean. Cool in the pan for 10 minutes and then turn it on to the wire rack to cool completely.  This bread doesn't rise much, so keep that in mind when you fill the pans.


Notes:
This is not a very sweet bread at all. Perfect for snacks for kids.
 
Pin It

Friday, December 28, 2012

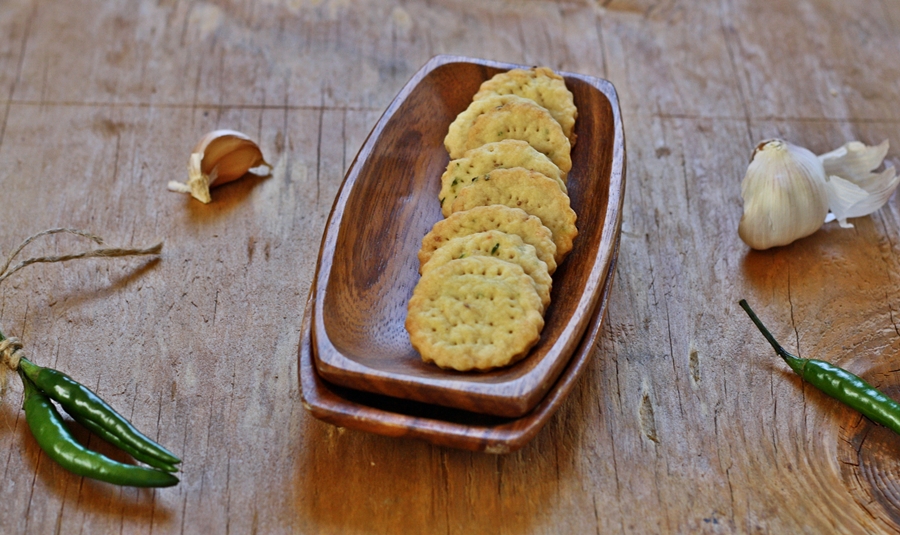
Chilli Garlic Crackers

This year's bake-a-thon has not been hectic because I decided to post just 3 times a week. But, it has been hectic in another way and hard for me to manage. Too many people went on vacation at work and I had to share their load of work with others who were working. Along with that, I took few projects at home and got busy with them.  With all these activities, I managed to bake whatever I found easy and didn't put too much creativity into them. Here is one of them where I took time and used the base of a tart dough recipe and converted them into a savory cracker.
One Year Back - No Knead Bread Sticks, Vegan Banana Chocolate Cake (lowfat)
Two Years Back - Rava Laddoo
Three Years Back - Cake Decorating Basics - Part 9
Ingredients: 
All purpose flour - 1 1/4 cups
Sugar - 2 tsp (optional but brings the flavors well)
Baking powder - 1/2 tsp
Salt - 1/4 tsp + a generous pinch
Butter - 3 TBSP cold cut into few cubes
Canola or Olive oil - 2 TBSP
Cold Water - 3 TBSP (Start with 2 TBSP and add the final TBSP if necessary)
Green chillies - 4 - 5 (I used 4 and they weren't that spicy for an Indian palate)
Garlic - 2 pods

Method:
Make the dough:
Take flour, salt, green chillies, garlic, baking powder, sugar into the bowl of a food processor fitted with chopping blade. Pulse till garlic and chillies are minced and mixed uniformly. Add butter cubes and oil. Pulse to get butter incorporated. Do not pulse too much and make sure there are tiny flakes of butter left as chunks. Add water and pulse till you get the crumbly dough. If you can make a ball out of it (not a smooth one though), it is done. Take it out and flatten it into a disc. Cover with plastic wrap and refrigerate for at least 3 hours or overnight. I felt the dough was easy to handle when it had chilled overnight in the refrigerator.

To Bake:
Preheat the oven to 350 F. Adjust the oven racks into the lower most and middle ones. Take out the dough from the refrigerator and let it sit 5 minutes at room temperature. Line two large baking sheets with parchment paper. On a lightly floured surface, roll the dough fairly thin. You can dust the top surface with flour if it is sticking to the rolling pin. Roll it thinner than 1/4" almost to 1/8" thickness. Cut with biscuit cutter or any other cookie cutter. You can also just cut them into squares or rectangles if that is easy for you. Dip a fork in flour and pierce it uniformly all over the cut cracker dough. Gently transfer them to the baking sheet and bake for 12 - 15 minutes. You will be baking the crackers at the lower most rack for the first 12 minutes. Then transfer it to the upper rack for the remaining 3 minutes. It all depends on how thin you have rolled the crackers and how big the area of the cracker is. Do a test batch and go from there. Cool on the wire rack and you can either serve them warm or cold. They become flaky and perfect to go with a cup of coffee or tea. Great for cocktail parties or topped with cheese for those cheese lovers out there.

Notes:
You could add your choice of herbs here if you wish but I kept them simple. For cheesy crackers, fold in half a cup of Parmesan cheese while making the dough.

Check out what my friends are baking -  Preethi, Veena, Priya, SrivalliSumana and Jayasri.

Enjoy.
Pin It

Wednesday, December 5, 2012

Pumpkin Pecan Bread

My kids never liked nuts in baked goods. But, that was in the past. They have started enjoying nuts in the bread and cake that makes it good for me to add few nuts here and there while baking. This is another version of the Pumpkin Chocolate Chip bread that I had posted sometime back. I made these into Pumpkin Pecan Bread since pumpkin and pecans go very well together.
One Year Back - Sweet and Spicy Almonds, Lemon Coconut Bread

Two Years Back -Holiday Gift Ideas

Three Years Back - Eggless Pecan Pie Bars
Ingredients:

Oil - 1/2 cup
Brown Sugar - 1 cup packed
Eggs - 2 large
Pumpkin puree - 1 cup
Water - 1/3 cup
All purpose flour - 1 2/3 cups
Baking Powder - 1/4 tsp
Baking Soda - 1 tsp
Salt - 1/2 tsp
Pecans - 1  cup chopped
Vanilla - 1 tsp

Method:
Preheat the oven to 350 F. (325 F if using dark pans) Grease one 9 X 5 or 8 X 4 loaf pan with vegetable oil spray or shortening. I made 4 mini loaves. Dust with flour. Set aside. In a bowl, whisk together flour, salt, baking soda, baking powder. In another bowl, beat eggs, oil, brown sugar, pumpkin puree together with a hand mixer. Add vanilla and beat for a second more. Now add the flour mixture in thirds alternating with water. That is 1/3 of flour mixture, 1/2 of water, 1/3 flour mixture , remaining 1/2 of water followed by the final 1/3 of flour mixture. Beat at slow speed or stir with a wooden spoon after every addition. Stir in chopped pecans. Divide between the loaf pans. Bake for 35 - 40 minutes in case of  mini loaf pans and 50 - 60 minutes in case of a large loaf pan or until a toothpick inserted in the center comes out clean.  Cool in the pan for 10 minutes on the cooling rack and then turn it on to the wire rack to cool completely.
Check out what my friends are baking -  Preethi, Veena, Priya, SrivalliSumana and Jayasri.

Notes:
If you make 3 mini loaves instead of 4 with this recipe, you will get tall, chubbier loaves. You might have to bake for 5 more minutes in that case.

Enjoy.
Pin It

Monday, November 19, 2012

Vegan Pumpkin and Cranberry Sauce Bread

I was looking for the recipe of a cake which uses cranberry sauce and I came across a recipe on Taste of Home site. But, it used mayonnaise which I neither have at home nor wanted to use. So, I had this idea of using pumpkin puree in its place and to compensate for the fat in mayonnaise, I used a bit of oil. But, I wouldn't and couldn't call it a cake. It was more of a bread and this could be very easily considered as a weight watcher's cake if you use whole wheat pastry flour. This is not for you if you want to enjoy the rich, buttery, sugary treat. This is for you if you want to eat something sweet and not rich. This tastes great with a cup of coffee or tea.
One Year Back - Homemade Cake Mix
Two Years Back - Coconut Chocolate Rolls/Buns
Adapted from - Taste of Home
Ingredients:
All purpose flour - 3 cups
Sugar - 1 cup (Can use up to 1 1/2 cups)
Cranberry sauce - 1 can of 14 Oz (I used whole berry cranberry sauce)
Salt - 1 tsp
Baking Soda - 1 tsp
Oil - 1/4 cup
Pumpkin Puree - 1 cup
Orange juice - 1/3 cup
Orange extract - 1 tsp (Or use about 1 TBSP of orange zest)

Method:
Preheat the oven to 350 F. Grease and flour a 10" tube pan with shortening and flour. In a bowl, whisk together flour, salt, baking soda. In another bowl, beat sugar, oil, cranberry sauce till smooth. Add pumpkin puree and orange juice till everything is mixed well. Add orange extract and dump the dry ingredients. Continue to beat at very low speed till no streaks of flour is left. Batter will be very thick. Pour into the prepared pan and bake for 55 - 60 minutes or until a toothpick inserted in the center comes out clean.
Cool in the pan for 10 minutes and then turn on to the wire rack to cool completely. 

Notes:
You can make this into two 8 X 4 loaves or about 20 muffins. If you like a sweeter bread, do use 1 1/2 cups. I liked it with this much sugar but my husband and kids felt it was bland. You could add a glaze made with powdered sugar and orange juice to make it pretty.

Enjoy
Pin It

Friday, September 14, 2012

Pumpkin Chocolate Chip Bread

Last year, I was suppose to bake a lot of goodies for an office during the holiday season. But whoever was in charge of placing those orders left that job and I ended up with a lot of baking supplies. Regular baking supplies like flour, sugar and chocolate chips were used up except for a good number of cans of pumpkin. So, here is an attempt to use up one of those numerous cans of pumpkin sitting in my pantry. Don't be surprised if you see a pumpkin cake coming up soon or different pumpkin bread recipes on the blog.
One Year Back - Vegan Sourdough Chocolate Cake with peanut butter glaze
Two Years Back - Sourdough Pumpkin Spice Cake
Adapted from - King Arthur Flour (makes two loaves)
Ingredients: 
Oil - 1 cup (You can substitute half applesauce)
Sugar - 2 cups (See Notes)
Eggs - 4 large
Pumpkin puree - 2 cups or 15 Oz can
Water - 2/3 cups
All purpose flour - 3 1/3 cups
Baking Powder - 1/2 tsp
Baking Soda - 2 tsp
Salt - 1 1/2 tsp
Chocolate Chips - 1 - 1 1/2 cups (I used 1 cup of mini chocolate chips)
Vanilla - 2 tsp

Method:
Preheat the oven to 350 F. (325 F if using dark pans) Grease two 9 X 5 or 8 X 4 loaf pans with vegetable oil spray or shortening. Dust with flour. Set aside. In a bowl, whisk together flour, salt, baking soda, baking powder. In another bowl, beat eggs, oil, sugar, pumpkin puree together with a hand mixer. Add vanilla and beat for a second more. Now add the flour mixture in thirds alternating with water. That is 1/3 of flour mixture, 1/2 of water, 1/3 flour mixture , remaining 1/2 of water followed by the final 1/3 of flour mixture. Beat at slow speed or stir with a wooden spoon after every addition. Stir in chocolate chips. Divide between the loaf pans. Bake for 60 - 70 minutes or until a toothpick inserted in the center comes out clean. If the top is getting too brown, after 45 minutes, loosely tent with an aluminum foil. You could also bake this in a tube pan or a bundt pan. Cool in the pan for 10 minutes on the cooling rack and then turn it on to the wire rack to cool completely.

Notes:
The original recipe called for 2 2/3 cups of sugar. It will be a really sweet bread more like a dessert bread if you use that much. Plus with chocolate chips adding some more sweetness, I cut it down to just 2 cups and it was perfect. You can add more if you like the sweeter bread.

Enjoy.
Pin It

Monday, August 6, 2012

Peanut butter Cookies

I know what you are all thinking. That I disappeared? Well, I haven't. Once in a while I get into stuff and I go deep into them. This summer it has been some home improvements. I did quite a bit of painting different rooms and other small home repairs.  Even though I have been baking a lot of new stuff, I haven't had time to write about them and take pictures. That is one of the reason for slow activity on the blog. These cookies were baked last week for someone. These are not too sweet, crisp. If you want softer cookies, bake them without flattening them.
One Year Back - Avocado Brioche, Roasted Banana Ice cream
Two Years Back - Deep fried cracker ( Nippattu )
Adapted barely from Hershey's book of chocolate
Ingredients: 
Shortening - 1/2 cup (I used crisco you can use butter softened instead)
Creamy peanut butter - 3/4 cup (not natural)
Granulated sugar - 1/3 cup
Light brown sugar - 1/3 cup packed
Egg - 1 large (or 1 TBSP flax meal mixed with 3 TBSP of warm water)
Milk - 2 TBSP
Vanilla extract - 1 tsp
All purpose flour - 1 1/2 cups
Baking Soda - 1 tsp
Salt - 1/2 tsp
Turbinado sugar for rolling (Or granulated sugar)

Method:
Preheat the oven to 375 F. Line two large baking sheets with parchment paper. Set aside. In a bowl, whisk together all purpose flour, baking soda and salt. Set aside. Cream the shortening or butter and peanut butter till smooth using an electric beater. Add both sugars and continue to beat till creamy. Add egg and beat. Add vanilla, milk and beat for few seconds. Now add all the dry ingredients and mix till the dough forms. Make 1 " balls of the dough and roll in turbinado sugar or just granulated sugar. If you want soft cookies, place the ball 1" apart on the cookie sheet. If you want a little crispier cookies, flatten it a little. I used the fork to do criss cross but I flattened it too much and the pattern is not that obvious. Bake for 8 - 10 minutes. Cool on the wire rack.

Enjoy.
Pin It

Sunday, May 6, 2012

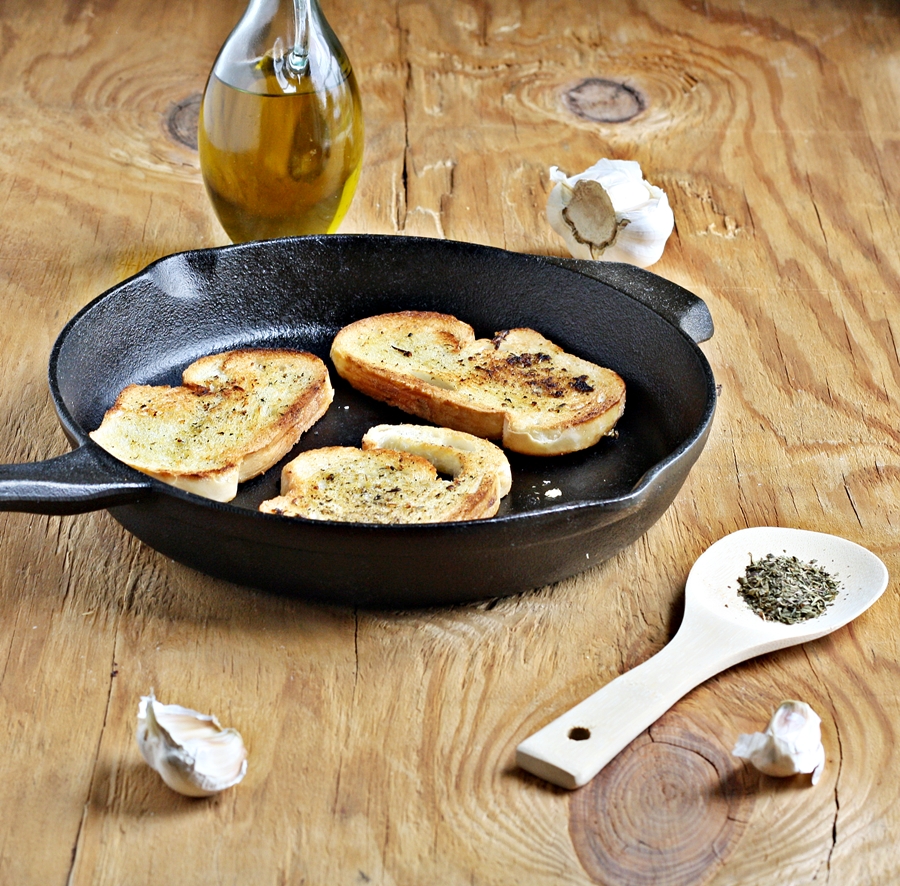
Garlic Toast

It was at my brother-in-law's place that I ate Texas Toast for the first time. It was salty, it was buttery, it was garlicky. I fell in love with that. For some reason, Texas is associated with everything big. This is my attempt to get the same taste, but with fewer calories than a traditional Texas toast. When you see how easy it is to make, one has to wonder why people buy these things frozen instead of making it fresh.
One Year Back - Vegan Sourdough Scallion Pancakes
Two Years Back - Fenugreek Curry / Menthyada Gojju
Ingredients: 
Olive Oil - 1/4 cup
Salt - to taste (little more than 1/4 tsp should be perfect)
Black pepper powder - 1/2 tsp or to taste
Cayanne pepper - 1/2 tsp or to taste
Italian seasoning - 1 tsp
Garlic - 5 cloves finely grated
Italian or french bread - 8 slices (Or you could use white bread) - See Notes

Method:
In a bowl, mix all the ingredients except the bread slices. Whisk to combine. Heat a skillet at medium high heat. Brush one side of all the slices with the mixture. When the skillet is hot, place the bread slices on the skillet so the side that is brushed with the mixture is facing down. Brush the top of the slices with the same mixture. After 2 - 3 minutes, flip and toast on the other side till golden. Repeat with all the slices. If you like it, you can toast it in the oven. At 375 F for about 10 - 12 minutes. I used the skillet to do it faster since I was just toasting few slices. If you do use the oven, make sure you flip them half way through to get the toast on both sides evenly.

Notes:
Since I was using baguette kind of bread, I got 8 slices for this proportion. If you use store bought white bread slices, you might find the mixture sufficient only for 5 - 6 slices.

Enjoy.
Pin It

Saturday, April 28, 2012

Herbed Spicy Garlic pull apart bread

I was thinking what to make for another bread post and the idea of using mint to make a bread came when I went to my backyard and saw my mint plant already spread to fill the entire planter. There were barely 4 sprigs last week and all the rain must have made them grow super fast. I plucked few mint sprigs and came inside. I have been wanting to make a herbed pull apart bread for a while now. I had seen the picture in a magazine which had Italian seasonings sprinkled between layers of dough and baked. Inspired by that, I started the process of my own spice mix. This bread is so awesome, I probably will bake it too many times and eat it and gain too many pounds. Try it and I promise you - you won't be disappointed.
One Year Back - Cake pans and their conversions
Two Years Back - Strawberry Mousse
Ingredients: (Makes one 9 X 5 loaf)
All purpose flour - 3 cups
Warm water - 1 cup
Salt - 1 1/4 tsp
Sugar - 1 TBSP
Oil - 2 TBSP
Active dry yeast - 2 tsp
Green chillies - 2 chopped fine
Mint leaves - 6 chopped fine
Cilantro - 2 TBSP chopped
Garlic Powder - 3/4 tsp

To make a paste:
Oil - 2 TBSP
Salt - to taste (about 1/2 tsp)
Green chillies - 3 chopped
Mint leaves - 2 - 3 TBSP
Cilantro - 2 - 3 TBSP
Garlic - 1 clove


Method:
In a bowl, take warm water, sugar. Add yeast to it. Let it stand till it froths. Add the remaining ingredients to it and start making a dough. When all the flour has been absorbed, knead it for 10 minutes or until it is smooth and elastic. It should not be sticky or tacky. If it is, add 1 TBSP flour at a time and knead it. Place in an oiled bowl and turn it once to coat all the sides. Cover and let rise in a warm place. About 45 minutes to an hour or till double in bulk.
Meanwhile, line a 9 X 5 loaf pan with aluminum foil or parchment paper. Leave an overhang so that you can lift the loaf as soon as it is done. Coat the bottom and sides with oil or vegetable oil spray. Set aside. In a food chopper or blender (small jar) or mortar and pestle, take all the ingredients mentioned in 'To make a paste' and mince them so that it is a coarse paste with some oil. Adjust the salt if necessary and set aside.

When the dough has doubled, punch it down. On a lightly floured or greased surface, divide the dough into 12 or 14 small portions. Keep the loaf pan vertically so that the pan is sitting on the shorter edge. Take one dough ball and flatten it to about 1/2 " thick. It need not be a perfect rectangle. A rough oval shape will be fine. Repeat with the remaining dough balls. Place one dough ball in the pan, top it with little bit of the paste and spread it. Make sure you use the paste evenly to coat all the dough balls. Stack the flattened dough balls in the pan and when done, place the loaf pan correctly. If you have any more paste remaining, you can spread it on the top. You might have to maneuver the dough so that it is stacked properly. Don't worry if the dough is not full in the pan. It will get full after the final rise. Cover loosely with oiled plastic wrap and let it rise till the dough is double or it touches the rim of the loaf pan. About 45 minutes to an hour.


Towards the end of the rise time, preheat the oven to 375 F. Bake for 25 minutes. Rotate the pan and reduce the temperature to 350 F. Bake for 5 - 8 more minutes or until the top is golden brown. Cool in the pan for 5 minutes and then holding  the over hang, remove it and place on the wire rack to cool completely. Pull the bread when completely cool if you can resist the smell that long. I pulled it when it was still warm. If you are one of those  who like spicy breads, I can tell you this is the best bread for you.

This is my entry for the Blogging Marathon started by Srivalli. Also sending this to Yeastspotting.

Enjoy.

Pin It

Thursday, April 12, 2012

Potato Patty / Aloo Tikki

There are too many appetizer recipes that are based on potatoes. If you think about it, these are really versatile and their advantage is the ability to absorb flavors. And they are cheap too if you want to feed a crowd. For some reason, I had never made aloo tikki before. We South Indians prefer to make bonda or deep fried fritter using potato stuffing rather than this. I made this since it consumes lot less oil and gets done very fast too.
One Year Back - Honey Cardamom Snack Cake, Chutney Powder Version 1
Two Years Back - Baklava
Ingredients: 
Potatoes - 3 medium
Frozen peas - 1 cup
Red Onion - 1/2 of a medium one chopped fine
Oil - 3 TBSP divided use
Ginger - 1/2" piece grated
Cumin powder - 3/4 tsp
Coriander powder - 3/4 tsp
Garam Masala - 1/2 tsp
Green Chillies - 3 - 4 sliced very thin
Turmeric powder - a generous pinch
Salt - to taste
Lemon/Lime juice - 1 - 2 TBSP
Chickpea flour / besan - 2 TBSP
Cilantro - 2 TBSP chopped

To Serve:
Tamarind Date Chutney

Method:
Boil potatoes with skin. Peel and mash when it is still warm. In a small pan, heat 1 TBSP oil. When hot, add grated ginger, chopped chillies followed by onion. Sprinkle a bit of salt. Add turmeric, spice powders, garam masala. Mix well. Let the onions cook. In the meantime, microwave the peas for 2 - 3 minutes. Add the peas to the onion and mix well. Add cilantro and turn off the heat. When it is cool enough to handle, add this mixture to the mashed potatoes. Add besan/chickpea flour, lemon/lime juice and mix with a fork or by hand. Check for the salt and add if needed. Divide them into 12 lime sized balls.
Take a shallow skillet. Heat it on medium. Brush the whole skillet with 1 TBSP of oil. Take the balls of veggie mixture and flatten a bit to make them patties. Place them on the skillet and let it stay for 2 minutes or so. Flip them and repeat the process on the other side too.

Everything is already cooked in the mixture except for the chickpea flour. Reason for toasting is to get the char and make it stay as one piece. Repeat with the remaining. I had to do it in two batches but I didn't use 2 TBSP of oil at all for that. Many people use lot more oil than what I have mentioned here. Serve hot with the chutney or even ketchup.

Enjoy.
 
Pin It

Monday, February 27, 2012

Green Peas Hummus

Some recipes intrigue because of the ingredients used. I came across such a recipe for Lentil Hummus in one of Martha Stewart's magazine. I have been making hummus for quite a while now. But, I had not seen the use of nut butter in any of them. This recipe used cashew butter with lentils. I made my own version of it using Green peas and used almond butter since that is what I had on hand. Nutritionally, it is better than traditional chick peas hummus since green peas has more fiber than chick peas. It tasted delicious and that is what matters the most. Don't you agree?
One year back - Sourdough Semolina Bread
Two years back - Vegan Apple Date Muffins
Ingredients:
Cooked green peas - 2 cups (Use canned or frozen cooked or dried, soaked and cooked)
Almond butter - 1/4 cup (Or any other nut butter without sugar)
Garlic - 2 pods crushed
Olive Oil - 1 TBSP
Lemon juice - 2 TBSP
Hot sauce - 1/2 tsp or to taste
Salt - to taste
Red chilli flakes - as per taste

Method:
Take all the ingredients in a food processor except red chilli flakes. Run it until smooth. Add chilli flakes and swirl once more. Serve with crackers or toasted pita bread.

Notes:
If using canned peas, rinse and drain well and use. Go easy on salt in that case. If it is hard to run the food processor, add more olive oil 1 TBSP at a time to get a smooth texture.

Enjoy.
Pin It

Monday, February 20, 2012

Peanut butter Banana Bread with chocolate chips

"Another banana bread?" you may ask. "Yes, but it has peanut butter in it." would be my answer.
Peanut butter and banana is a classic combination. Top it with few chocolate chips and you are in sugar heaven. This is one of those bakes that can be converted into a vegan recipe just by using flax meal as egg replacer. You would need vegan chocolate chips of course. Want to use all whole wheat flour? go ahead. Bread might be a little dense, but tasty nevertheless.
One year back - Chocolate Pudding
Two years back - My kid's birthday cakes
Ingredients:
All purpose flour - 1 1/2 cups
Whole wheat flour - 1 cup
Baking Soda - 1 tsp
Baking Powder - 1 1/2 tsp
Sugar - 1 cup
Oil - 1/4 cup
Creamy peanut butter - 1/2 cup (not natural - see notes)
Banana - overripe 4 large to yield 1 3/4 - 2 cups of mashed bananas
Eggs - 2 large (Or 2 TBSP flax meal mixed with 6 TBSP of warm water)
Vanilla - 1 tsp
Mini chocolate chips - 3/4 cup

Method:
Preheat the oven to 350 F. Grease a loaf pan that has 9 cup capacity. You could use a 9 or 10 cup bundt pan or tube pan. Or you could use 9 X 5 pan with two mini loaf pans. You could also use 2 pans of size 8 X 4 but you might not get a very tall loaf. Whatever you do, don't use just one pan of 9 X 5. It will overflow and make a mess. I used a 11 X 6 bundt loaf pan. In a bowl, whisk together whole wheat flour, all purpose flour, baking powder, baking soda. In another bowl, beat eggs, sugar, oil, peanut butter and mashed banana together. Stir in vanilla. Add the dry mixture and slowly fold until no dry flour is visible. Do this mixing gently. Stir in the chocolate chips. Pour into the prepared pan and bake for 55 - 60 minutes or until a toothpick inserted in the center comes out clean. If baking in a tube pan or a loaf pan, tent loosely with aluminum foil after 45 minutes to prevent over browning. Cool in the pan for 10 minutes and then turn it on to the wire rack to cool completely. Slice when completely cool. My pan took 1 hour and 10 minutes. It will be less if you bake in bundt or tube pan.
Notes:
If using natural peanut butter, add 1/2 tsp salt and you might want to increase the sugar to 1 1/4 cup or 1 1/3 cup. This is not a very sweet bread. So, topping it with some jelly/jam is perfect if you have a sweet tooth. Or eat it with some plain milk.

Enjoy.
Pin It

Thursday, January 26, 2012

Banana Sourcream Cake (Low fat)

At any time, I prefer baking cakes with oil rather than butter. You need to be prepared ahead of time if you want to use butter. It has to be at room temperature, you need an electric mixer /beater to cream butter and sugar. With the oil based cakes, all you need is a whisk and the job gets done. Another reason for me to prefer oil based cakes is due to the reason that they stay moist longer compared to the cakes with butter. I had to make something to give as a 'thank you' gesture to one of my neighbors. This past weekend when it snowed, when I was shoveling the snow, my neighbor came with his snow blower and cleared my drive way. It took him 10 minutes with his machine and it would've taken me one hour to do it by hand.
One year back - Sweet Corn Raisin Bread, Vegan Tomato Soup
Two years back - Cranberry Rice Orange Muffins, Multigrain Brown Bread
Adapted from - here.
Ingredients:
All purpose flour - 1 1/2 cups
Sugar - 1 cup
Baking Soda - 1 tsp
Salt - 1/4 tsp
Mashed banana - 1 cup
Oil - 1/4 cup or 4 TBSP
Sour cream - 1/3 cup (measured in dry measuring cup) I used fat free - you could use yogurt instead
Egg - 1 large
Vanilla - 1 tsp

Method:
Preheat the oven to 350 F (I did it at 325 F since I was using a dark pan). Grease and flour a 9 X 5 loaf pan or 4 mini loaf pans. In a bowl, whisk together flour, salt, baking soda. In another bowl, beat oil, egg, sour cream and sugar till combined. Stir in vanilla. Add the banana puree and continue to beat. Start adding flour mixture little by little and continue to whisk until everything is mixed well. Pour into the prepared pan. Tap the pan few times to remove air bubbles. Bake for 30 - 35 minutes in case of a mini loaf pan or 50 - 60 minutes for a 9 X 5 loaf pan or until a toothpick inserted in the center comes out clean. Cool in the pan for 15 minutes and then turn it on to the wire rack to cool completely. You could double the ingredients and bake in a bundt pan or a tube pan. I prefer mini loaf pans since it reduces the serving size if you just eat one slice.
This one makes a very nice snack cake. You could go overboard and add a cream cheese glaze or cream cheese frosting if you like it. This one is not too sweet and is not too heavy.

Pin It

Saturday, January 7, 2012

Quick and easy Salsa

Almost every person I have met in my life likes Salsa. It could be mild version or a fiery hot version, but they do like it. What's not to like in it anyway? Being used to moderately spicy food all my life, that is something I can enjoy when I am dining out. When I saw the title of Restaurant Style Salsa, it caught my attention. You might wonder why I haven't used the same title for this post. Because, I felt this salsa was way better than the restaurant one. It could be the addition of pineapple that did the trick or whatever, it was a big hit. Makes a huge amount, so unless you plan on eating two bags of chips to finish this salsa and gain few pounds, make it for company. All the folks who ate it loved it very much.
One year back - Sundried Tomato and Olive Bread
Two years back - Apple Butter Spice Bread
Adapted from Pioneer woman via Browneyedbaker
Ingredients:
28-ounce can whole tomatoes (peeled) with juice
1 14 1/2 ounce can diced tomatoes
1/4 cup chopped red onion ( 1 small red onion will do)
1 clove garlic, chopped
4 - 5 jalepeño, quartered and sliced thin or per taste
1/2 cup - 1 cup cilantro chopped roughly
Crushed Pineapple with juice - 1 cup or 8 Oz can
Juice from 1/2 a fresh lime
1/2 teaspoon salt
1/2 teaspoon granulated sugar
1/4 teaspoon ground cumin
Method:
Place all the ingredients in the bowl of a food processor fit with chopping blade. Pulse until desired consistency is required. Pulse less for chunkier salsa and more for a smoother version. Refrigerate for an hour before serving with chips. You might be tempted to add more salt, but when you are serving with chips which has quite a bit of salt, it balances out. So, eat with the chips and then adjust if required.

Notes:
Original recipe used two cans of diced tomatoes (10 Oz each). What I had was a 14 1/2 Oz can and I just added a cup of crushed pineapple to give that extra sweet and tangy taste along with compensating for the lack of 5 Oz of diced tomatoes. I also added more Jalapeno peppers since my tomatoes were not the kind with green chillies in them.

Enjoy.
Pin It

Saturday, December 24, 2011

Chickpea crackers

Here comes a savory cracker recipe which is very easy to put together. You can flavor them the way you want and one good thing about these are they are not too rich.
One year back - Eggless peanutbutter swirled chocolate cake
Two years back - Cake decorating basics part - 3
Adapted from - King Arthur Flour
Ingredients:
All purpose flour - 3/4 cup
Chickpea flour / Besan - 1/4 cup
Sugar - 1 tsp
Salt - 1/4 tsp (See Notes)
Red chilli powder - 1/2 tsp or to taste
Garlic powder - 1/4 tsp - optional
Onion powder - 1/4 tsp - optional
Olive oil - 3 TBSP
Water - 2 - 3 TBSP as required


Method:
Preheat the oven to 325 F. Line a large baking sheet with parchment paper. Mix all the ingredients except water. Add water 1 TBSP at a time to make a dough. Dough need not be very smooth, a little bit crumbly will work too. On a lightly floured surface, roll the dough very thin (1/8") or make 12 X 12" square. Cut into 1 - 1 1/2" squares using a pizza cutter or a very sharp knife. Transfer on to the prepared baking sheet. These don't need too much space between them. As long as they are not touching each other, it should be fine. Bake for 10 minutes and then rotate the pan and continue to bake for 5 - 10 more minutes till lightly golden. They will get crisper after they cool down. Cool completely and store in an air tight container for several days.

Notes:
Original recipe suggested to sprinkle with some coarse salt which, I did not follow. I could have increased the salt by 1/8 tsp. Chilli powder was mild enough for us. You could add some herbs of your choice in addition to garlic and onion powder or instead of them.

24 days of the Bake-A-Thon are done. 7 more to go.  My fellow bloggers doing this are - Preethi, Veena, Priya

Enjoy.
Pin It

Monday, December 19, 2011

Caramel Corn

It has been almost a decade since I tasted caramel corn for the first time. I thought I was in heaven. I fell in love with it. Little did I know they are loaded with calories and they are so easy to make. This batch makes it enough to give as a gift for about 5 - 6 people and will cost you less than 2 dollars plus some time.

One year back - Gingerbread Biscotti
Two years back - Chocolate Chip Cookies, Coconut Macaroons, Ginger Spice Cookies
Ingredients:
Popping corn kernels - 1/2 cup (See Notes)
Canola oil - 1 TBSP to pop the corn
Light Brown Sugar - 1 cup packed
Corn syrup - 1/4 cup
Butter - 1/2 cup or 1 stick
Salt - 1/2 tsp
Baking soda - 1/4 tsp
Vanilla - 1 tsp

Method:
Pop the corn using stove top method. Heat 1 TBSP oil and add the kernels. Use large enough pot so that the kernels are sitting in one layer. Cover and when it starts popping, shake frequently until the popping sounds subside. If there are any unpopped kernels, remove them. Line a shallow large baking dish/sheet with aluminum foil. Spray vegetable oil spray really well or butter the whole foil. Place the popcorn in that. Preheat the oven to 250 F. When it is preheating, start making the caramel.

Melt butter, brown sugar, salt, corn syrup in a saucepan. Stir till the sugar is dissolved and it starts boiling. Keep it at medium heat and boil it for 4 - 5 minutes. Turn off the heat and add vanilla and baking soda. It will bubble, so be careful. Remove the tray with popcorn from the oven and pour this evenly on the entire popcorn. Mix gently with the spatula. Don't worry if all are not coated. Caramel will get thin in the oven and eventually coat all the popcorn. Bake for one hour stirring every 15 minutes. If you like it chewy, you can remove at 45 minutes and if you like it crisp, bake for a total 1 hour. Break the lumps if any and cool in the pan. Store in an air tight container when completely cool. This if stored properly can stay for at least a month if not used up by then.

Notes:
You can use the microwave popcorn. But, they have a lot more fat than what I used to pop them using stove top method. You need to measure about 14 - 15 cups of popped corn for this recipe. You can add about 1 cup of peanuts or your favorite nuts to the popcorn mixture and then pour the caramel and bake.

Day 19 of the Bake-A-Thon and we are still going strong. Check out these blogs too -  Preethi, Veena, Priya. Linking it up to Kid's delight - Vegan and egg less bakes hosted by Priya, started by Srivalli.

Enjoy.
Pin It

Wednesday, December 7, 2011

Vegan Carrot Oat Bars

When I announced this 'Bake-A-Thon', why didn't any of you warn me about how tough this will be? I don't really know what I was thinking. You see, I have so many baking books that my problem is to settle on what to bake next. And knowing the way I am, I will get some idea when I look at something and start something else. There was a carrot walnut bar recipe in one of the better homes and garden book that I have. I thought of making that but ended up changing so much that it became my recipe. If you like carrot cake, this is for you. If you don't like granola bars because they are a bit hard, you might like them. Throw in about a cup of raisins if you like them. By the way, if you want to see a recipe here on this blog, drop in a line. I might get ideas from your request.

One year back - Eggless Almond Date Cake
Two years back - Coconut Almond Cookies
Ingredients:(Makes generous 24 bars or medium sized 35 bars)
All purpose Flour - 1 1/2 cups (You could use whole wheat flour instead)
Rolled Oats - 1 cup
Sugar - 1 cup
Carrots grated - 2 cups
Baking Powder - 1 tsp
Baking Soda - 1/2 tsp
Salt - 1/2 tsp
Cinnamon - 1 tsp
Flax Meal - 2 TBSP
Warm water - 6 TBSP
Oil - 2/3 cup


Method:
Preheat the oven to 350 F. Grease a 13 X 9 pan with vegetable oil spray. In a bowl, whisk together flax meal and warm water. Set aside for 5 minutes. In another bowl, whisk together flour, baking soda, baking powder, salt, sugar, oats, cinnamon. When the flax and water mixture has thickened, beat it with a whisk and add oil to it continuing to beat. Pour the wet mixture to dry and stir. Fold in the grated carrots. It will loosen up a bit after you add carrots. Pour into the prepared pan and push to cover the entire pan. Smooth the top with the spatula. Bake for 25 - 30 minutes or until a toothpick inserted in the center comes out clean. I was using a new pan which doesn't conduct heat very well and it took me almost 35 minutes. Check at 25 minutes. Cool in the pan on the rack and slice when completely cool. These make healthy snacks that are great as a 'on the go' snack bars.

Today is day 7 of the bake-a-thon. Do drop in and check out what my Bake-A-Thon buddies are baking in their kitchens -  Susan, Preethi, Veena, Priya. Linking it up to Kid's delight - Vegan and egg less bakes hosted by Priya, started by Srivalli.

Enjoy.
Pin It

Wednesday, August 3, 2011

Mrs.Fields Chocolate Chip Cookies

Who is Mrs.Fields? I have no clue who she is, but there is a brand of cookies named after her. I have seen the ads of those cookies on TV, on magazines, but have never tasted them. When I stumbled across the site which had the recipe, I just glanced at it as I always do. This is what happened next......
Have you ever been intrigued with something that is different from what your understanding on a subject was? I have baked many types of cookies. I think I understand how it works to a certain extent at least. Most of the cookies call for creaming butter and sugar, adding egg followed by flour, add ins etc and baking. This recipe called for cold butter similar to pie dough. Pie dough needs real cold butter so that it doesn't get mixed very well. To make the flaky pockets. And I didn't understand how it could work in a cookie. I saw the recipe this morning and I already baked them. I was that curious. They work beautifully and I will let you get curious about how it works too. Go make them. These are that good so I was told.
One Year back -  Yam Rolls
Adapted from here.
Makes about 3 1/2 dozen medium sized cookies.
Ingredients:
All purpose flour - 2 1/2 cups
Brown sugar - 1 cup packed (I used light brown sugar)
White granulated sugar - 1/2 cup
Salt - 1/2 tsp
Butter - 1 cup or 2 sticks (unsalted. If using salted, cut the salt down to 1/4 tsp) cold cut into cubes
Eggs - 2 large
Baking Soda - 1/2 tsp
Vanilla extract - 2 tsp
Semi sweet chocolate chips or chunks - 2 cups or 12 Oz bag (I used chunks)
Method:
Preheat the oven to 300 F. Line two large baking sheets with parchment paper. In a bowl, whisk together flour, salt, baking soda. Set aside. In another bowl, mix both the sugars. Add the cubed cold butter chunks and beat with an electric beater to make the mixture grainy. No need to mix them very well. Add eggs and continue to beat scraping the sides of the bowl once or twice. Add the flour mixture. Beat for a few seconds till most of it is incorporated. Switch to a spatula and stir in the chocolate chips. Drop by TBSP on to the cookie sheet at least 2 " apart (they spread during baking quite a bit) and bake for 20 - 23 minutes. It depends on how big your dough balls are. I baked mine till 22 minutes and they were perfectly baked. Do not forget to rotate the pans half way through. Remove the parchment paper immediately from the cookie sheet on to the wire rack to cool. Cookies will be very soft to touch when hot. They firm up when they cool down. These are crispy on the edges but very soft on the inside.
Notes:
Remember to keep the dough chilled till ready to bake. That is the key to this cookie. My first batch was perfect. But second batch spread a little too much making it less soft compared to the first batch. Third batch spread even more.

Enjoy. Pin It

Tuesday, July 19, 2011

Chocolate Chip Chocolate Bread

I have the patience of a 3 year old I guess. I envy those bloggers who schedule their posts to be published at certain time. Me? Never. I make something, write about it and publish it right away. Just can't have it in drafts for more than a day. When I made the Easy Pineapple Coconut Cake two days back, I made this quick bread too. You see, I had couple of people to say 'Thank you' to. And this bread is perfect for that. Makes 4 mini loaves so even if I gave couple away and keep some for kids, it is still plenty for all.

One Year Back - Basil Mint Rice
Adapted from the book 'Treasury of Christmas Collection' by Publications International Ltd.
Ingredients:
All Purpose Flour - 3 cups
Unsweetened Cocoa - 3 TBSP
Sugar - 1 cup
Baking Powder - 2 tsp
Baking Soda - 2 tsp
Salt - 1 tsp
Chocolate chips - 1 cup (I used mini chocolate chips 3/4 cups)
Vanilla - 1 tsp
Milk - 1 1/2 cups
Vegetable Oil - 1/3 cup
Egg - 1 Large beaten slightly

Method:
Preheat the oven to 350 F. Spray 4 mini loaves of size 5 X 3 with vegetable oil spray. In a bowl, whisk together flour, sugar, cocoa, baking powder, baking soda, salt. Take this mixture about 1 TBSP and coat the chocolate chips with it. In a measuring cup, take the milk. Add Oil, crack the egg to the same measuring cup and whisk together. Add vanilla and whisk one more time. Pour this into the dry mixture and stir to combine. Stir in the chocolate chips. Do not over mix. Divide between the four loaf pans. Bake for 30 - 35 minutes or until a toothpick inserted in the center comes out clean. Cool in the pan for 10 minutes and then turn it on to wire rack to cool completely.
Notes:
You can bake this in a 9 X 5 loaf pan. You will have to bake for 60 - 65 minutes or till done. You could bake it in a muffin pan to make 12 muffins. Bake for 22 - 25 minutes.There was an additional 1/2 cup of chopped walnuts in the recipe. I didn't add them since my kids would pick around them.

Enjoy. Pin It

Tuesday, April 12, 2011

Honey Cardamom Snack Cake

In most of the Iyengar bakeries in Bangalore, Mysore area, they sell a cake called 'Honey Cake'. It is oozing with syrup and topped with some coconut flakes. That cake is to die for. Till I started baking, I used to think it is a real honey cake. But it is actually sponge cake douched with honey flavored simple syrup. I didn't attempt to make that cake but made a honey cake using an old ginger bread cake recipe. I changed so many things, I cannot even say I adapted this from that recipe.
If you are in Mysore or Bangalore area and you are alright to eat out, do eat this cake in an Iyengar bakery. I cannot guarantee how good their stuff is but, if a bakery is good, there is a good chance that you get a decent honey cake.
One Year back - Baklava
Ingredients:
All purpose flour - 2 1/2 cups
Baking powder - 2 tsp
Baking soda - 2 tsp
Salt - 1/2 tsp
Cardamom - 7 pods seeds crushed into powder
Sugar - 1/2 cup (See Notes)
Honey - 1 cup
Butter - 1 stick or 1/2 cup softened (See Notes)
Eggs - 2 large at room temperature
Warm water - 1 cup

Method:
Preheat the oven to 350 F. Grease and flour a 9 X 13 pan. Whisk the flour, baking powder, baking soda, salt, cardamom powder in a bowl. In another bowl, beat butter and sugar till creamy. Add honey and continue to beat. Add the eggs and continue to beat. Add dry mix to the butter and egg mixture in three parts alternating with the warm water. That is 1/3 of the dry mixture, 1/2 cup of water, 1/3 of the dry mixture, 1/2 cup of water and the remaining 1/3 of the dry mixture. You might want to use just the spatula to fold gently towards the end of mixing. Batter will be very thin. Pour the batter into the pan and bake for 35 - 40 minutes or till done. It took 38 minutes for mine to be done. Cool in the pan on a wire rack. Dust with confectioner's sugar if desired.

Notes:
It is pretty sweet and everyone felt that it could use a bit less sugar. So, I would suggest using no sugar at all or using just 1/4 cup. When I saw the way creamed butter and sugar felt once I added honey, I could see that this cake would just be great with oil instead of butter. Use just 1/3 cup of canola or vegetable oil in the place of butter. If you do omit sugar and / or use oil instead of butter, this cake might bake up a few minutes earlier. Check at 30 minutes.

Enjoy. Pin It